XHE-3 adapter for PC Engine
Introduction
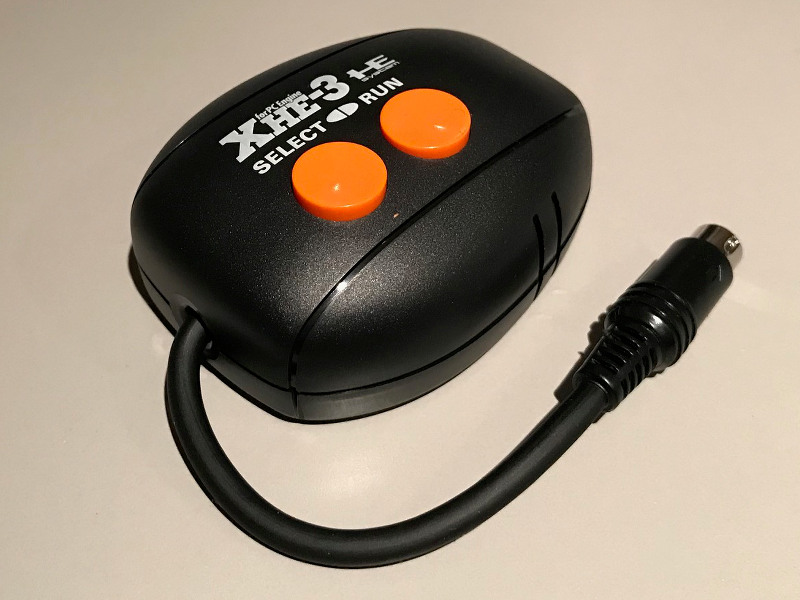
Le XHE-3
- Outrun
- After Burner
- Operation Wolf
- Thunder Blade
- Forgotten Worlds
- After Burner II
The XHE-3 does not support Megadrive controllers.
This adapter appears to be a bit rare, is generally fairly expensive and there seems to be very little information about it on the net. Having a unit on hand, I decided to do something about it by creating this page.
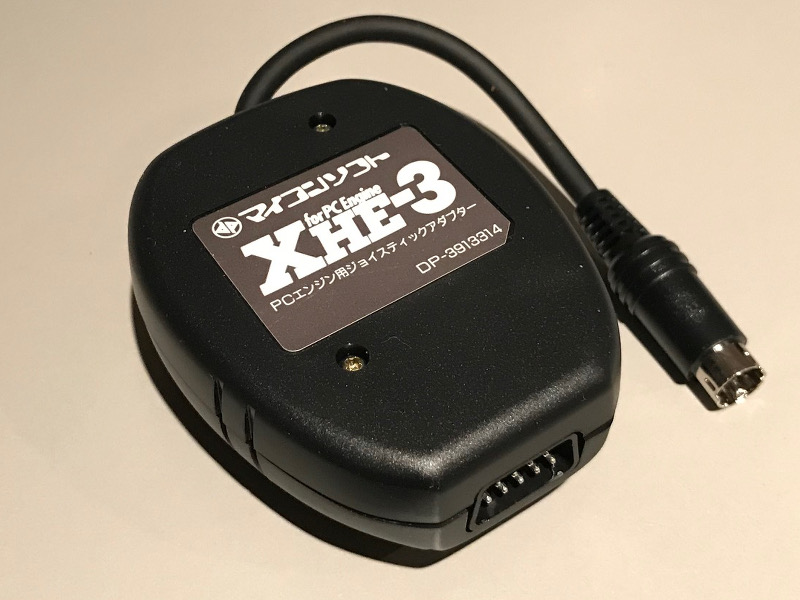
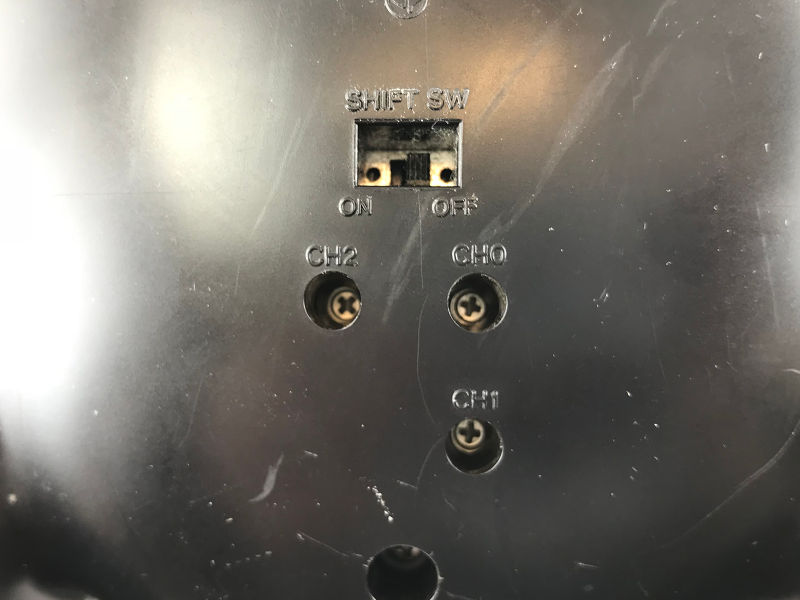
Face inférieure

Connecteur DB9
The box
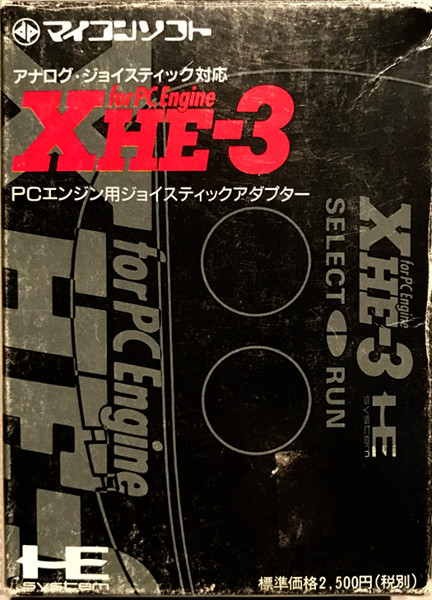
Box, front face
Compatible with analog joysticks
XHE-3
Joystick adapter for PC Engine
Standard price: 2500 yens (plus taxes)
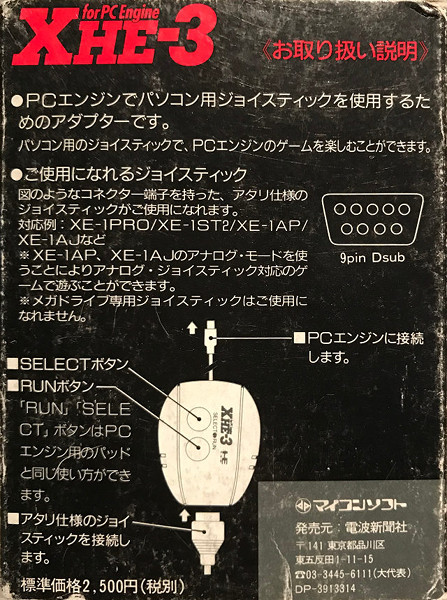
Box, back face
XHE-3 (for PC Engine) [Operating instructions][1] Translation note: The term PC here does not refer to an IBM PC (with a DB15 joystick port) but rather to japanese home computer series such as the X68000, MSX, PC-8800, etc.Standard price 2500 yens (plus taxes)
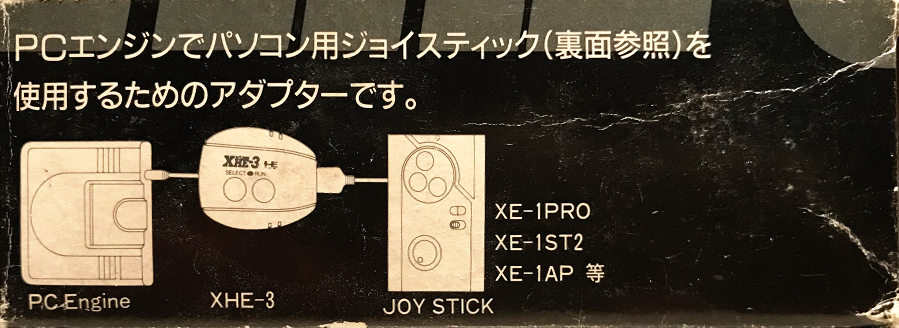
- An adapter to use PC joysticks [1] on a PC Engine console.
Makes it possible to enjoy PC Engine games with PC joysticks.- Compatible joysticks:
Atari-style joysticks with a connector as illustrated are supported.
Examples: XE-1PRO, XE-1ST2, XE-1AP, XE-1AJ, etc.
Note: The XE-1AP and XE-1AJ in analog mode are also supported by some games.
Note: Megadrive joysticks are not supported.- Connects to the PC Engine
- SELECT button
- RUN button
The RUN and SELECT buttons function as they do on a PC Engine gamepad.- Atari-style joystick connection
Box, left side
An adapter for using PC joysticks (see opposite face) on the PC Engine.
Box, right side
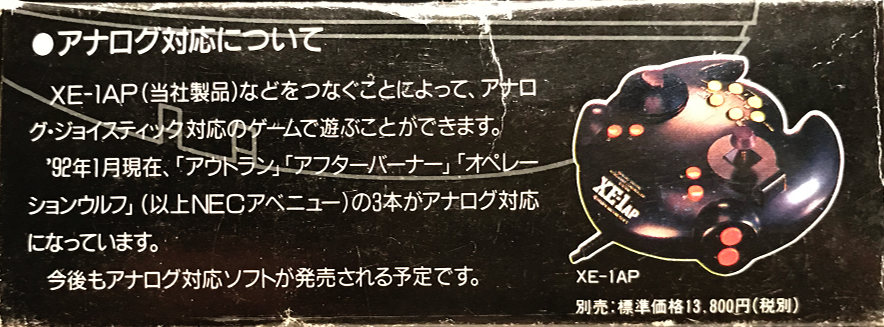
- About analog compatibility
Games supporting analog joysticks can be played by connecting a compatible joystick such as the XE-1AP (one of our products) to the adapter.
At the moment (January 92), games compatible with analog joysticks are "Outrun", "After Burner" and "Operation Wolf", sold by Nec Avenue.
More analog-compatible games are planned.
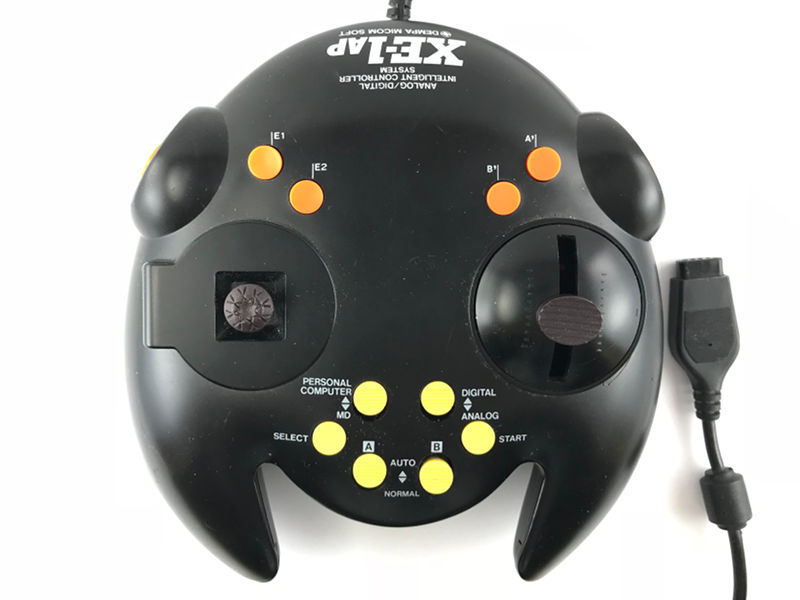
XE-1AP
Sold separately: Standard price of 13800 yens (plus taxes)

Box, top side
Adapter to use PC joysticks on PC Engine. (see opposite face)
Compatible with analog joysticks.
Instruction sheet
The instruction sheet included with the product gives some details about how the XHE3 can be used with the XE-1AP analog controller.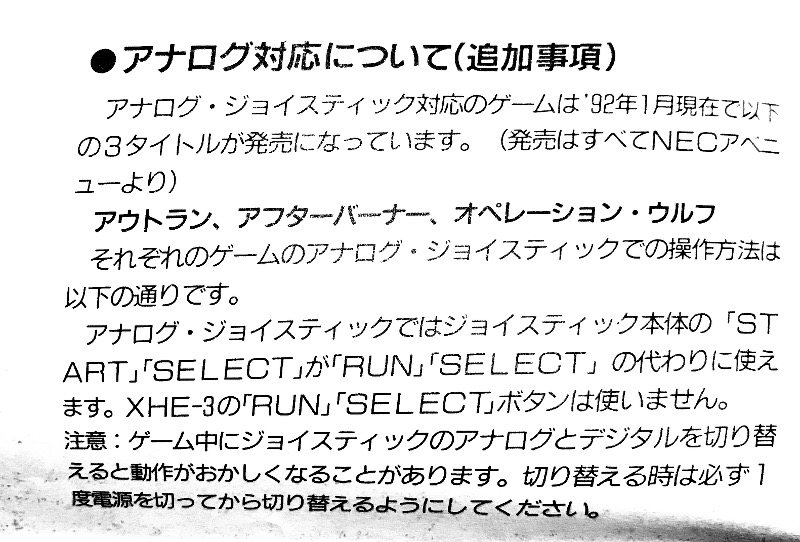
About analog compatibility
- About analog compatibility (Information supplement)
At the moment (January 92) 3 games with analog joystick support are available:
"Outrun", "After Burner" and "Operation Wolf" (all sold be Nec Avenue)
The controls for each game, when an analog joystick is used, are as described below.
The START and SELECT buttons on the analog joystick function as the RUN and SELECT buttons. The RUN and SELECT button on the XHE-3 are not used.
Warning: Switching between analog and digital mode may confuse the game. Be sure to always turn the power off when changing mode.
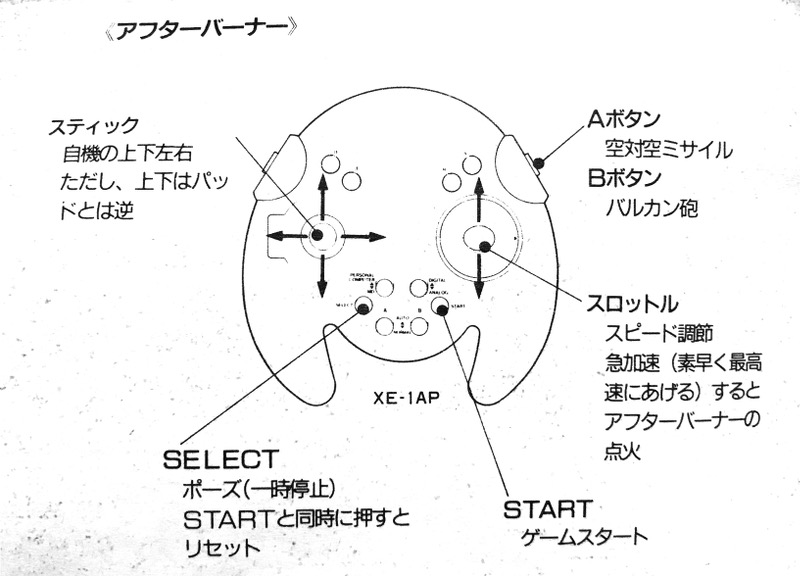
After burner controls
After Burner
Joystick: Up/down/left/right movement. Note however that up/down is the opposite of a regular control pad.
A button: Air-air missile
B button: Vulcan canon
Throttle: Speed control. Fires the after burners in response to sudden speed demands.
SELECT: Pause (stops the game temporarily). Triggers a reset when pressed together with START.
START: Used to start the game.
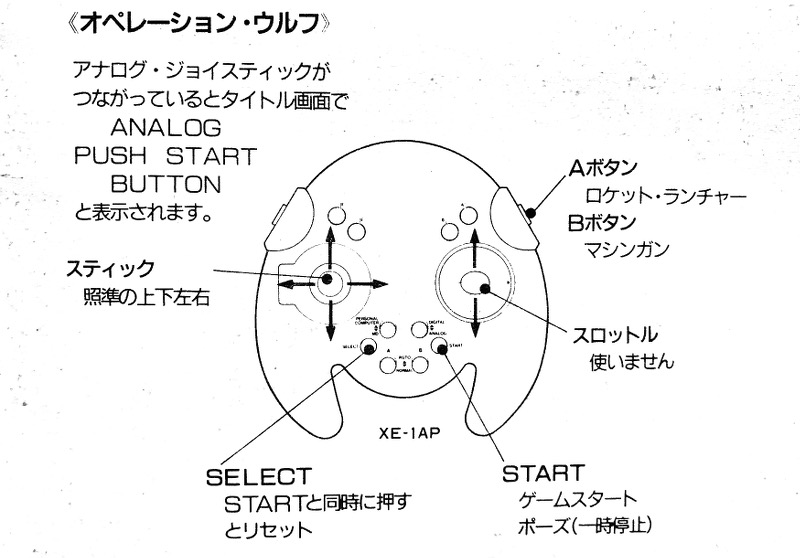
Operation wolf controls
Operation Wolf
The game's title screen shows "ANALOG PUSH START" confirming an analog joystick is connected.
Joystick: Aim
A button: Rocket laucher
B button: Machine gun
Throttle: not used
START: Start or pause the game.
SELECT: Triggers a reset when pressed together with START.
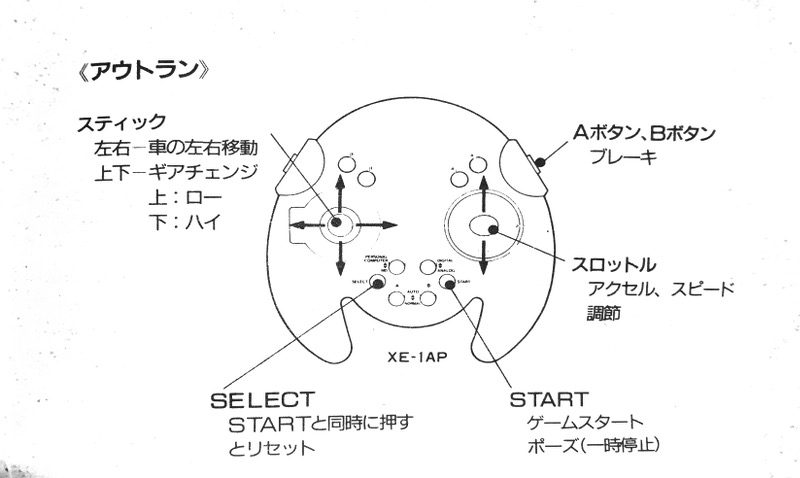
Outrun controls
Outrun
Joystick: Left-Right: Direction, Up-down: Gear change.
A and B buttons: Brakes
Throttle: Accelerator, speed control.
START: Start or pause the game.
SELECT: Triggers a reset when pressed together with START.
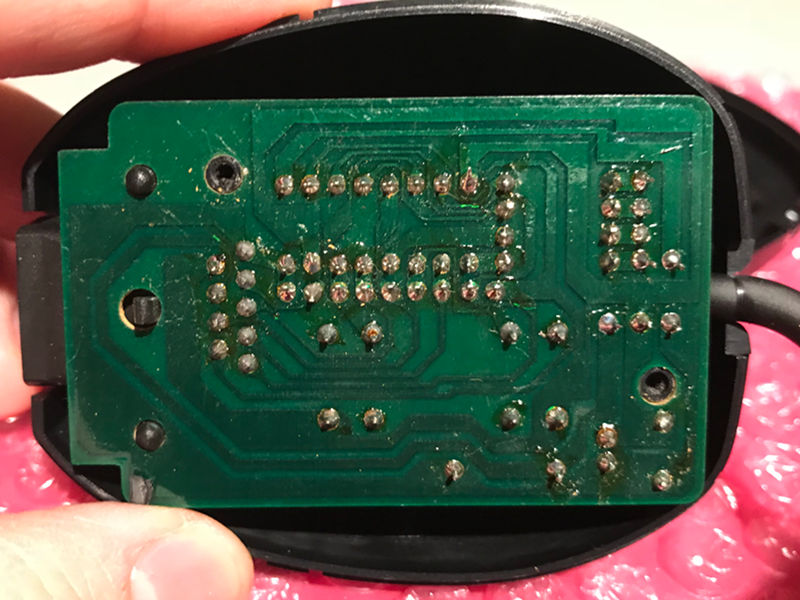
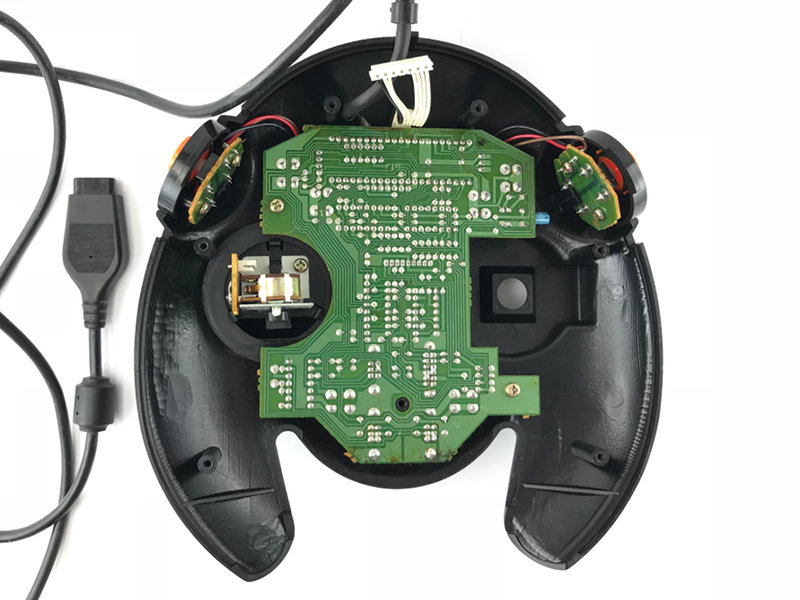
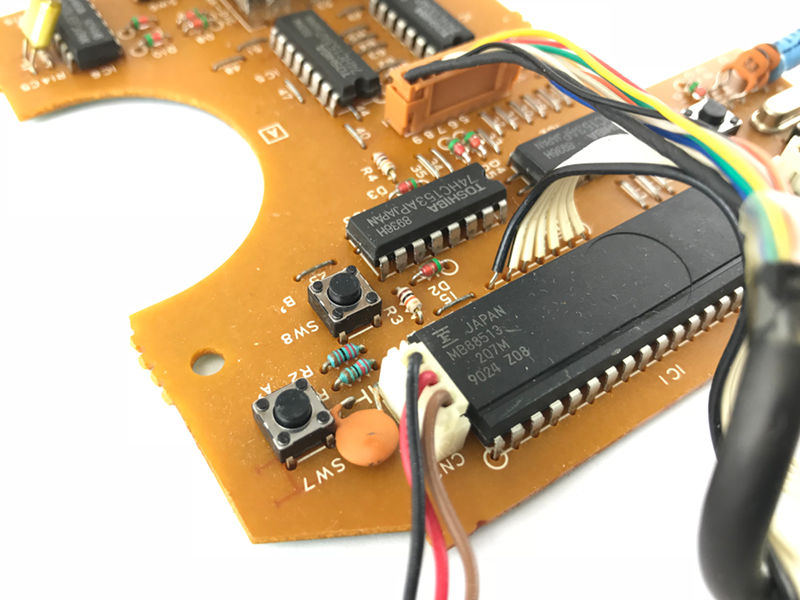
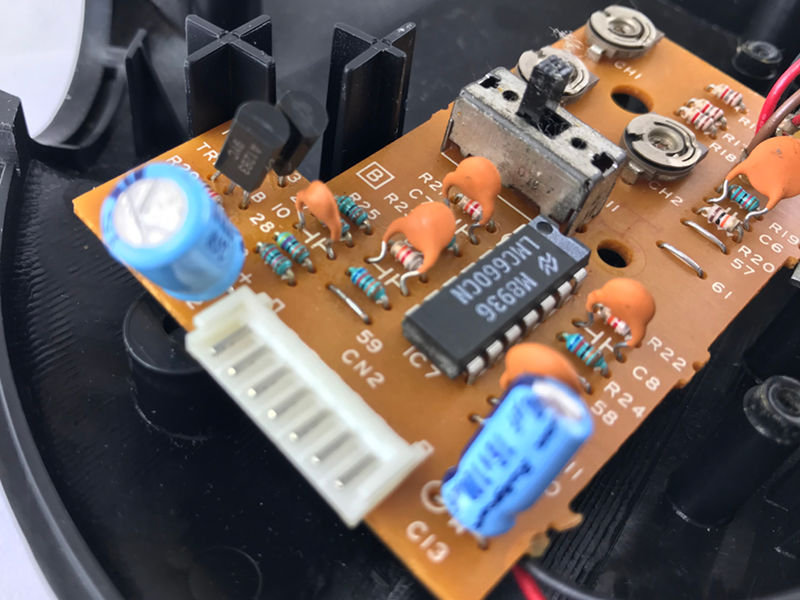
Inside the adapter
Getting inside is a simple matter of removing two philips screws, revealing a single layer PCB with through-hole components.

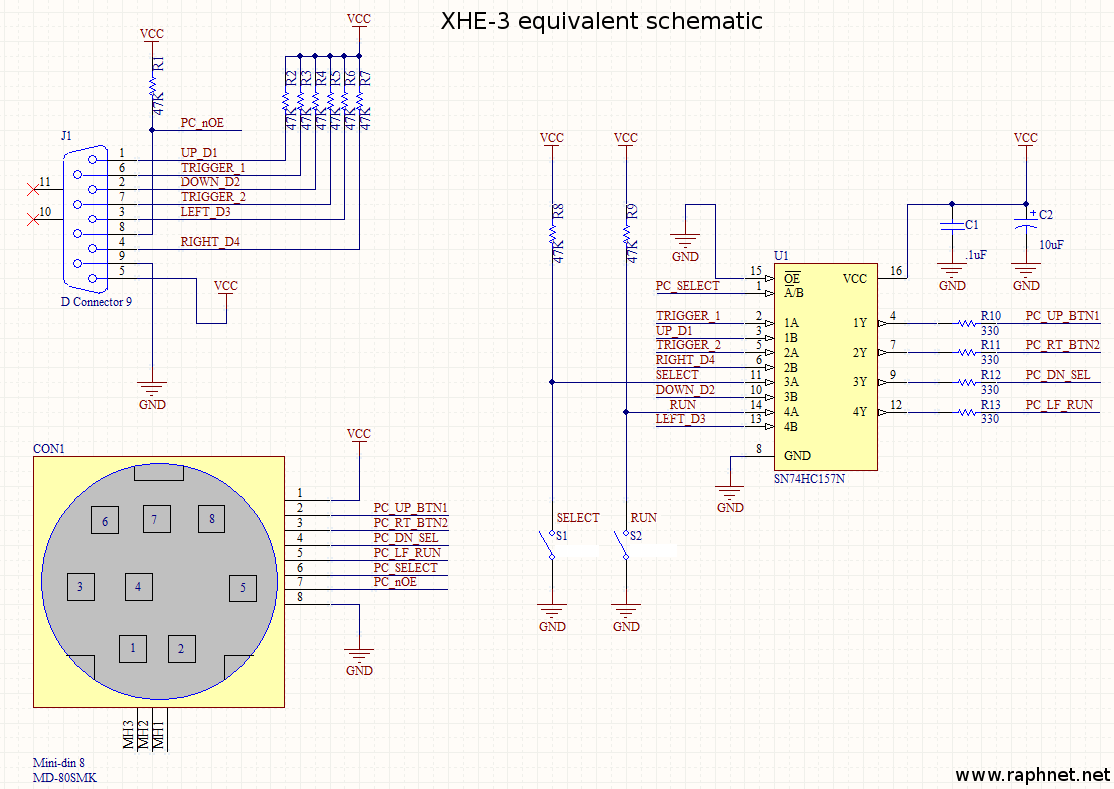
Schematic
I drew a schematic which I expect to be functionally equivalent to the original XHE-3. Here are a few observations:- The adapter is basically a standard (2 button) PC Engine gamepad but without rapid fire, and where signals from the DB9 connector replace most physical switches.
- Unlike standard controllers, the OE (multiplexer pin 15) pin is kept low.
- The OE signal (from mini-din pin 7), instead of being connected to the multiplexer, goes to DB9 pin 8.
- This adapter supports analog controller such as the XE-1AP. Given this simple (and entirely digital) design, we can of course conclude that the analog to digital conversion is taking place inside the joystick. How are the resulting values transmitted? More on this below.
DIY adapter
Using the above schematic, I designed and ordered a few circuit boards.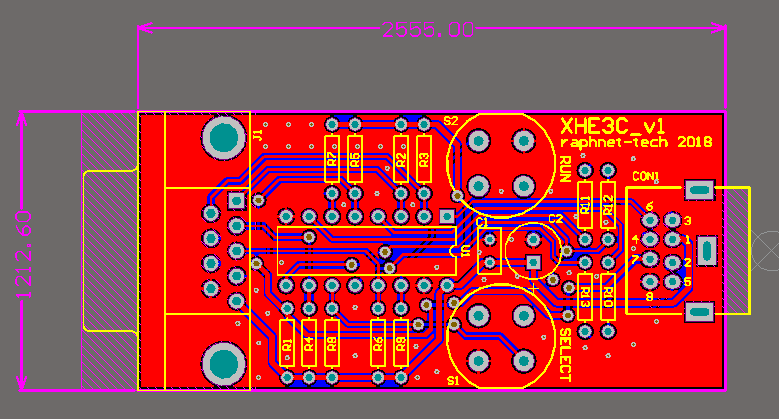
PCB design
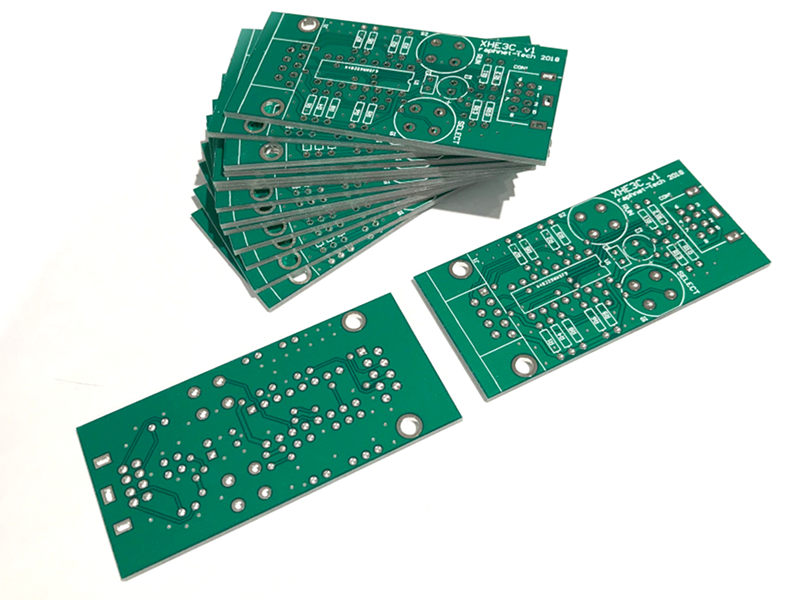
Bare PCB
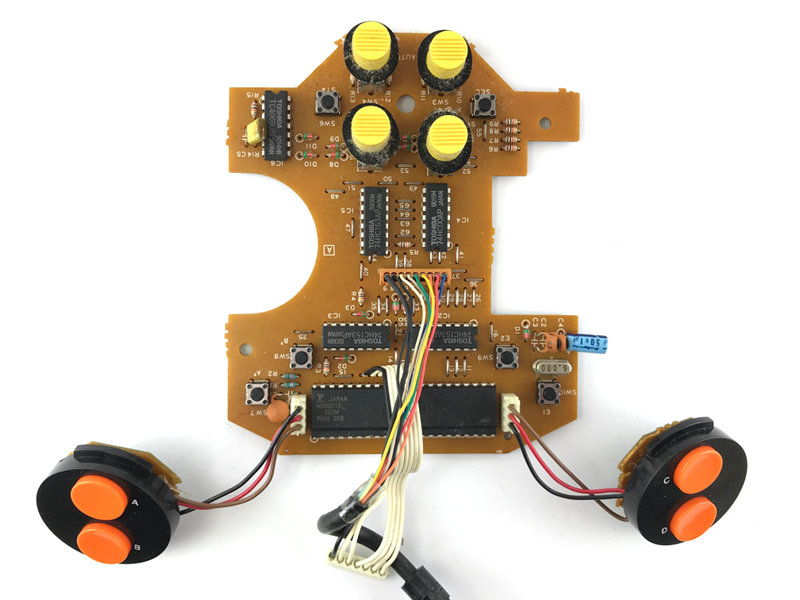
Here are a few pictures of the assembled board:
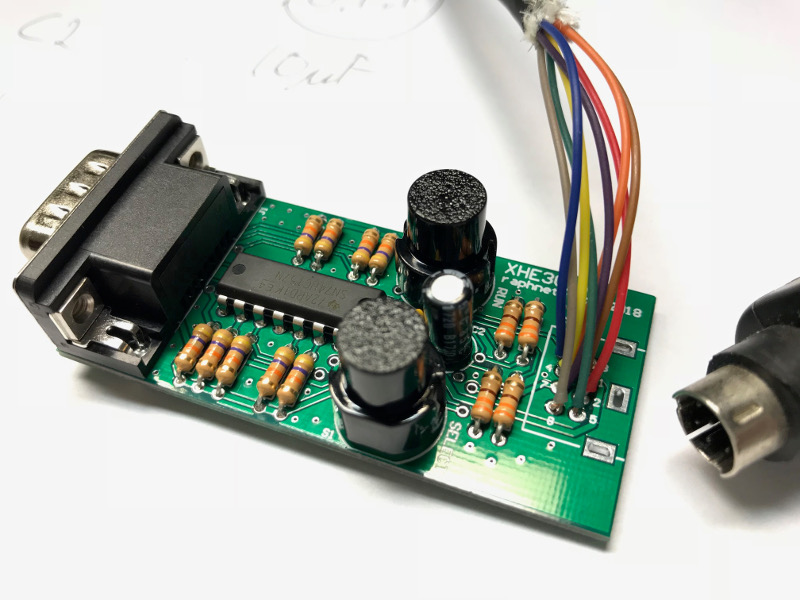
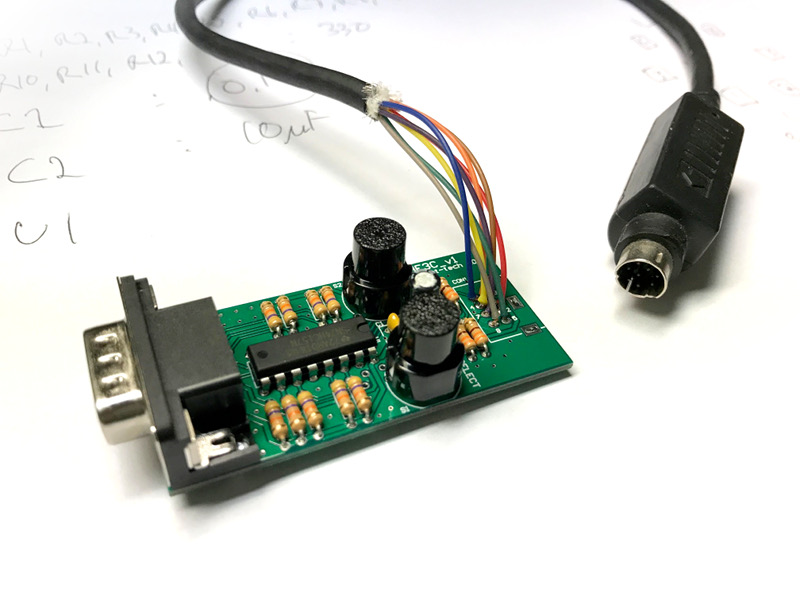
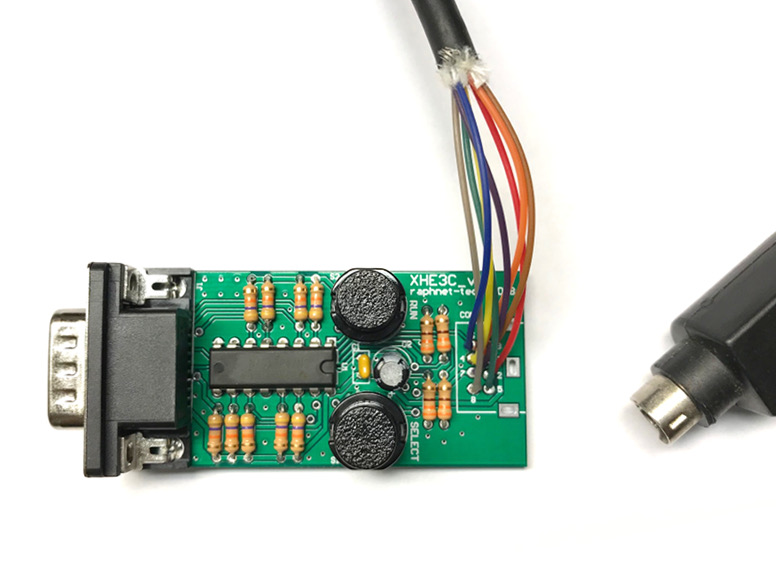
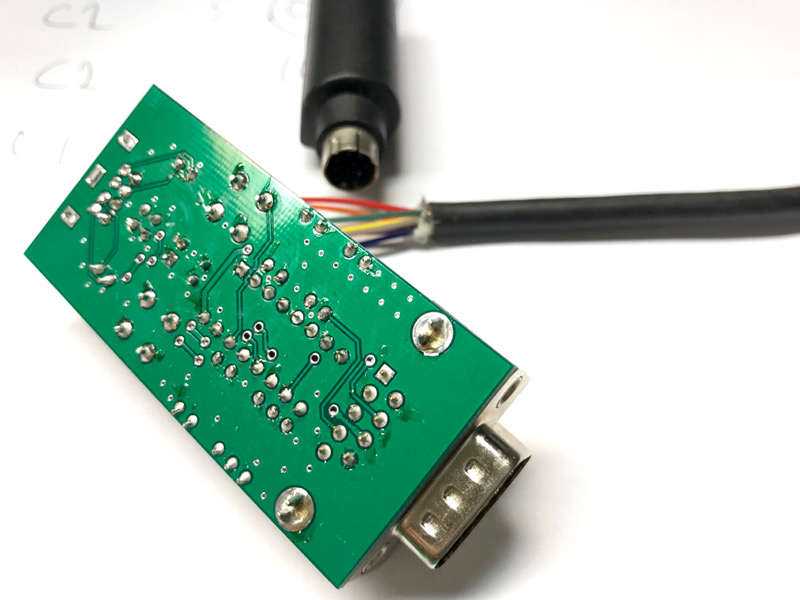
Note: The mini-din cable comes from a broken PC Engine controller.
Component list:
| Quantity | Designator | Description | Manufacturer and part number |
|---|---|---|---|
| 9 | R1, R2, R3, R4, R5, R6, R7, R8, R9 | 47k resistor | Yageo CFR-25JB-52-47K |
| 4 | R10, R11, R12, R13 | 330 ohm resistor | Yageo CFR-25JB-52-330R |
| 1 | J1 | DB9 connector, male, right-angle | Norcomp 182-009-113R531 |
| 2 | S1, S2 | Push button, SPST-NO | E-Switch KS-01Q-01 |
| 1 | U1 | Integrated circuit SN74HC157N | Texas Instruments SN74HC157N |
| 1 | C1 | .1uF capacitor | AVX SR205C104KAR |
| 1 | C2 | 10uF capacitor | Nichicon UVR1C100MDD1TD |
PCB + Component kit
The PCB as well as the required components for building this project are available in the online store.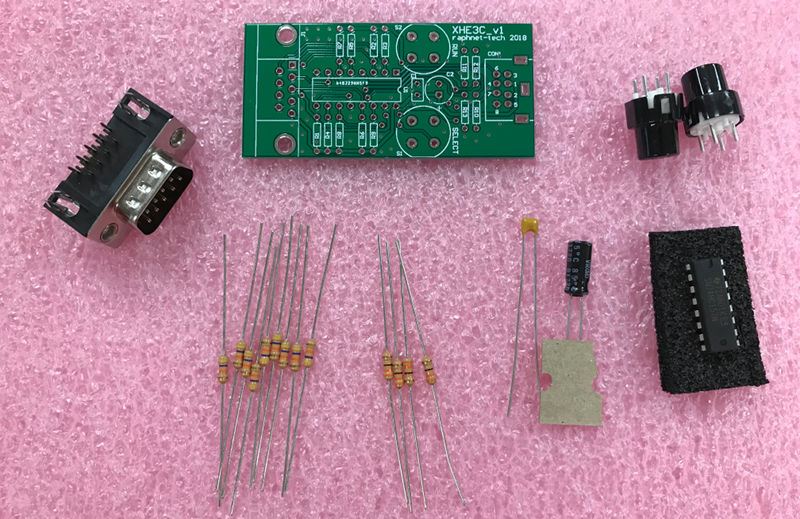
How the XE-1AP analog controller works
The XE-1AP controller uses DB9 pins 1 to 4 as a 4-bit data bus, and pins 6 and 7 (Trig1/Trig 2) as a clock to transfer 6 bytes, as illustrated below:
Reading the data can be done like this:
- The console generates a logic low pulse on OE for 2.24uS.
- The console waits for a logic low level on TRIG2.
- The console reads the most significant nibble on pins 1-4
- The console waits for a logic high level on TRIG1.
- The console reads the least significant nibble on pins 1-4
- Steps 2 to 5 are repeated 5 other times, for a total of 6 received bytes
| Bit | ||||||||
|---|---|---|---|---|---|---|---|---|
| Byte | 7 | 6 | 5 | 4 | 3 | 2 | 1 | 0 |
| 0 | A/A' | B/B' | C | D | E1 | E2 | START | SELECT |
| 1 | Y <7:4> | X <7:4> | ||||||
| 2 | THROTTLE<7:4> | 0 | 0 | 0 | 0 | |||
| 3 | Y <3:0> | X <3:0> | ||||||
| 4 | THROTTLE<3:0> | 0 | 0 | 0 | 0 | |||
| 5 | A | B | A' | B' | 1 | 1 | 1 | 1 |


Disclaimer
I cannot be held responsible for any damages that could occur to you or your equipment while following the procedures present on this page. Also, I GIVE ABSOLUTELY NO WARRANTY on the correctness and usability of the informations on this page. Please note, however, that the procedures above have worked in my case without any damages or problems.Now you cannot say that I did not warn you :)