RetroChallenge, March 2019
- Summary
- Part 1: Development tools
- Part 2: Game choosen, setting goals
- Part 3: Using a sprite
- Part 4: Issues on real hardware
- Part 5: Validating moves
- Part 6: Hints
- Part 7: Sudoku Puzzles
- Part 8: A first release
- Part 9: New goals
- Part 10: Designing the cartridge PCB
- Part 11: Standard controller support
- Part 12: Sudoku solver
- Part 13: Second ROM release
- Part 14: Testing the cartridge PCB
- Part 15: Adding sound
- Part 16: Third ROM release
- Part 17: Making a cartridge
- Part 18: ROM releases
- Part 19: Source code
- Conclusion
Summary
In the previous edition (RC2018/09) I learned a bit of SNES programming, but all I did was a controller test ROM.So for RC2019/03, to avoid forgetting what I managed to learn about 65816 assembly language and SNES architecture, I intend to put my skills to use to create an SNES game, something I've always wanted to do!
I have not decided yet exactly what kind of game it will be, but I would like it to take advantage of the numerous buttons found on the NTT Data Keypad, since there are not enough (or none, if you don't consider JRA PAT a game) games supporting this controller:
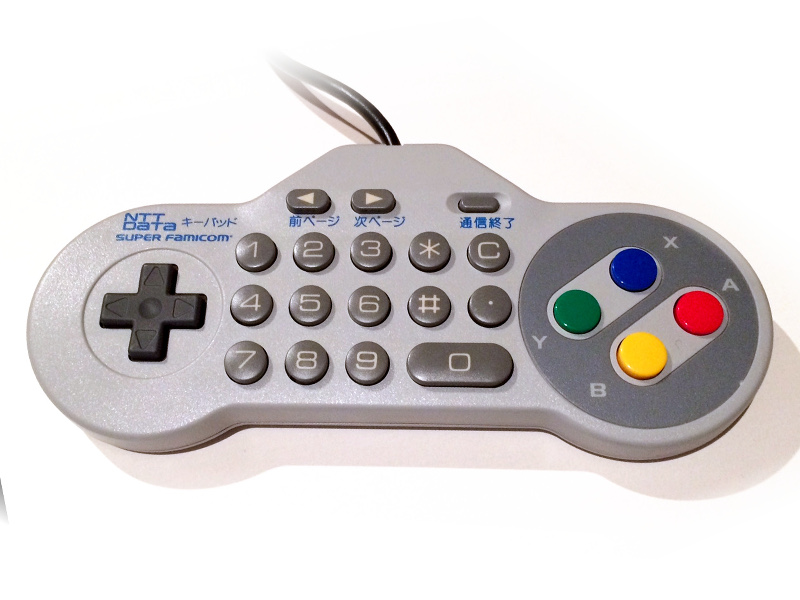
The NDK10 controller
Part 1: Development tools
Going slowly for a change
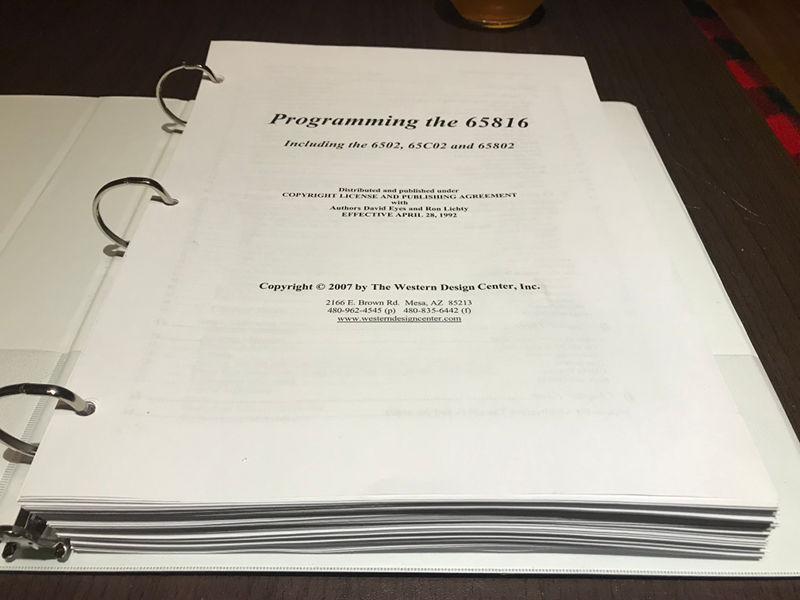
Last time I tried my hand at SNES programming, I took a learn-as-you-go, only-what-you-must and go-very-fast approach to the project. It worked of course, but it was not not so easy.This time I'm serious about SNES programming, so I printed what appears so far to be an excellent reference book for the 65816 CPU. I spent a few hours reading about its architecture, discovering the numerous addressing modes, learning about limitations and common pitfalls. And it has already paid off, I don't regret it.

Development environment and tools
I prefer working under Linux, but this makes the life of a would-be SNES programmer more difficult. Many tools and compilers are only distributed as .EXE files. I could use Wine or virtual machines, but this is not ideal. As a result, my set of tools may be a bit atypical.Programming language
I know that C can be used for SNES development and that there are libraries to make things easier, however I decided to stick to assembly language for the time being. I'm still learning, so I think staying very close to the hardware is better. Nothing is hidden, so understanding and ultimately controlling everything is easier to achieve.The assembler I use is WLA-DX. I learned how to use it for my last project (the controller test), and many SNES programming tutorials do too, which means examples can be found, etc.
Graphics
Tilesets
I use GIMP to draw tilesets. With a visible grid configured to match the tile size, it's easy. I use indexed color mode and configure the palette manually.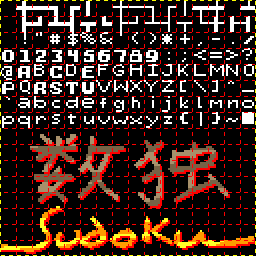
I save the tileset in one large PNG image.
Tilemaps
Tiles are small fixed-size images referred to by a number. A Tilemap is a two-dimensional array specifying which tile goes where on the screen. In this project, the screen is a grid of 32x28 tiles, or 256x224 pixels (due to the use of 8x8 tiles).To build my tilemaps, I use a map editor named Tiled. It is free, open-source and runs under Linux. Perfect.
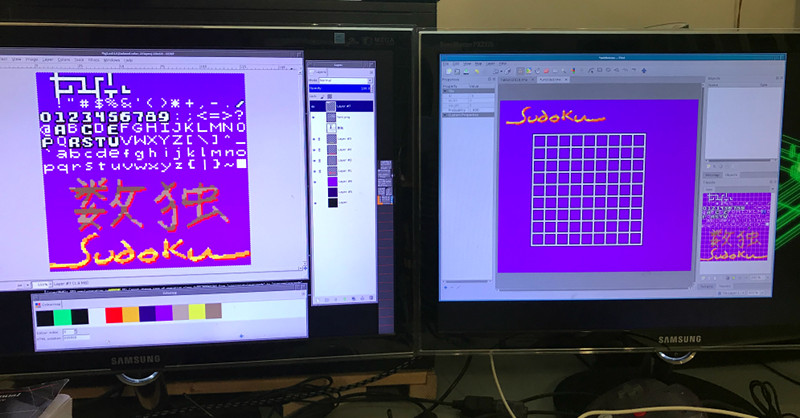
I import the PNG file for my tileset in Tiled, and then I use it to place tiles in a grid representing the screen. A very convenient feature is that whenever the PNG changes (due to editing in Gimp) Tiled automatically reloads it, for immediate results in the tilemap.
I like working with both tools open in their own screens: (Left: GIMP, Right: Tiled)
Data conversion
Naturally, the SNES does not support PNG files nor Tiled .TMX files. But I have tools to convert both.Converting PNGs
To convert tilesets to the binary format expected by the SNES hardware, I use png2snes (See also my fork on GitHub). Being a command-line tool, calling it from scripts to automatically convert resources is easy. I use it from my project's Makefile, so whenever I update the graphics, the binary files are regenerated and a new ROM is assembled automatically.Here is an example:
./png2snes -v --bitplanes 4 --tilesize 8 --binary tilemaps/main.png --output=mainThe above reads main.png and generates two files: main.cgr (palette data) and main.vra (tile data). Both files are then included from the source code by the means of the
.incbin assembler directive.Converting Tilemaps
Tiled can export in .CSV format. And it can be done from the command-line, so it is easily automated:tiled tilemaps/grid.tmx --export-map grid.csvThat's a start (it is a simpler format than XML files, which is what .TMX files are) but it's not what the SNES hardware expects. To convert the .CSV to the SNES binary format, I wrote a simple tool in C:
csv2bin/csv2bin title.csv title.mapThis generates tilemap.map which is then included from the source (using .incbin). Here again, this is all done by the project's Makefile. Whenever I click save in Tiled, the next time I compile a new CSV is exported and automatically converted to binary.
Editing the code
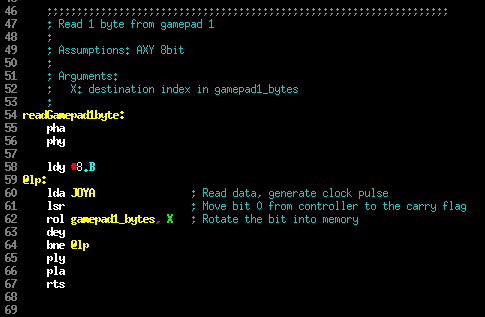
I already use the VIM editor for almost everything, so using it for SNES assembly too feels natural.I like color, but by default there is no syntax highlighting for 65816 assembly. But I found this git repository which has syntax files for SNES development (65816, SuperFX and SPC700), exactly what I need: vim syntax highlighting for 65816, SuperFX and spc700 assembly
Looking good!:
Running the code
Emulation
Most of the time, I use bsnes-plus, a debug-oriented fork of the famous bsnes. Over the course of my previous retro-challenge, I contributed to the project by adding NTT Data Keypad support. That's good, I'm going to need it, and you too if you wish to try my game. (There should be more emulators supporting this controller in the future. At least, I think byuu said that the next version of Higan would support the NTT Data Keypad too in a tweet, but I can't find it anymore..)As the description implies, bsnes-plus is well equipped for debugging. You can inspect memory, execute the program step by step, look at the PPU registers, etc.
I have a special target in my makefile called
run which start the ROM in bsnes-plus
automatically for me, which makes it super convenient for development. Also, using the System -> Reload
menu, a newly compiled ROM can be opened without closing the debugger windows. Excellent!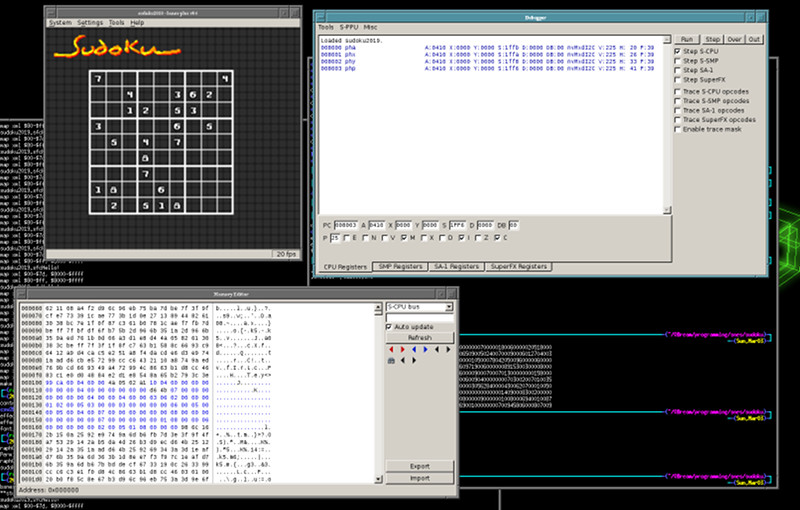
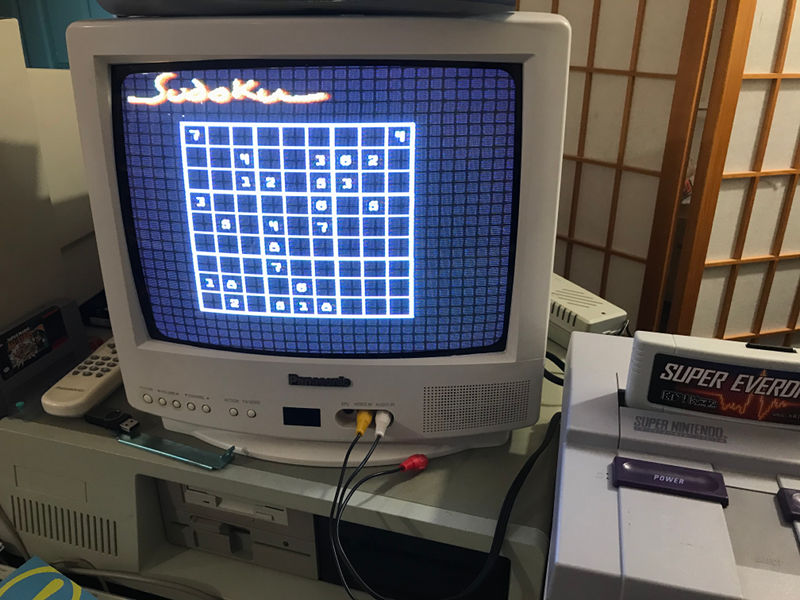
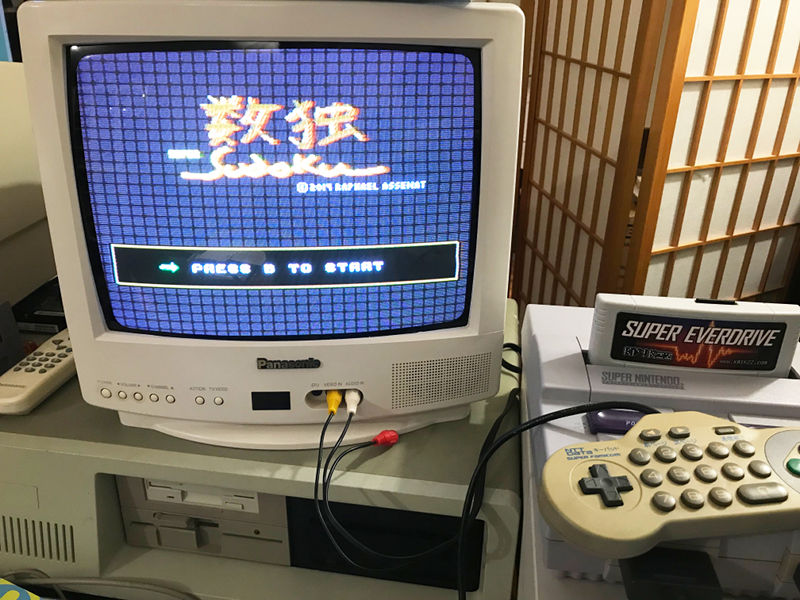
On the real thing!
Of course, ultimately the code has run on real hardware. I got a Super Everdrive from krikzz a few months ago which makes this possible: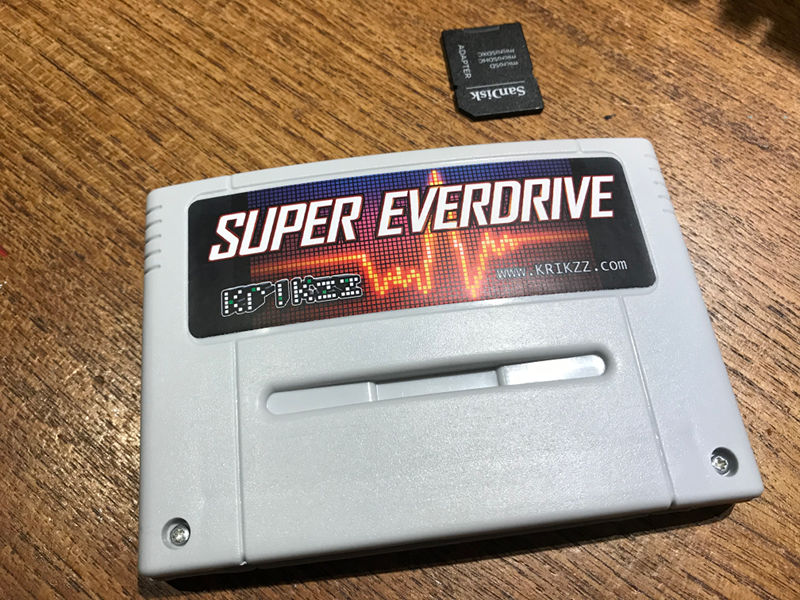
Everdrive + SD Card
Testing in bsnes-plus is very easy and quick, but testing on real hardware every now and then is very important. Even though bsnes is a very accurate emulator, the behaviour on a real machine could be different. If my program suddenly misbehaves on the console and last time I tested was weeks ago, it could be difficult to guess which of all the changes I made caused the regression. (This is applicable to any software developed using an emulator... For instance, this has happened to me many times when developing DOS games using DOSBox)
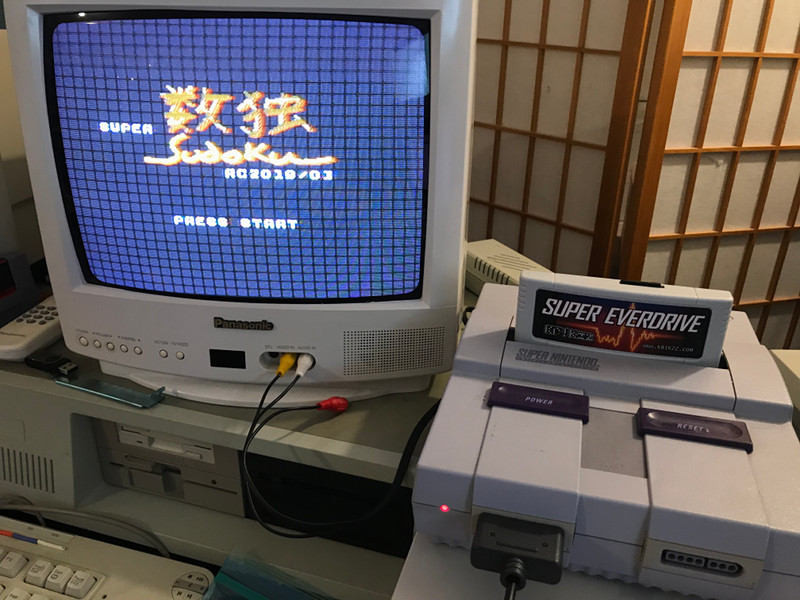
My first test
Later: Testing the grid code
Part 2: Game choosen, setting goals
I had a few ideas, but I was not sure what kind of game I would do. But then a suggestion to make a Sudoku game came from Twitter (by @Shadoff_d). I thought this was an excellent idea:- It is simple. Not too many moving objects, not much animation, no collision detection... Perfect for a beginner project.
- The use of the keypad for entering numbers really makes sense.
- Many different puzzles should be available
- Difficulty level should be selectable
- The game must support the NTT Data Keypad for data entry
- The game must assist the user by not accepting invalid input, or by highlighting conflicts. TBD.
- The game must detect when the puzzle is solved.
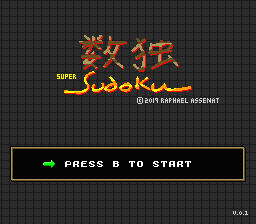
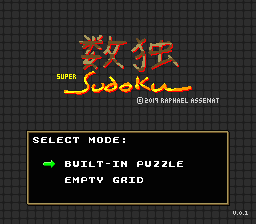
So, I began building my development environment and working on the game Saturday afternoon, and Sunday I had a working gamepad driver (Ok, it came from my previous retrochallenge entry), and a beginning of title screen. I also had the code for populating a grid on the screen according to the content of a game-state array of 81 entries (9x9).
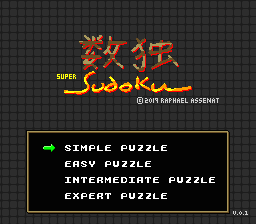
The title screen is functional. By pressing START, the screen fades to black, then the grid screen fades in. I know this should be finishing touches, but it looked so easy I could not resist. I implemented fade-ins and fade-outs using the Master Brightness bits in register $2100 (INIDISP). All one must do is write a value between 0 and 15 and that's it. Very convenient.
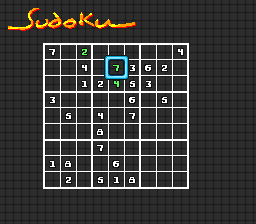
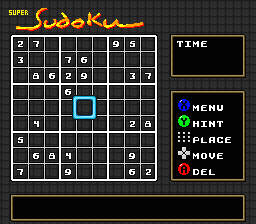
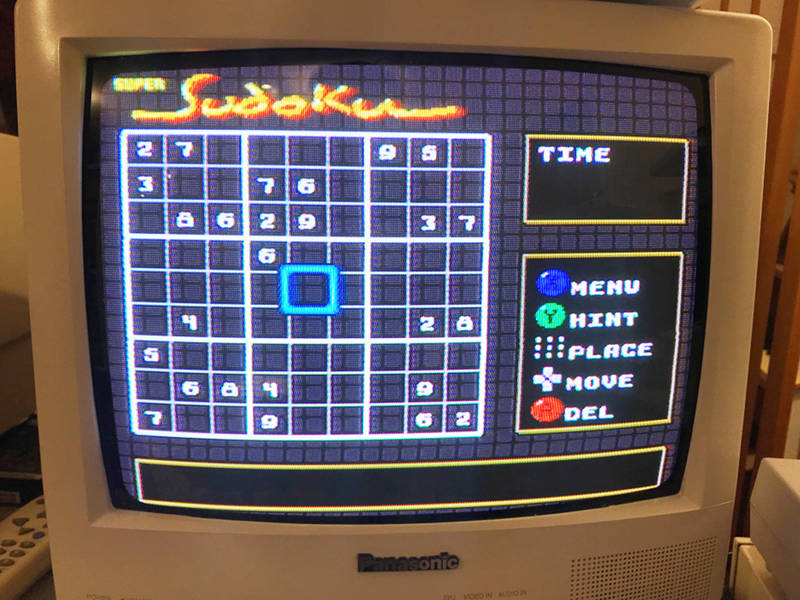
Here are a few screenshots of the game as it is right now:
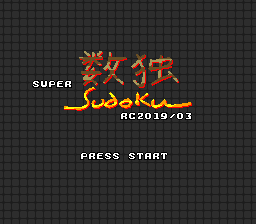
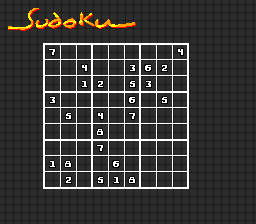
The grid is not centered because I intend to add something on the right. Probably a timer and possibly some button info (for instance: Y to delete, B to place a number, A to place a guess?). I will experiment.
Making the grid interactive is my next step. I need a cursor, and I want it to be a sprite. So now I need to learn how to use sprites on the SNES :-)
Part 3: Using a sprite
Qwertie's SNES Documentation is a good reference on how graphics work on SNES. After carefully reading it I knew what I had to do to use sprites.It is necessary is to:
- Store the sprite images in VRAM in the correct format.
- Tell the PPU what the sprite size is and where the image data is located in VRAM (OBSEL / $2101)
- Install at least one 16-color palette at CGRAM address $80.
- Fill a data structure in OAM (Object Attribute Memory) containing on-screen sprite coordinates, the number of the first 8x8 tile the sprite is made of, and other attributes.
Storing the sprite images in VRAM
Qwertie's documentation explains that sprites are made up of several small 8x8 tiles and that rows must start 16 tiles apart. This means that I can use png2snes as I did for backgrounds, provided that the source .png image is exactly 128 pixels wide.Setting the sprite sizes and VRAM origin
The 3 least significant bits of register @2101 (OBSEL) indicates where the sprite tiles are to be found in VRAM. 1 bit weights 16KByte, so possible locations are $0000, $4000, $8000 and $C000. As my background tiles and tilemaps are located at the beginning of video memory, I used a value of 2, placing the sprite tiles at $8000 (32K) well past those.Bits 7 to 5 defines the two sprite sizes that will be available. There are small and large sprites (each sprite can be either, this is controlled by a table in memory, more on this soon). Here, the size of 'small' and 'large' is chosen:
- 0: Small: 8x8, Large: 16x16
- 1: Small: 8x8, Large: 32x32
- 2: Small: 8x8, Large: 64x64
- 3: Small: 16x16, Large: 32x32
- 4: Small: 16x16, Large: 64x64
- 5: Small: 32x32, Large: 64x64
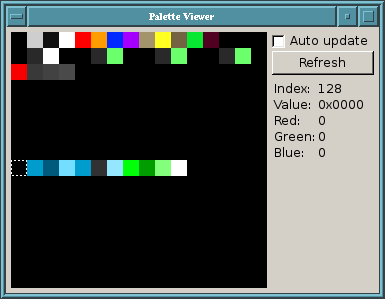
Palette
For sprites, a total of 8 distinct palettes (16 colors each) can be laid out in CGRAM starting at address $80. Which of the 8 palettes is used for a given sprite/object is controlled by a data structure in OAM. This means the tiles for a sprite can be shared between on-screen objects of different color (they just use different palettes). But for this game, I only need one palette.Bsnes-plus has a palette viewer, here is what this game's palette looks like in it. The sprite palette is the strip in the middle.
OAM (Object attribute memory)
The SNES certainly has a lot of different memory spaces:- WRAM ("Work RAM", that's "normal" memory for general use by the CPU)
- VRAM (Video memory)
- CGRAM (Palette memory)
- OAM (Object attribute memory).
However, for a simple game like mine, I only care about a single sprite. To move it around, I simply write the new X/Y position in OAM.
The Sprite Viewer in bsnes-plus is an easy way to look at what the table in OAM contains, very helpful when things are not working properly...
After solving a few problems (which were my fault for not understanding correctly at first) I had a working pointer and entering numbers in the grid became possible. I was very happy to solve a Sudoku puzzle in my game for the first time!
Part 4: Issues on real hardware
So time passed and I kept improving the game, updating graphics, etc, continuously testing with bsnes-plus. And then I decided to try the game which had become very playable on the real thing. But surprise! The cursor sprite was not visible...At that point in time, the pointer used in the grid would also appear on the title screen. But for some then unknown reason, it did not when the game was running on the console. I had no idea what change had broken it, I had made so many modifications.... (I did not follow my own advice: Test on the real thing, and test often!).
After a lot of experiments, I concluded that my sprite was most likely non-working right from the start. I had 127 sprites located at coordinate 0,0. There are limits regarding how many simultaneous sprites can be shown on the screen, but it is not documented very well (or I do not understand correctly, which is very likely). I think that the behavior when those limits are exceeded may not be reproduced by the emulator with perfect accuracy.
When I modified my code to place all unused sprites/object off-screen, the cursor sprite finally became visible on real hardware.
Sprite missing
Later: I see a sprite!
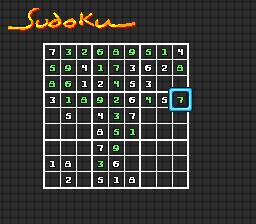
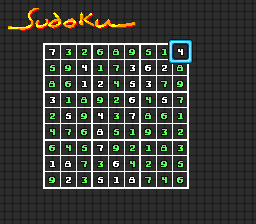
With a visible pointer even when running on a console, I celebrated this small victory by finishing another Sudoku puzzle:

First game on SNES
Part 5: Validating moves
First I prevented the player from overwriting/deleting digits that are part of the puzzle.Next I wanted to detect and refuse moves that are not permitted by the sudoku rules. The algorithm to check if a move is valid is the following:
- Check if the digit is already present in this 3x3 group
- Check if the digit already exists in this column
- Check if the digit already exists in this row
I decided that it would be better to write a C program which would, for each of the 81 cells in the grid, precompute the list of "neighbors" to be look at.
void computeNbrs(int x, int y)
{
	int X, Y, i, j;

	// Same row
	for (X=0; X<x; X++)
		outputNeighbor(X,y);
	for (X=x+1; X<GRID_SIZE; X++)
		outputNeighbor(X,y);

	// Same column
	for (Y=0; Y<y; Y++)
		outputNeighbor(x,Y);
	for (Y=y+1; Y<GRID_SIZE; Y++)
		outputNeighbor(x,Y);

	// Same cell AND not already output above
	for (Y = (y/3)*3, j = 0; j < 3; j++,Y++) {
		for (X = (x/3)*3, i = 0; i < 3; i++,X++) {
			if (Y != y && X != x) {
				outputNeighbor(X,Y);
			}
		}
	}
}
_nbors_0_0: .dw $02, $04, $06, $08, $0a, $0c, $0e, $10, $12, $24, $36, $48, $5a, $6c, $7e, $90, $14, $16, $26, $28,
_nbors_1_0: .dw $00, $04, $06, $08, $0a, $0c, $0e, $10, $14, $26, $38, $4a, $5c, $6e, $80, $92, $12, $16, $24, $28,
...
_nbors_8_8: .dw $90, $92, $94, $96, $98, $9a, $9c, $9e, $10, $22, $34, $46, $58, $6a, $7c, $8e, $78, $7a, $8a, $8c,

neighbor_list:
	.dw _nbors_0_0, _nbors_1_0, _nbors_2_0, _nbors_3_0, _nbors_4_0, _nbors_5_0, _nbors_6_0, _nbors_7_0, _nbors_8_0,
	...
	.dw _nbors_0_8, _nbors_1_8, _nbors_2_8, _nbors_3_8, _nbors_4_8, _nbors_5_8, _nbors_6_8, _nbors_7_8, _nbors_8_8,
neighbor_list
array. Then it can perform a series of indirect accesses while counting up to 20.
	; Get the pointer to the list of neighbors for the designated cell
	lda neighbor_list, Y
	sta dp_indirect_tmp1

	ldy #0
@checknext:
	lda (dp_indirect_tmp1),Y    ; Load offset for neighbor
	tax                         ; Move the offset to X to use it
	lda griddata, X             ; Load the value at this position
	and #$FF
	cmp gridarg_value           ; Check if it is the value we are checking
	beq @foundit                ; Yes? Then it is not unique. Can't put this value in this cell.
	iny                         ; Advance to next neighbor in list
	iny
	cpy #20*2
	bne @checknext

	; All neighbors checked, no match found
@finished:
	; return with carry clear
	clc
	...
	rts

@foundit:
	; TODO ? Perhaps remember *where* we found it to show the user why he can't place it here?

	; return with carry set
	sec
	...
	rts
Part 6: Hints
Did you notice the blue button (X) labelled Hint in the screenshots? With this button a suggestion for the next move can be obtained. The first time it is pushed, it moves the cursor over a cell where only 1 digit will be accepted.With the cursor still over the cell, pressing the button again will insert the correct digit for you. Simple puzzles can actually be solved by repeatedly pushing X...
For the moment, this is a very simple feature. The code looks at the cells one by one until it finds one which will accept only 1 digit (single valid move).
I intend to improve this by also detecting cases where a digit can only appear in one place in:
- A column
- A row
- A 3x3 group
Part 7: Sudoku Puzzles
The puzzles are not generated by the SNES (sorry). The are pre-generated and stored in ROM. To generate sudoku puzzles, I used qqwing. This program has a command-line interface, has 4 difficulty levels and can provide computer friendly output. I made a simple script to generate 100 puzzles of each difficulty level:#!/bin/bash
N_PUZZLES=100
function generatePuzzles
{
echo "Level: $1..."
qqwing --generate $N_PUZZLES --one-line --difficulty $1 > $1.txt
}
echo "Generating puzzles..."
generatePuzzles simple
generatePuzzles easy
generatePuzzles intermediate
generatePuzzles expert
27....95.3..76.....8629..37...6...............4.....285.........684...9.7..9...62
....8....6.....5...71...6...9...7.......35894.53....71.....4.63.39......4.....1.8
47..5....9.6...............2...3...6.6.8.4.798..2..35.....6......8..7.4.3495.8.6.
........8...........5...21..28.9.5....36..1..9.15.3.6.5.9481.3.....3.4....6..5...
9.1....72.......65...17.....15.....9...325.1....8....6...913........7.8..2...6..7
I wrote a simple C program to convert from this text format to a simple binary format using one byte per cell, with values 0 to 9 (0 for empty cells). It would be possible to store two cells per byte, and even to add compression, but I don't need to do this yet. (The ROM is not too big yet).
./puzzletxt2bin simple.txt simple.binEach collection of 100 puzzles is then included by the assembler with the
.incbin
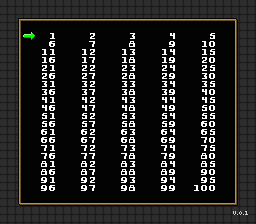
directive.So with this nice little collection of 400 puzzles in ROM, it was time to give the player a means of selecting a puzzle.
This took a bit of time, since I had to create a system for drawing boxes and printing text. I also did some rework, for instance moving a sprite (the pointer) over a grid is now a generic concept, which means that code can also handle moving the arrow in the menus.
Here is the result:
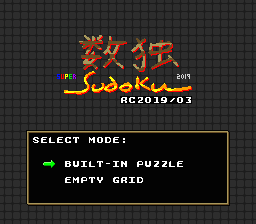
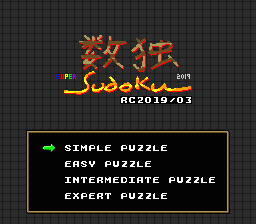

Part 8: A first release
Here is a first release you can try! However you will need an emulator where support for the NTT Data Keypad is implemented, or otherwise a real controller and a way to load this rom on your SNES.Specifications for this version:
- A total of 400 built-in puzzles
- 4 difficulty levels (simple, easy, intermediate, expert)
- A basic "Hint" function
- Only playable with the NTT Data Keypad.
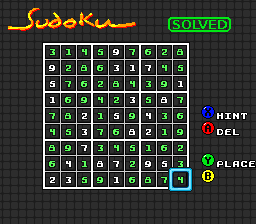
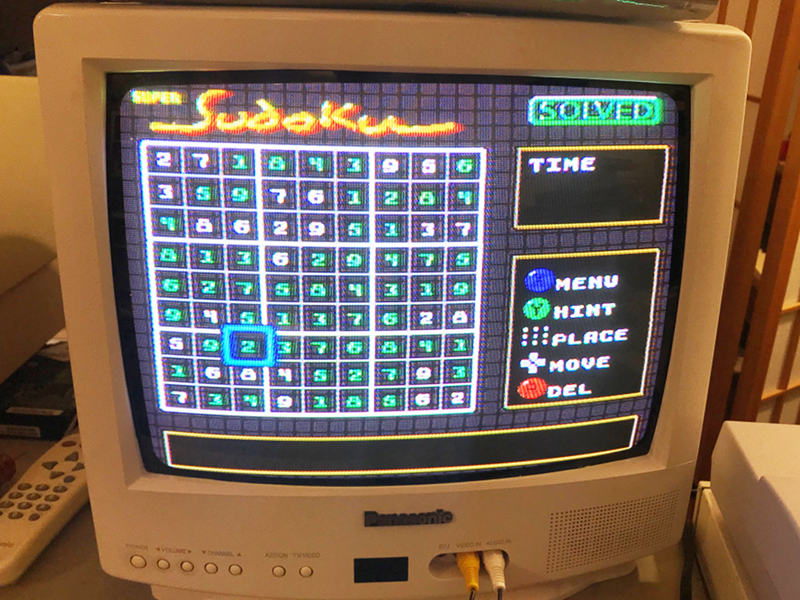
Here are a few screenshots of this version:


This version works fine on my SNES console too!
Part 9: New goals
Things went well, or rather I think I had too much time to spend on this project. It's only the second weekend of RC2019/03 and I already met all my goals. Maybe I should have aimed a bit higher. My goals were:- Many different puzzles should be available: Yes, 400 of them
- Difficulty level should be selectable: Yes, 4 levels
- The game must support the NTT Data Keypad for data entry: It does, and it's non-optional (for now)
- The game must assist the user by not accepting invalid input, or by highlighting conflicts. TBD. Done
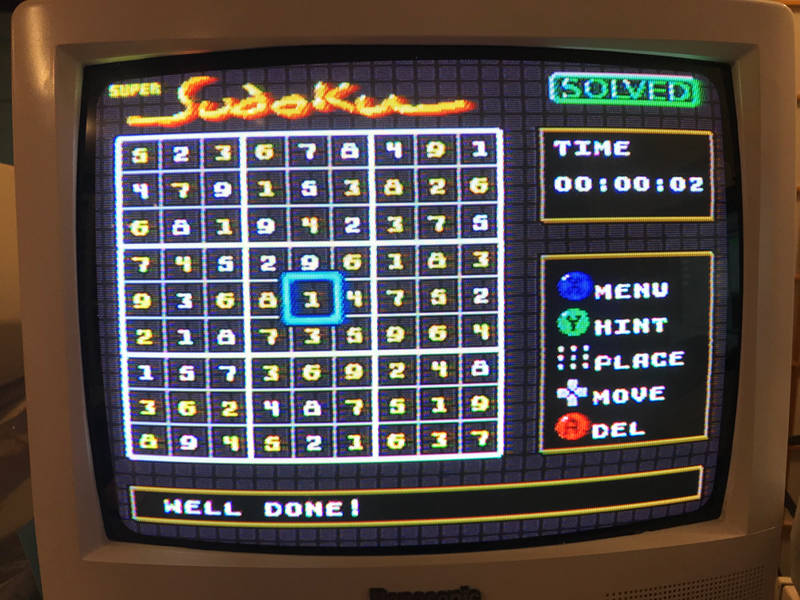
- The game must detect when the puzzle is solved. Yes!
- Add a timer (There is already a box for one in the game screen)
- Add messages (They'll be shown in the box below the screen)
- Implement a sudoku solver (by brute force). Find the solution of any puzzle using your SNES!
- Improve the hint function: Add the additional case already discussed.
- Make it possible to play with a standard controller too. (Maybe use L/R to cycle through valid moves for a given cell?
- Add basic sound effects (error sound for bad moves, small clicks when placing digits...)
- Build a cartridge version of the game (with an EEPROM, not an everdrive + SD card, that's too easy)
- Add background music
Part 10: Designing the cartridge PCB
One of my new goals is making a cartridge. I checked online for options but I could not find exactly what I wanted:- Simple design accepting a 32 pin EPROM. (by simple I mean just a ROM and CIC, no save RAM)
- Hard gold fingers, or at least gold plated fingers.
- In stock and shipped fast enough to get here before the retrochallenge ends!
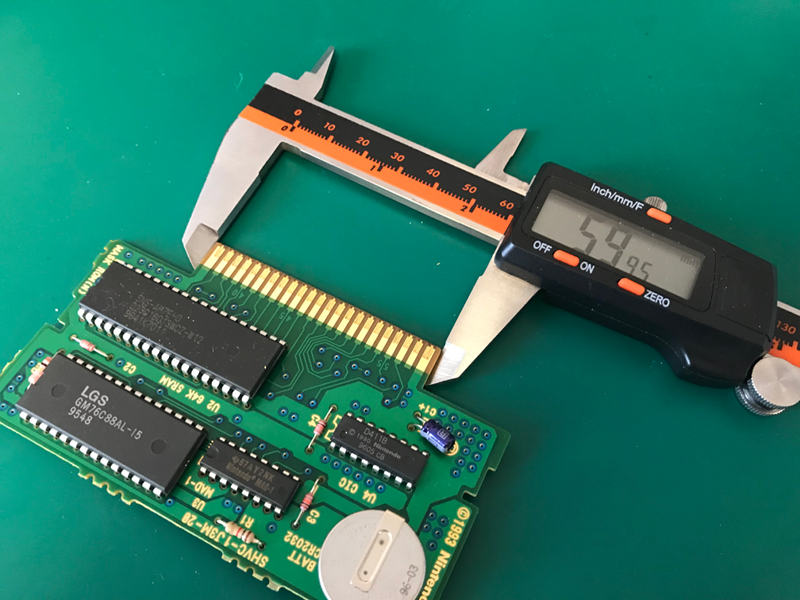
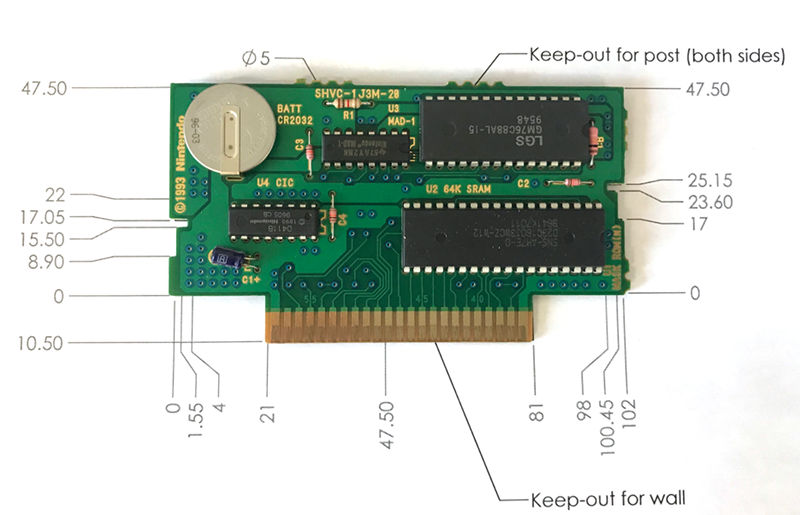
Part 1: Board dimensions
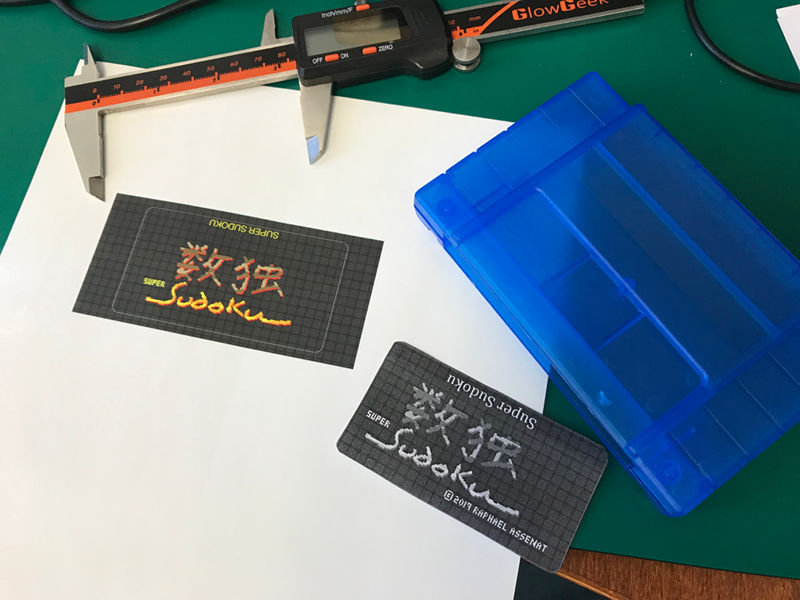
I opened a cartridge (damn those annoying screws, I misplaced my driver bits) and took a series of measurements using a digital caliper. I think the designer was using the metric system as most dimensions come up pretty close to millimeter or half-millimeter values. So I rounded most of the values according to my judgment.
Here is the drawing I made. I used ordinate dimensions because I find them convenient when drawing PCBs.
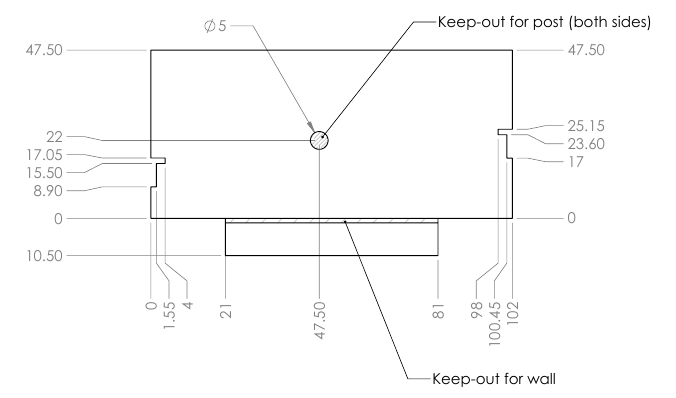
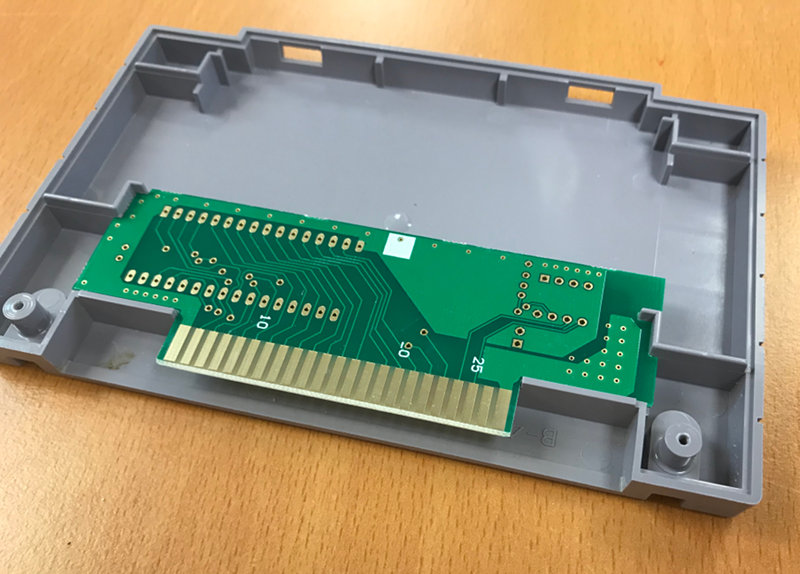
Hopefully I got those right. But I printed the drawing at 1:1 scale and the reference PCB aligns with it well. So I am confident my PCB will fit a standard case.
PCB over drawing
Part 2: Schematic and PCB
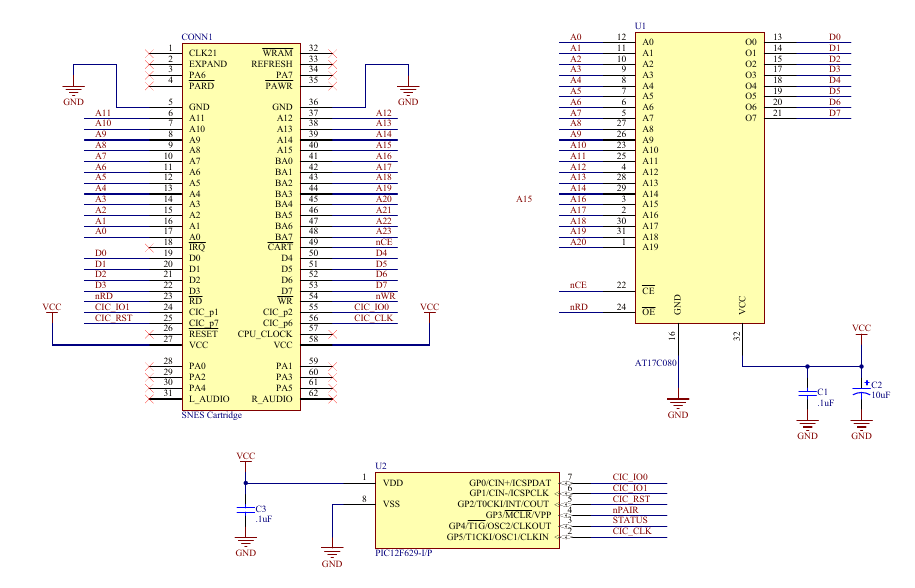
I am making what is called a LoRom cartridge. Before programming for the SNES, I really had no idea what this was about, but now that I know banks 00-3F are split in two 32K parts (0000-7fff: System area [WRAM, I/O], 8000-FFFF: ROM), I understand why address line A15 is not wired to the ROM.But when I was still unsure I understood, I was fortunate enough to stuble upon this page which confirmed everything and cleared all my doubts:
LoRom Model (https://www.cs.umb.edu/~bazz/snes/cartridges/lorom.html)
Besides ROM, there is also another very important (and almost as annoying as cartridge screws) piece to consider: The lock out chip, a.k.a. CIC chip. This chip acts as a key for its counterpart (the lock) in the console. The lock communicates with the key and if it is not satisfied, it resets the console and the game does not run.
Can new CIC lock chips be bought? Not likely, but it does not matter! Functional equivalents have been developed for PIC 12F629 micro-controllers, and the firmware is available on github. So I included a PIC 12F629 in my design.
Now here is the schematic. I hope I won't get messages about glaring errors and omissions. But if there are, please let me know!
Here is a screenshot of the routed PCB. I'll receive in 1~2 weeks, can't wait to try it!
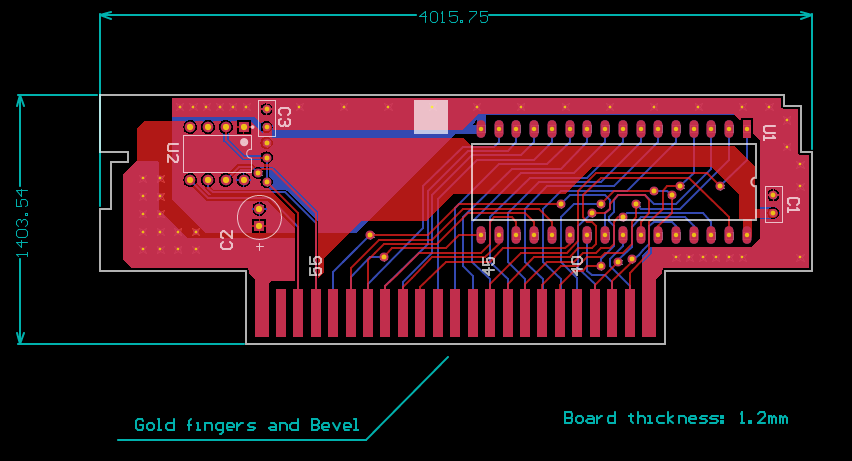
See Part 14 below where I receive and test this design!
Part 3: Cartridge case
Many eBay sellers offer "replacement cases" for SNES games. I ordered some, but I'm not sure I'll receive them in time. If not, I'll make a quick 3D model and 3D print one.Part 11: Standard controller support
With the PCBs now being manufactured, I resumed my work on the game. First I made it possible to use a standard controller, because NTT Data Keypads are not that common.Data entry is done using the L/R buttons, which cycle between values. Only valid moves moves are proposed.
Part 12: Sudoku solver
As previously discussed, I improved the hint function to let it detect cases when a specific digit will only fit in one cell within a column or row. So the Y button now provides much more move suggestions than it previously did.That's good, because it is useful to to automatically solve puzzles. In a first phase I simply call the hint detection code repeatedly until the grid is full (solved) or no more moves are found. For simple and easy puzzles, this generally finds a solution.
But it's not enough for intermediate and expert puzzles. After a few iterations, no more new moves are found. This is where the second phase, a brute-force search, begins.
I implemented this using a recursive function (a function that calls itself). Here is the equivalent in pseudo-code:
function bruteforcer()
{
	Cell cell = getEmptyCell();

	if (cell == null) {
		return true; // no more empty cells! Puzzle solved!
	}

	for (value = 1; value <= 9; value++) {
		if (cell.isLegalMove(value)) {
			cell.insertValue(value);
			if (bruteforcer()) {
				return true;
			}
		}
	}
	cell.clear();
	return false;
}
Here is a video of the solver in action. You can easily tell the two phases apart (first phase: Logic, second phase: Brute-force):
Part 13: Second ROM release
Would you like to try the game? Here is version 0.2:Download: super_sudoku_v0.2.sfc (256K)
What's new:
- Standard controllers are supported. Use the L/R buttons to select values.
- The hint function now proposes more moves.
- A dual-phase (logic, then brute-force) automatic puzzle solver has been implemented.
- Added an in-game clock.
- The text and menu boxes are drawn much faster.
Part 14: Testing the cartridge PCB
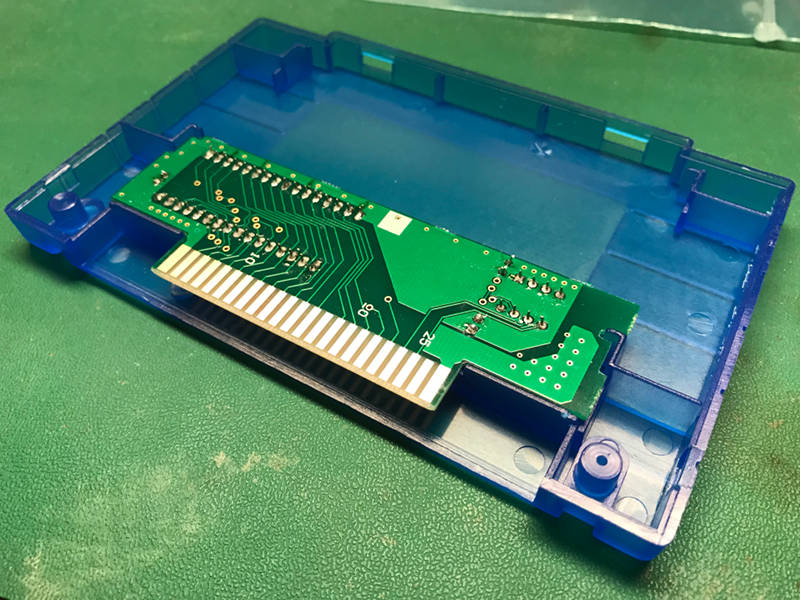
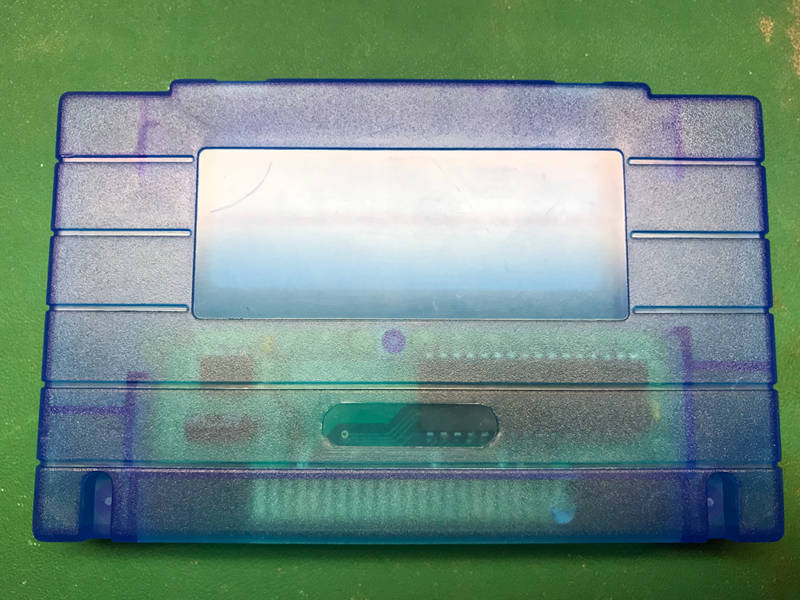
When I received the circuit boards, I immediately checked if they would fit correctly in a cartridge case, and they did! However there are a few cosmetic details (i.e. things that do not prevent it from functioning) I would like to correct: Some vias fall outside the copper plane on the solder side, there is some solder resist on the edges of fingerboard, and I'm not entirely happy with how I routed some areas (too uneven). But overall, I think it's not a bad job.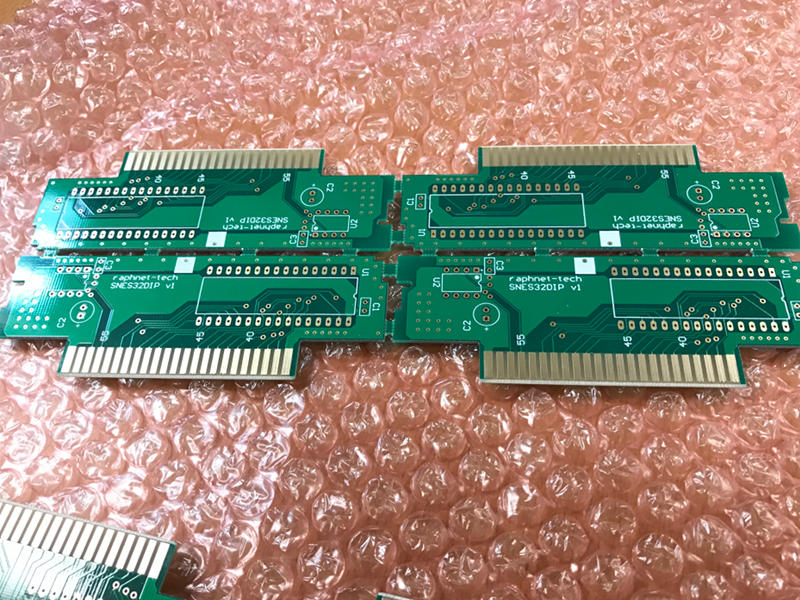
The boards
Fits perfectly
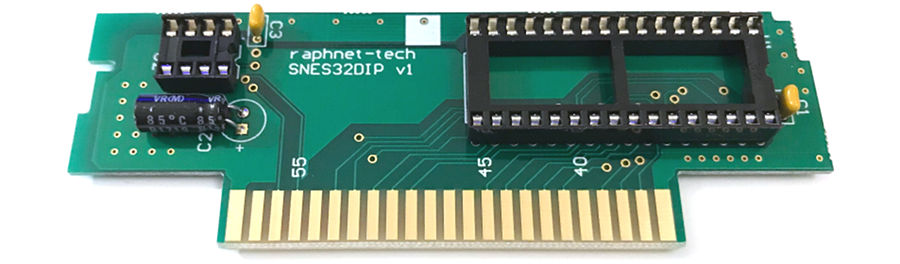
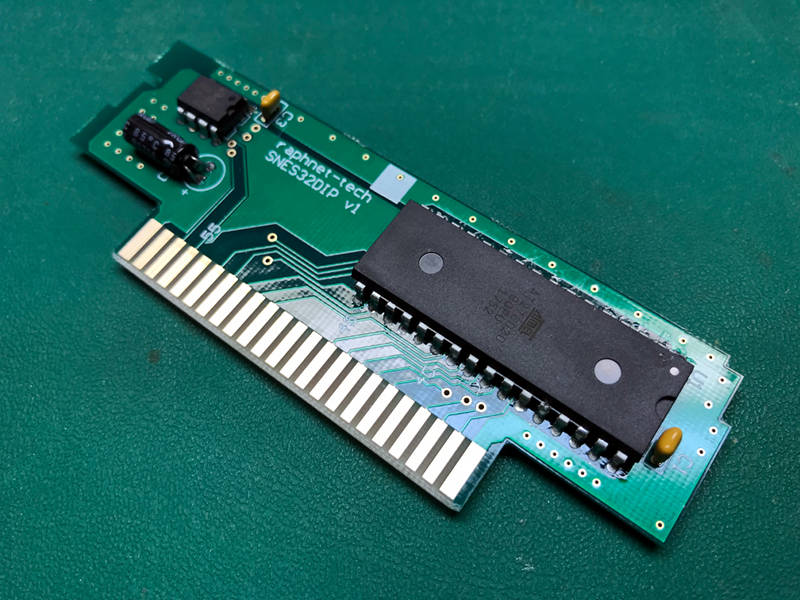
Next I assembled the PCB and installed IC sockets for testing and swapping chips easily.
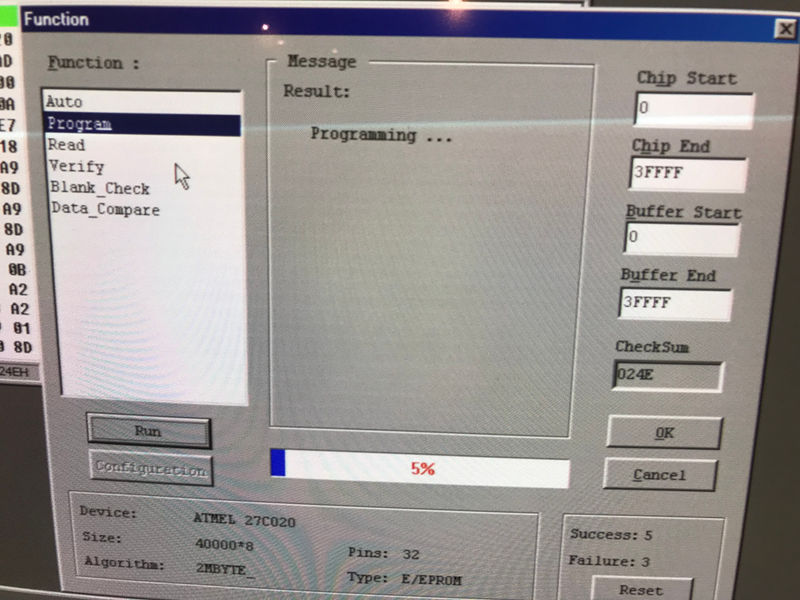
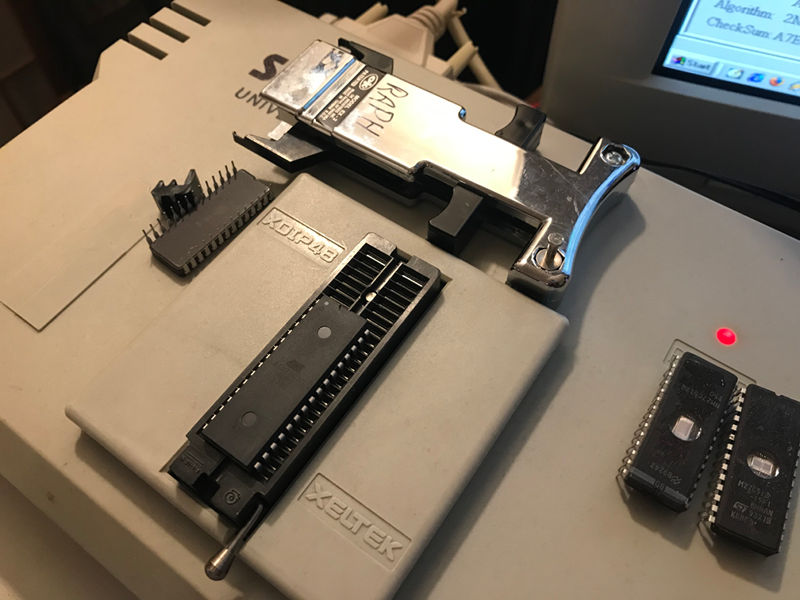
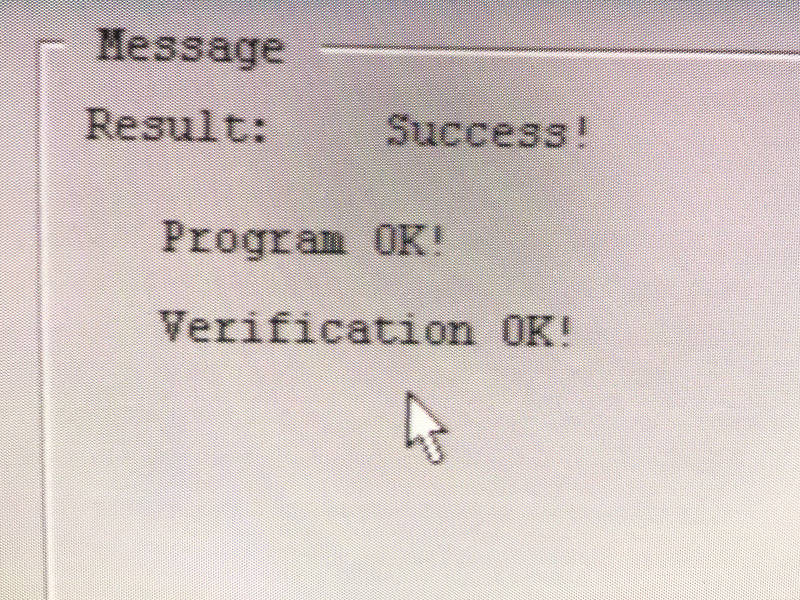
Then I had to program the PIC microcontroller (the 8 pin chip). This was the first time I programmed a PIC, and luckily my old universal programmer supported this model so I did not have to buy a new programmer. I was not sure it was going to work, but everything went well.
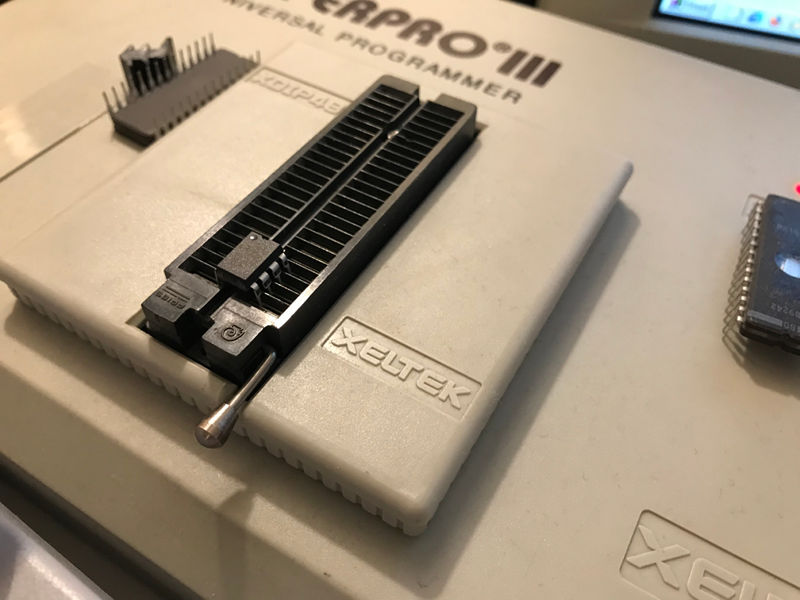
The PIC being programmed...
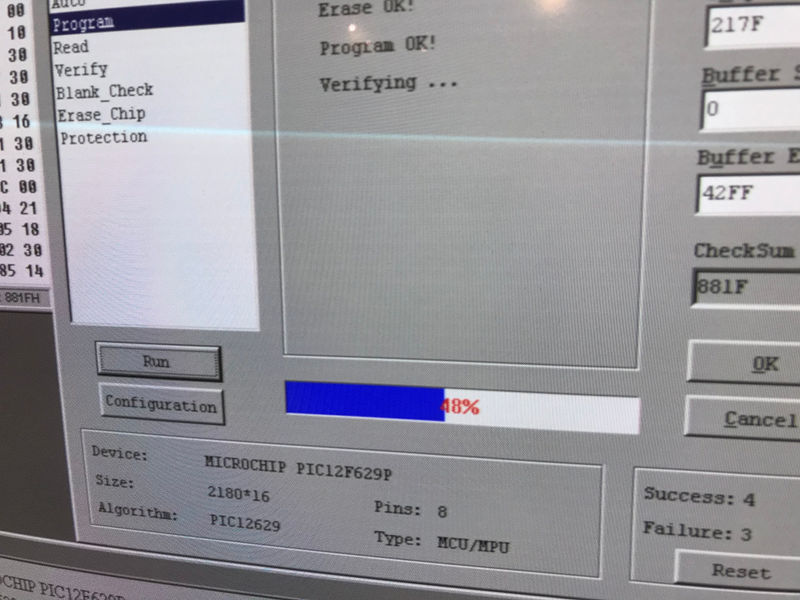
Programming with Windows 98!
Second chip to program: The EPROM. Well known territory this time.
Programmation du EPROM en cours...
I inserted the programmed chips in their sockets. As I expected, when sockets are used the PCB no longer fits in a standard cartridge case. I'll just have to solder the chips directly to the board when the final version of the game is ready.
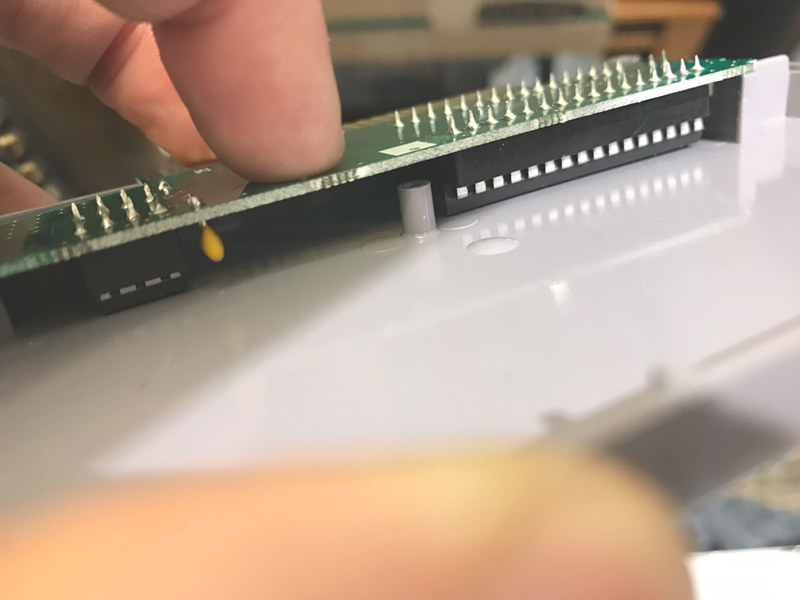
Excessive height due to sockets
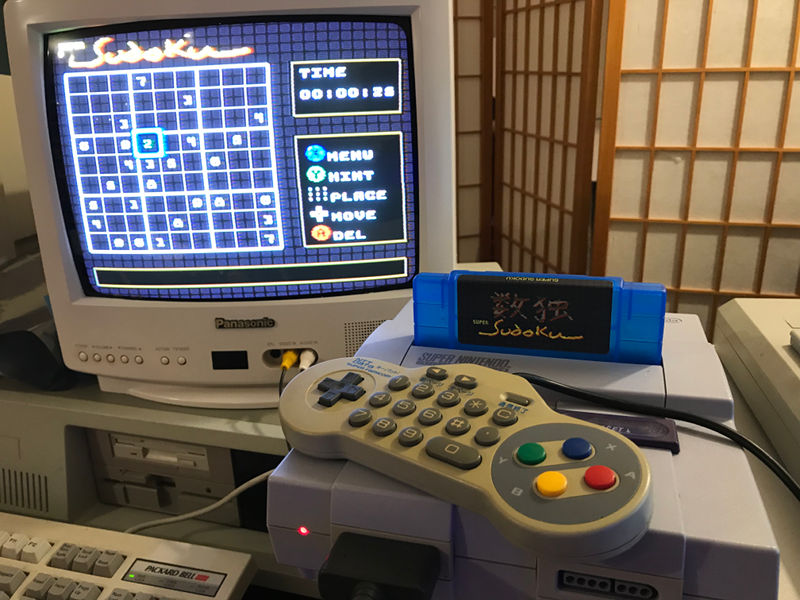
An finally, the moment of truth. I inserted the circuit board in the cartridge port, minding the orientation very carefully, took a deep breath and turned the thing on. The title screen appeared almost instantly!
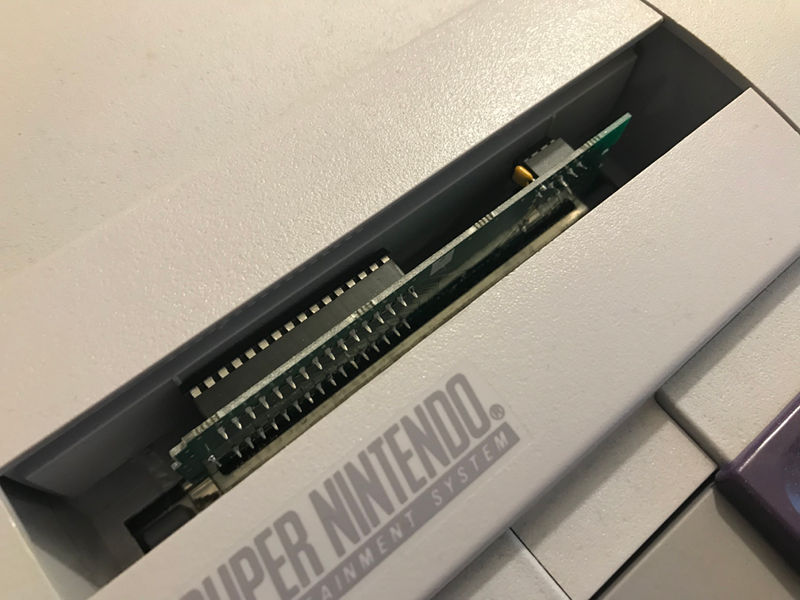
PCB inserted
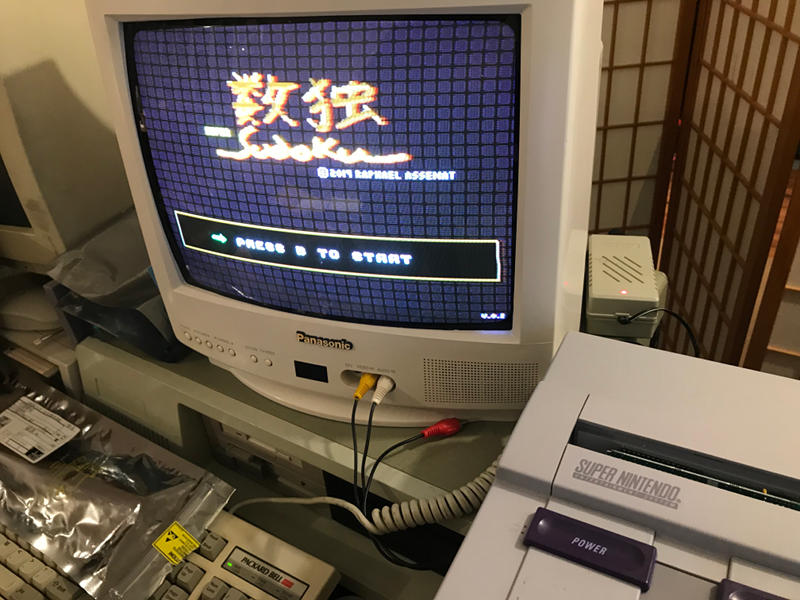
Power ON and... success!!
Here is a video of the above in action:
Part 15: Adding sound
On the SNES, sound is handled by a separate CPU, the SPC700. It is a 8-bit CPU with access to 64K of RAM and a DSP capable of handling 8 voices. See the fullsnes - SNES Audio Processing Unit (APU) documentation for more information.After reset, the APU runs a built-in ROM containing a small program loader. The main program running on the SNES must communicate with this loader through four 8-bit registers to load a music/sound effect program. So this means another assembly project targeting a different CPU :)
Now, I know there are tools to convert IT files to SPC700 programs such as SNESMOD, and complete solutions such as the SNES Game Sound System by Shiru which appears to be excellent. Still, I decided to try doing something myself because its the best way to learn how things work. And besides, for now I'm only doing sound effects (no music) so it's not very complicated.
Loading a program into the APU
I began by writing the uploader code for the main SNES CPU. I used the pseudo-code from fullsnes as a reference. I did not have a program to load yet, so to test I uploaded a "Hello, World!" string and used bsnes-plus to inspect the APU memory, confirming that the uploader was working.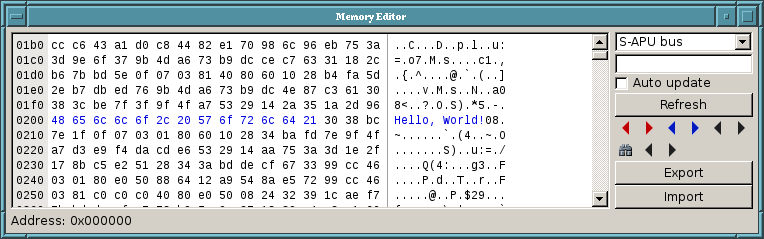
Coding for the SPC700
The assembler I use for the main program (running on the SNES's 65816) is WLA-DX, and it happens to also support the SPC-700. So that's what I'm using.On the SPC700, the first block of 256 bytes of memory is the zero page. The next block of 256 bytes, Page One, is used for the stack. So the program can start at byte 512 ($200).
The program could be almost as large as 64 KB, but to keep things simple I decided to use a bit less than 32KB so it would fit in a single 32KB bank on the SNES side. Here is how I configured WLA-DX:
.memorymap
	slotsize $7000
	defaultslot 0
	slot 0 $200
.endme

.rombankmap
	bankstotal 1
	banksize $7000
	banks 1
.endro
.bank 0

.section "Code" FORCE
	entry: jmp !main
...
- Bytes 0-1: Sample start address (used when voice is Keyed-ON)
- Bytes 2-3: Restart/loop address (used when the end of sample data is reached)
.section "source_directory" align $100 FREE
source_directory:
	.dw sample1 ; Sample start
	.dw sample1 ; Sample loop address (unused)
	....
.ends.section "samples"
sample1: .incbin "sample1.brr"
...
I created some simple macros for accessing DSP registers:
.macro writeDspReg
	mov DSPADDR, #\1
	mov DSPDATA, #\2
.endm
.macro writeDspReg16
	mov DSPADDR, #\1
	mov DSPDATA, #<\2
	mov DSPADDR, #\1+1
	mov DSPDATA, #>\2
.endm
	; Sound 0 (error)
	writeDspReg SCRN 0
	writeDspReg16 P_L $0400 ; original $1000
	writeDspReg VOL_L 128
	writeDspReg VOL_R 128
	writeDspReg16 ADSR1 $0000
	writeDspReg GAIN 64
To play the sound, it's a simple matter of writing to the KON (Key On) register:
writeDspReg KON 1
Converting samples
The SPC700 does not play raw PCM samples. The samples must be in BRR format (Bit rate reduction), a form of compression. I discovered BRRtools, a set of command-line tools able to convert to/from .WAV files and BRR samples. For instance, here is how I convert the error sound:brr_encoder -sc8000 error.wav error.brrPlaying sound effects
After writing to a bunch of registers to configure the different voices and setting some common registers (master volume, flags, source directory location, etc) my SPC700 program starts monitoring port 0 for changes. (Port 0 is one of the 4 8-bit registers the SPC700 uses to communicate with the SNES main CPU). Whenever Port 0 changes (due to a write from the SNES main CPU) my SPC-700 program echoes the value in port 0 (acknowledge) and then plays the sample requested in port 1.In other words, on the SNES side:
sound_sendCommand:
	...
	sta APU_COMMAND	; Write command/sample number to port 1
	inc kick
	lda kick
	sta APU_HANDSHAKE	; Write new value to port 0
@waitack:
	cmp APU_HANDSHAKE
	bne @waitack	; Loop until the SPC-700 acknowledges
	....
@mainloop:
	mov A, CPUIO0   ; handshake
@waitChange:
	cmp A, CPUIO0
	beq @waitChange

	mov A, CPUIO1   ; get command / sample number to play

	; acknowledge the command
	push A
	mov A, CPUIO0
	mov CPUIO0, A
	pop A

	; ... code to play requested sample (not shown) ...

	bra @mainloop
Testing the sound on real hardware
Everything appeared to be working perfectly in bsnes-plus, but when I tried the ROM on my SNES system, it did not work as expected. Instead, it was continuously emitting noise. Very annoying noise.Warning!!: Loud annoying noise ahead. Remove your headphones and/or drop the volume.
I suspected this was caused by uninitialized registers. In an emulator, maybe registers are set to 0 at reset, but on real hardware, it's often not the case. Could it be that a channel I never touch (channel 7, for instance) starts with a non-zero volume and plays samples from a random location in memory?
I tried many things, including setting the volume of all channels to 0, but nothing helped.
Out of ideas, I read the documentation again and noticed the existence of volume registers for an echo effect which I was never setting. Setting those to 0 solved the problem!
Phew! That was a lot of work for simply adding sound effects....
Part 16: Third ROM release
Would you like to try the game updated with sound effects? Here is version 0.3:Download: super_sudoku_v0.3.sfc (256K)
Changes since last version:
- Add sound effects
- The solver can now be interrupted (A or START button)
Part 17: Making a cartridge
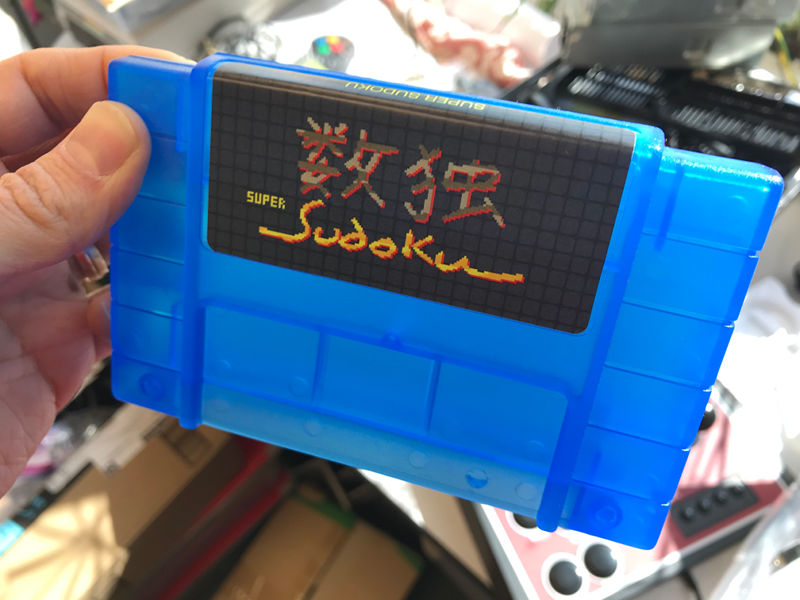
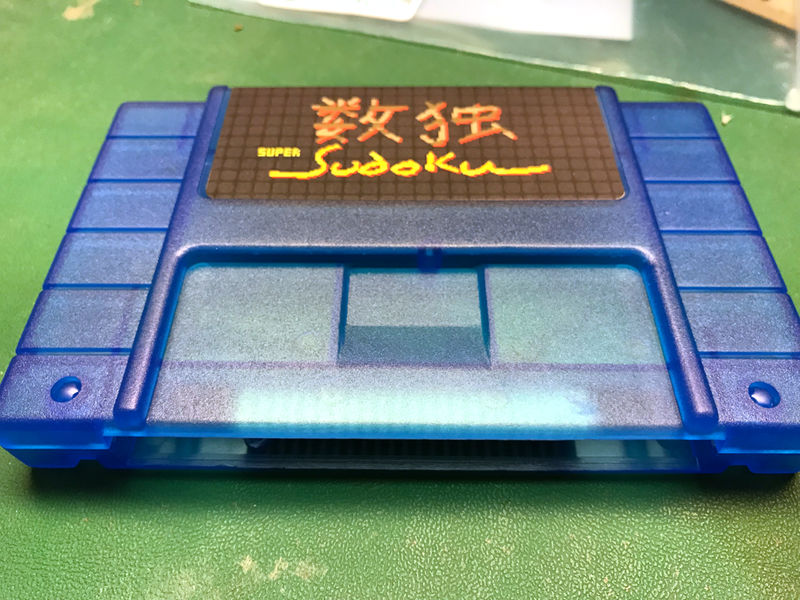
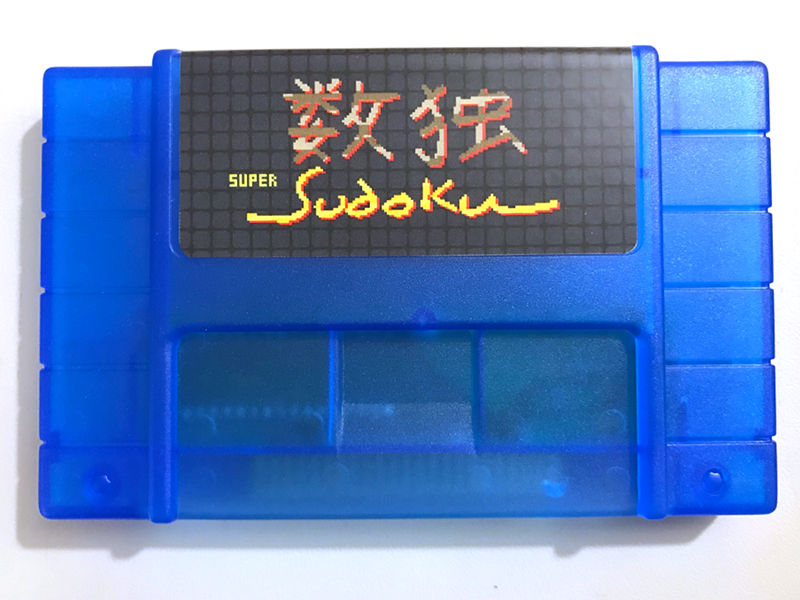
I finally added messages in the box at the bottom of the screen, and the pointer is now placed on a random puzzle number during selection. I consider this version of the game to be complete and I received the enclosures. It's now time to make a cartridge.The label design is just a screenshot of the title screen. I did a few print tests and once I got correct dimensions, I laser-printed the label on a glossy label sheet. It turned out all right I think!
Tests and measurements
There!
Programming the EPROM went well, and I soldered the chips directly to the circuit board (no sockets this time) so it would fit in the cartridge.
And finally, everything in action!
Part 18: ROM releases
The version 1.1 ROM is available here: super_sudoku_v1.1.sfc
Changes since last version:
- Use an opaque background on the grid to (hopefully) avoid eyestrain.
- Also use less bright colors on the grid
- Slow down the background scrolling to (hopefully) make it less distracting.
https://ko-fi.com/raphnet
Or why not buy the game on itch.io?
The version 1.0 ROM is available here: super_sudoku_v1.0.sfc
Changes since last version:
- Added message in the box at the bottom of the screen
- When selecting a puzzle, start with the pointer in a random position
Part 19: Source code
In February 2022, I published the source code in February 2022 on github:https://github.com/raphnet/super_sudoku
Conclusion
Without doubt, this month of SNES programming taught me a lot about how the SNES works, but there is so much more to learn and try! I think this most likely won't be my last SNES project.
Good-bye, until next time.