RetroChallenge, April 2018
Summary
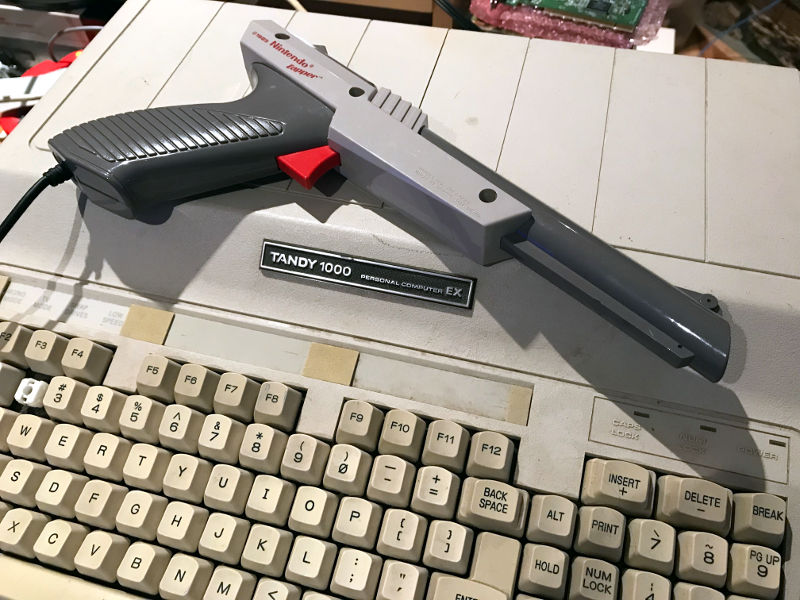
One unlikely duo
- Design an adapter to connect an original NES Zapper to a Tandy 1000 EX PC.
- Code a Duck Hunt clone and/or an original mini-game if I find inspiration.
- Use the Tandy-specific 16 color video mode. (It would be a shame not to!)
- Also support CGA 320x200 video, and test the game on my XT-clone with a CGA card.
- Experiment a bit to find out if an unmodified Zapper can also work on a VGA monitor.
- Let the game also be played using a mouse (speed could be accelerated to make aiming more difficult.)
Introduction
At the time personal computers were a new thing, decicated video monitors were expensive. Composite video output was therefore a common feature on early PCs, so users could conveniently use the TV they already owned. Just like for video games consoles.Computers such as IBM PCs had composite video output on CGA cards, but limited graphical capabilities (4 colors) and no joystick ports, unless an expansion card was installed. On the other hand, computers from the Tandy 1000 series (from 1984) offered 16-color graphics, two built-in game ports and enhanced sound hardware. Much better suited for video games!
The NES came out in 1985 and as everyone certainly knows, it also connected directly to TVs. The NES also came with a light gun accessory known as the NES Zapper, which worked by detecting light emitted by the screen. To avoid interference from other light sources in the room, the NES Zapper is tuned for TV displays operating at a ~60 Hz vertical refresh rate, and ~15 kHz horizontal refresh rate.
It think the Zapper should be usable even if a Tandy 1000 or CGA card is driving the TV instead of a NES console. The video timing should be identical, at least within some small tolerances that probably won't matter. So I think it is an interesting thing to try, and given that the Tandy 1000 EX computer I will use and the NES Zapper are from the same era, it is at least plausible that someone could have bought a NES Zapper to use with his Tandy 1000, provided a suitable adapter and compatible game(s) had existed. (Maybe it did an I don't know!?)
For RC2018/04, I'd like to try to make the required Zapper adapter and code a game that uses it. For the game itself, I will reuse the graphics library and tooling I made for RATillery. But the game code itself, the graphics (and music if I get there) will be new material created from April 1 to April 30 as per the RC2018/04 rules.
If I have time (and if I don't, I'll probably do it later anyway) I would like to test a theory. Because most VGA monitors do not support horizontal refresh rate of 15 kHz (too low), the Zapper probably cannot be used (will test to confirm). But then, I think there is still a way to use an unmodified Zapper with a VGA monitor and I would like to give it a try.
April 3 update
I first tested Duck Hunt to confirm that the Zapper still works and that it had no problem with the monochrome monitor I planned to use for the time being. (I plan to begin using the large color TV later). Duck Hunt worked fine, so I connected the Tandy 1000 EX and prepared a floppy for the project.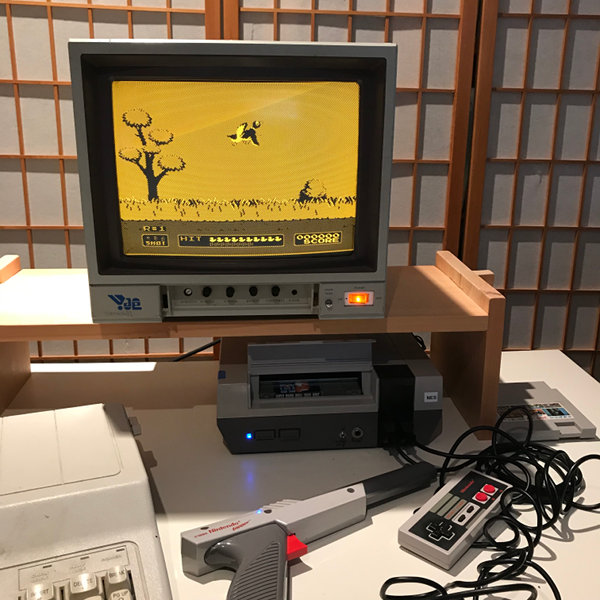
Testing Duck Hunt
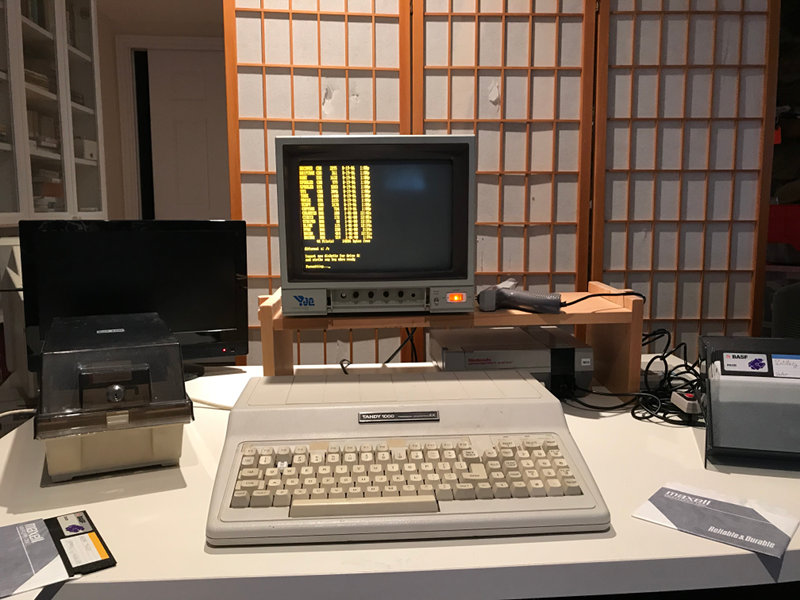
Setting up
Next target: Building an adapter. Using the joystick port was obvious due to the presence of a 5 volt output (to supply the Zapper) and two button inputs (one for the trigger, one for the light detect output).
I located a NES controller extension and the end of an old DIN-6 cable in my parts bin. After figuring out the color code for both cables, I wired them into an adapter according to the table below:
| Joystick port | Zapper | Comment(s) |
|---|---|---|
| 5v | 5v | |
| GND | GND | |
| Button 1 | Trigger | Pulled to GND by the trigger switch |
| Button 2 | Detect | Continuously pulled to GND, but released when light is detected. (more on this later) |
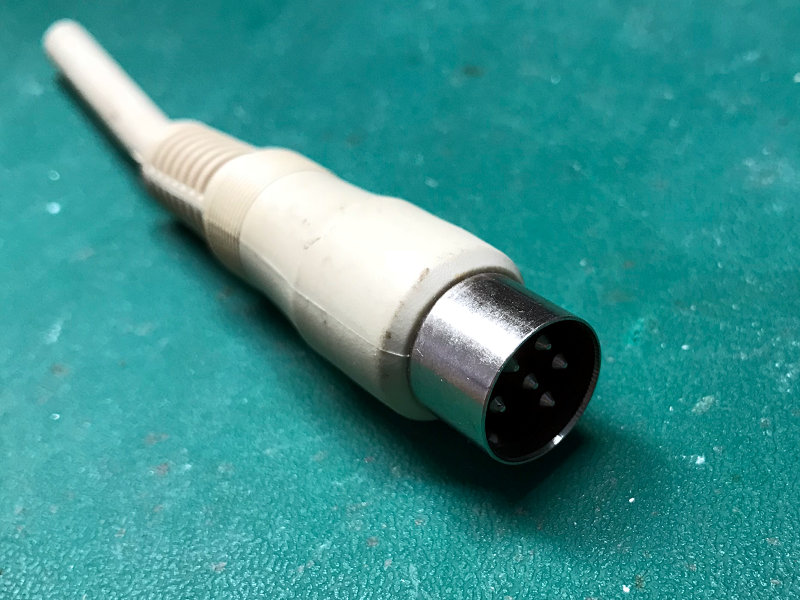
DIN6 from the bin
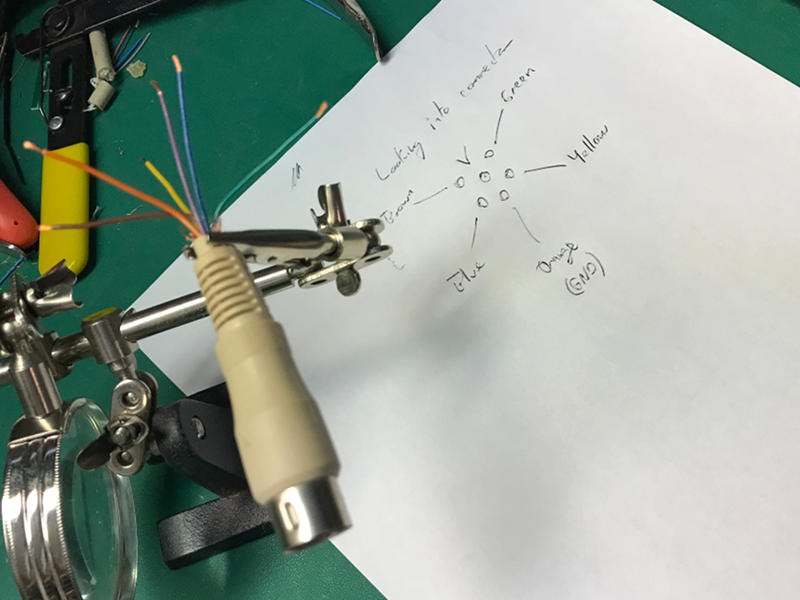
Figuring out the pinout
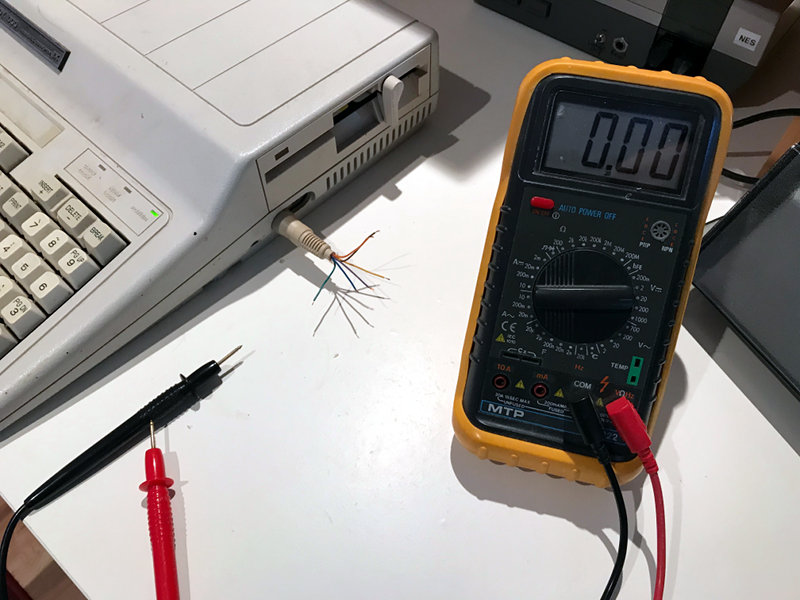
Checking the voltage
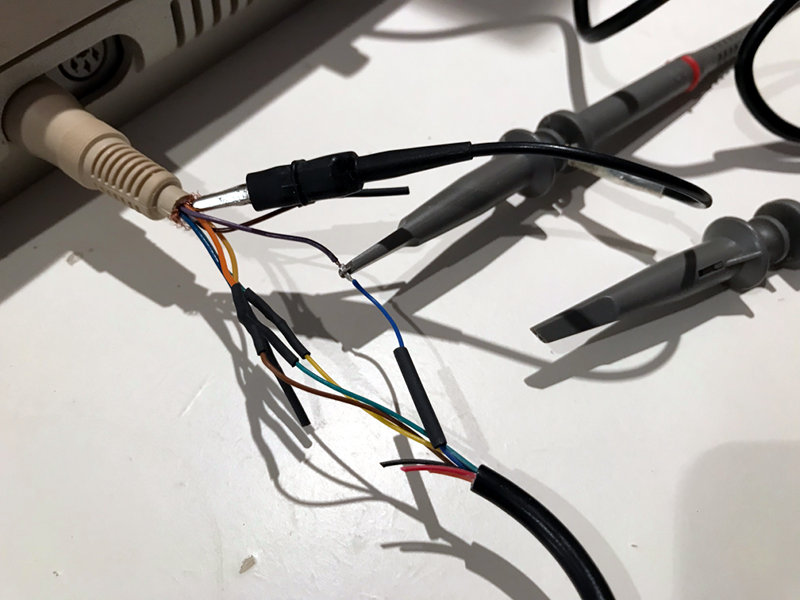
Wired adapter
The state of the two joystick button inputs can be monitored by polling port 0x201. The two significant bits reflect the button state. I wrote a simple basic program displaying the value from port 0x201. I arranged for a blinking white rectangle to be present so I could point the Zapper at it and see the effect.
I also had a scope wired to the zapper detection output to observe its behavior and timing closely.
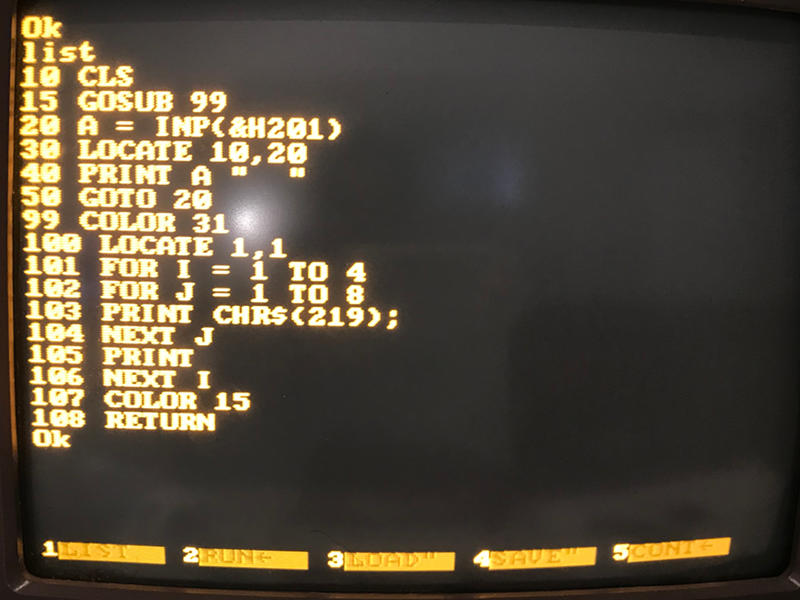
Input test program
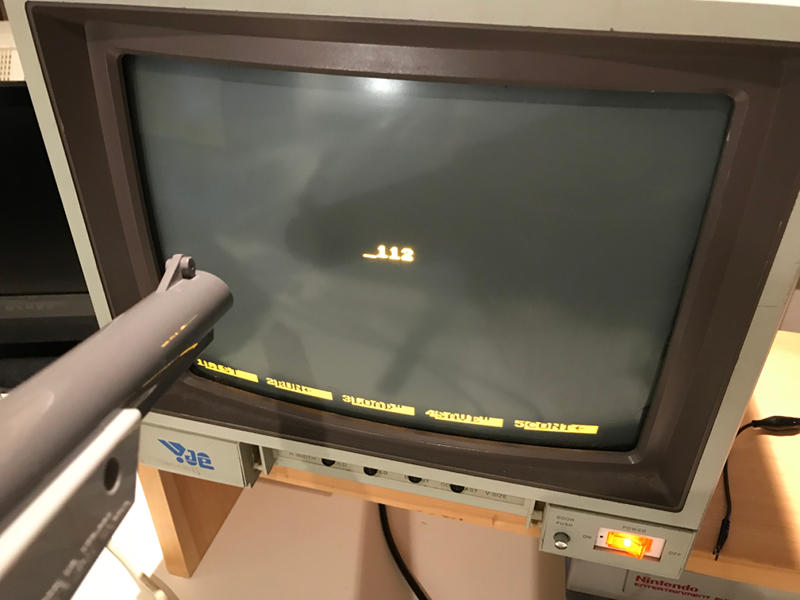
Trigger released, no light
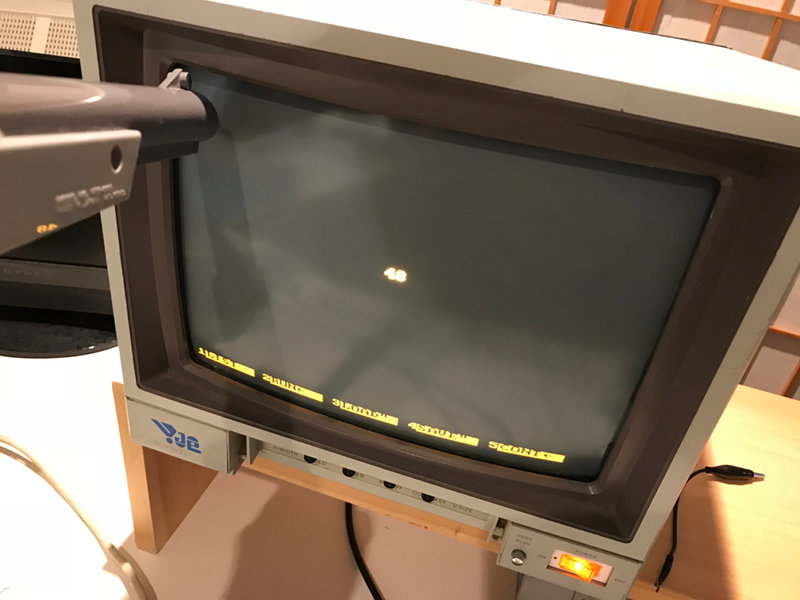
Trigger on, no light
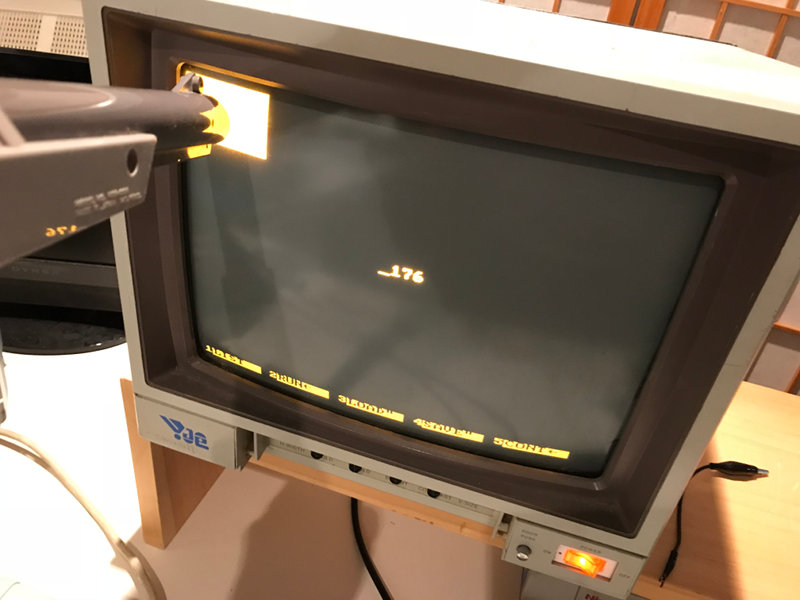
Trigger on, light detected
So it worked! But light detection was not reliable. In the rightmost picture above (the one showing a white rectangle) the number 176 was only shown occasionally and briefly.
I looked at the output from the scope and saw that the signal went high for approx. 2ms. And after thinking about it, it makes sense. While our eyes does not see it, the block on the screen is never completely lit at once. The Zapper actually sees the beam drawing each new scanline as the previous one is already faded. Once the beam is lower than the block, the zapper does not detect anything until the beam reaches the bottom of the screen and vertical refresh takes place (every 16ms / 60Hz).
As I am writing this, I suspect that aiming the Zapper at a completely white screen would result in a much longer pulse. (Need to try this!)
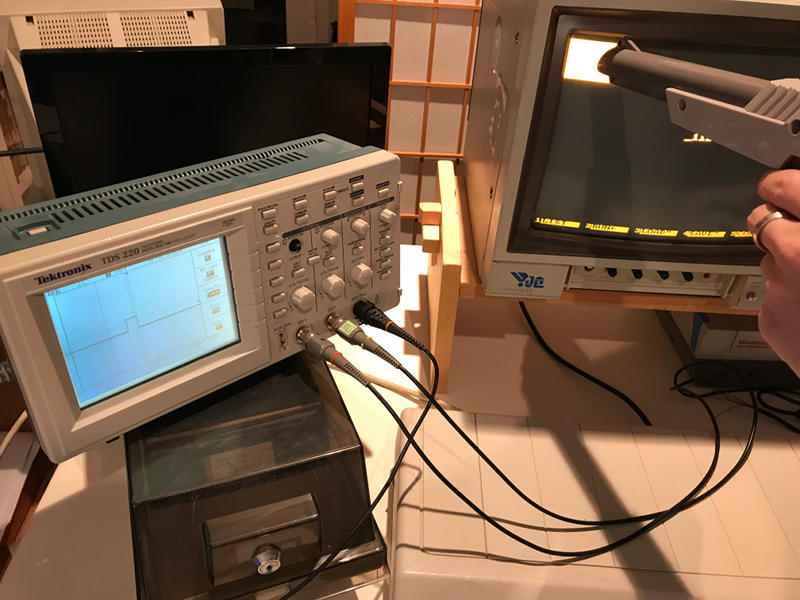
Test with an oscilloscope
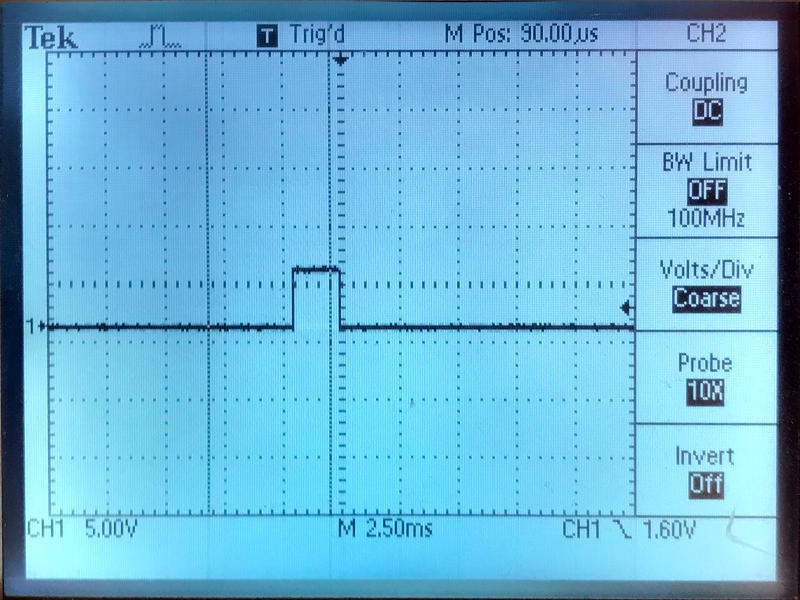
The pulse
The code I had used so far was reading the IO port and displaying the value in a loop. Interpreted BASIC being already slow, writing numbers on the screen in decimal between each sampling of the IO port is obviously much too slow.
I made a new program that polled the port in a tight loop without screen updates, waiting for a trigger first (worked very well) and then waiting for light (using a loop as a timeout to detect misses). But it still failed to reliably sense pulses from the Zapper.
So detecting a 2ms pulse by polling an IO port in BASIC is probably impossible on this slow machine. But it does not matter, I was using BASIC only as a temporary convenience for quick experimentation. The game will of course be written in assembly. So the next thing I will do now is to implement a simple test in assembly, so see if it will be fast enough and reliable.
April 9 update
As planned, I redid the test in assembly language and now everything seems to work fine even though it is an incomplete implementation where one can easily cheat by aiming at non-black screen areas, or even by pointing the Zapper at another screen when pulling the trigger... But at least the feasibility of the project is now confirmed!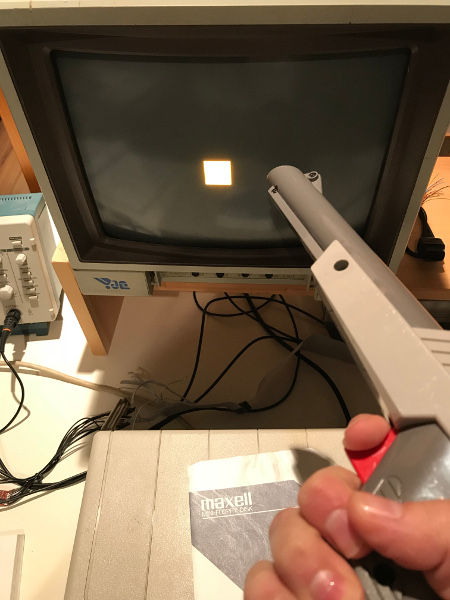
Miss
Hit
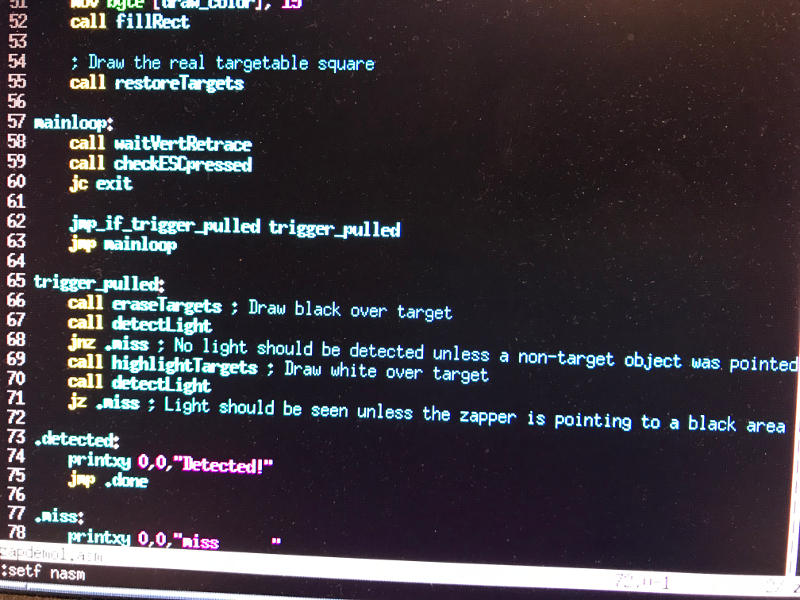
 The procedure I used is detailed below:
- Wait until the trigger is pulled
- Once pulled:
- Wait the next vertical retrace
- Monitor the light detection signal from the Zapper during a complete frame
- If light has been seen, consider this a hit
- Otherwise, it's a miss
- Wait until the trigger is released
- Goto start
- First pass: Draw a black rectangle over the target, confirming no light is seen by the Zapper during a first frame.
- Second pass: Draw a white rectangle over the target, confirming light is seen by the Zapper during this second frame.
If there are several targets, drawing the white rectangles can be done in extra frames. The exact moment where the zapper finally sees light again will depend on which target was hit.
All this is in fact pretty much how the game Duck Hunt does things, except that in Duck Hunt, the whole screen becomes black instead of only the targets. Why is that? Is it for technical reasons? My next tests will probably tell. To be continued...
April 15 update
This week, still no sight of a game, but the basics are under control and I think I have a good grasp of the capabilities of the Zapper. I should have a playable demo soon!Passive object rejection
The "cheating" issues I wrote about in my previous update are solved as planned. Drawing black for one frame, white in the next, while monitoring the zapper to make sure its output follows exactly. Consider the pictures below: The square in the middle of the screen is not shootable (passive), while the one near the upper left corner is. Pulling the trigger at the former reports a miss, but shooting at the later is correctly recognized as a hit. An important concept for games, where shooting passive objects such as the scenery or score should do nothing.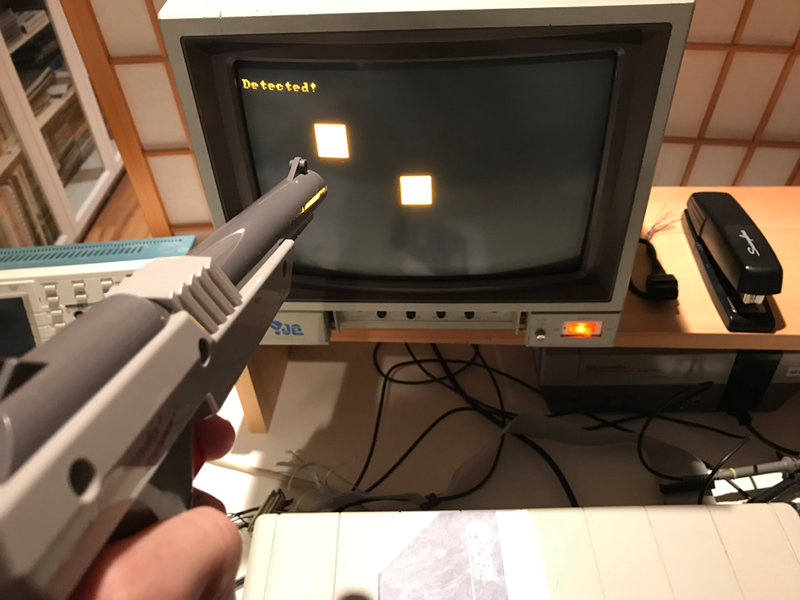
Shootable object, reported as a hit
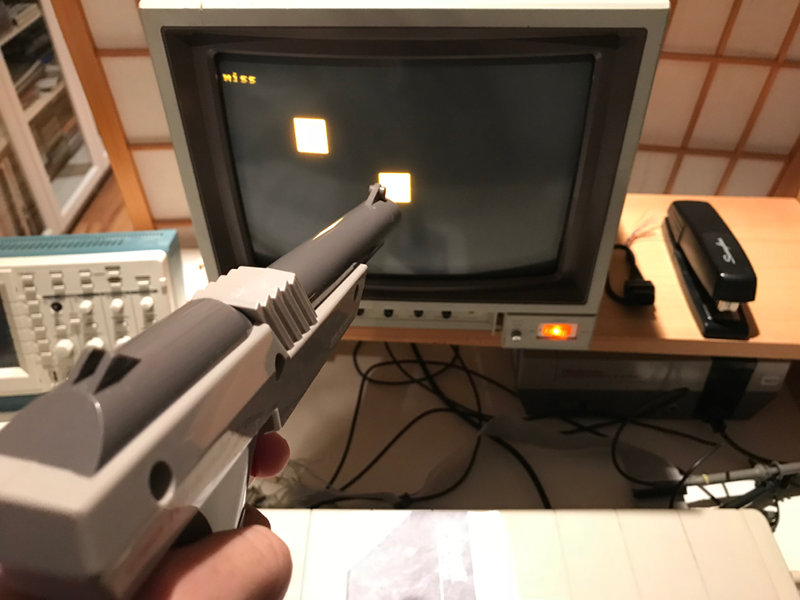
Non-shootable object, reported as a miss
Passive object rejection code
Of course, this technique causes flickering of the shootable object when pulling the trigger.
Getting the Y value by timing
The simple detection test I wrote about last week waits for vertical retrace and then monitors the Zapper during the full frame. Why? Because the exact moment the detection pulse will come is not known in advance. It depends on the vertical position of the object being shot at.So this week it occurred to me that by timing how long it takes from the end of vertical refresh until light is first detected, it should be possible to get the Y value corresponding to the screen area being pointed at by the Zapper. I wrote a new test program showing a tall vertical bar, added code to count after how many cycles first light appears, and code to time how many cycles the frame lasts. (I use the term cycle here since it refers to iterations of the loop that polls the zapper for light and the video status register. The exact counts depend on CPU speed.)
On this 200 pixel high display, Y is roughly equivalent to [cycles_to_first_light] * 200 / [frame_total_cycles]. The test program computes the Y value and draws a red/pink square at the current height next to the vertical bar. In practise there is a scale error, which I suppose is caused by the 40 extra black lines the video adapter probably adds to generate 240p NTSC video. I'll investigate and correct for this only if I need to use it in a game and require extra precision...
I wonder if some NES games used this technique, I have not done research on games other than Duck Hunt.. In any case, for a game with a great number of targets that are not vertically aligned, the process of drawing the targets in black (or blanking the screen) and then in white could be done in parallel rather than one by one.

Y=162

Y=125
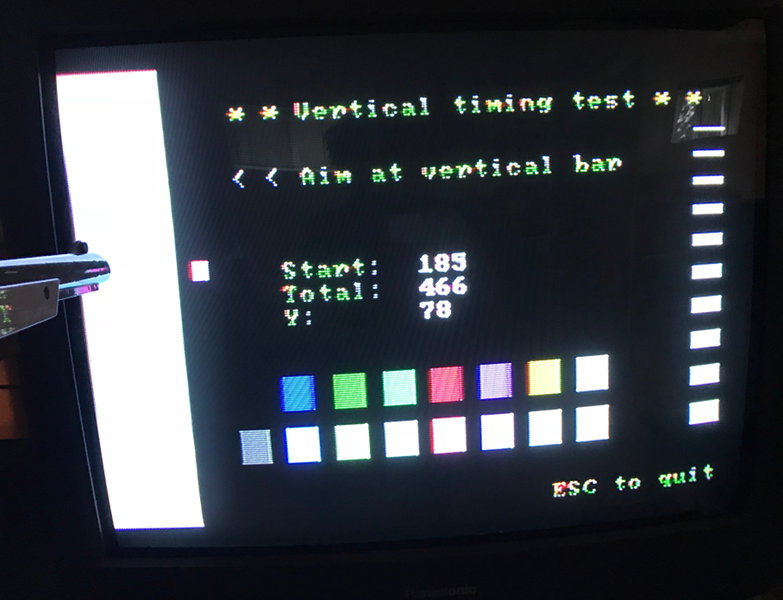
Y=78

Y=42
While I was at it, I added colors to test how the Zapper reacts. They are all reliably detected, even from good distance. On a black background, it might be possible to get away without even drawing white over the object...
Also, on the right of the screen, the series of lines of increasing thickness was to test how many scanlines were required for detection. But it turns out even a single scanline is detected.
April 24 update
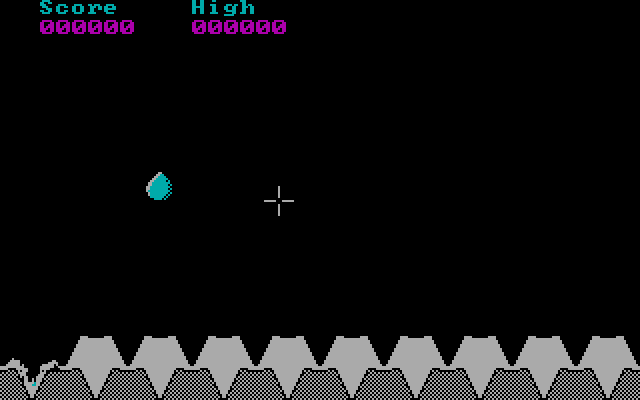
A first game prototype
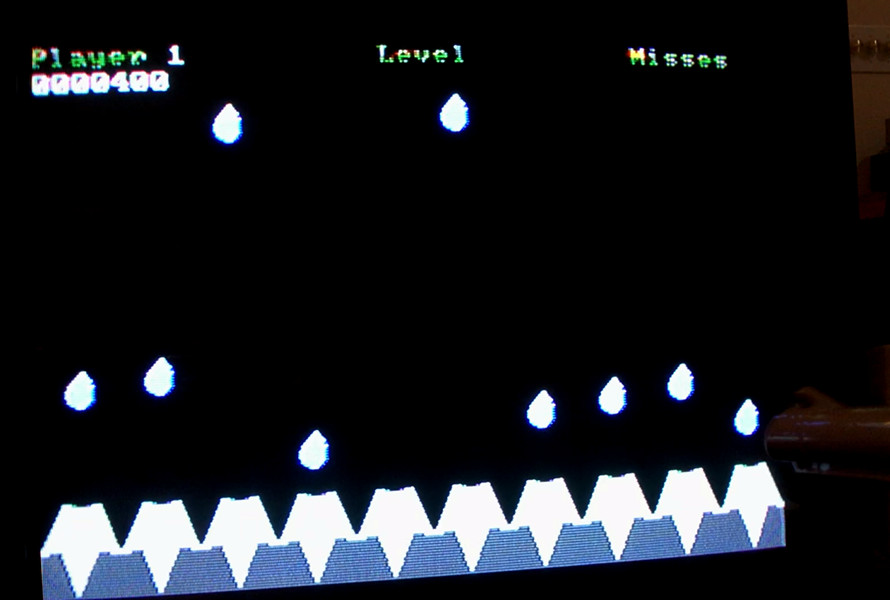
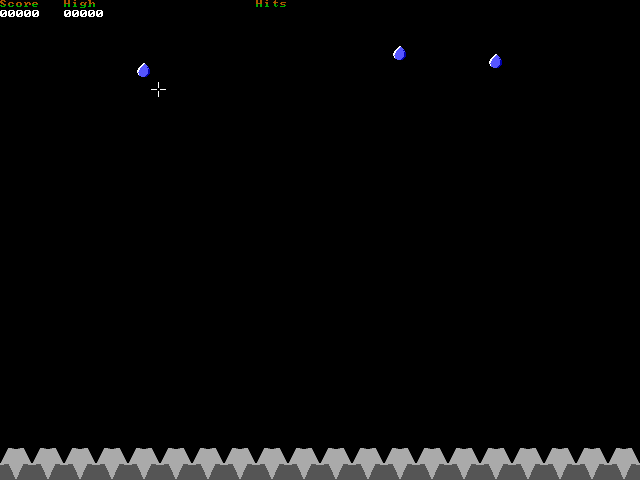
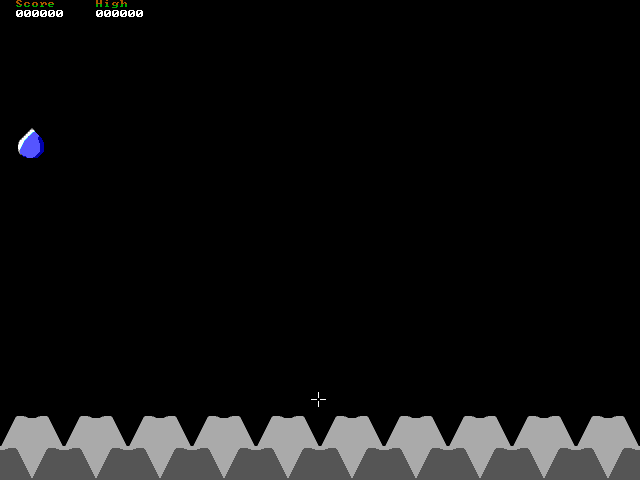
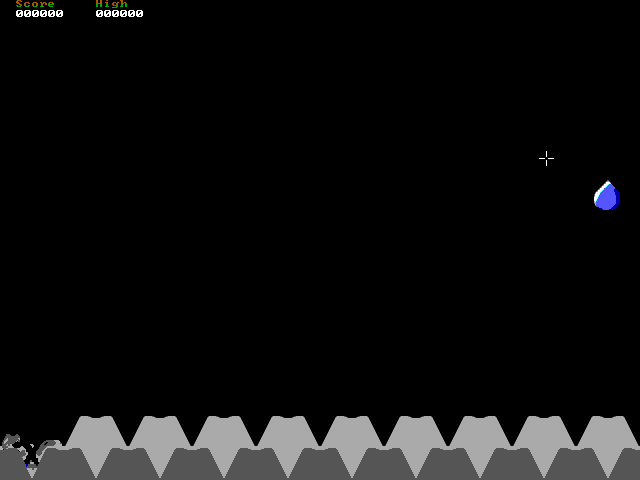
These last few days, I spent time working on a first game concept. The player must protect his keyboard from falling water droplets. How? But by zapping them of course! There are still a few missing features: The apparition frequency and falling speed of the droplets should gradually increase. Once more than half of the keys are broken, it should be game over. The best score should also be memorized and displayed.I don't know how much I'll manage to do, but until RC2018-04 ends, I'd like to make at least one more game.
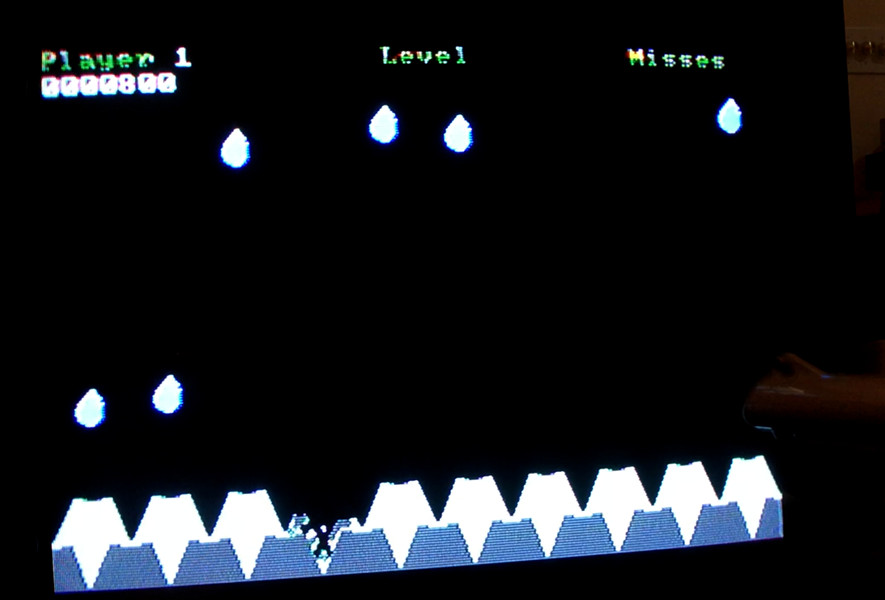
Here are a few screenshots of the game running in DOSBox:
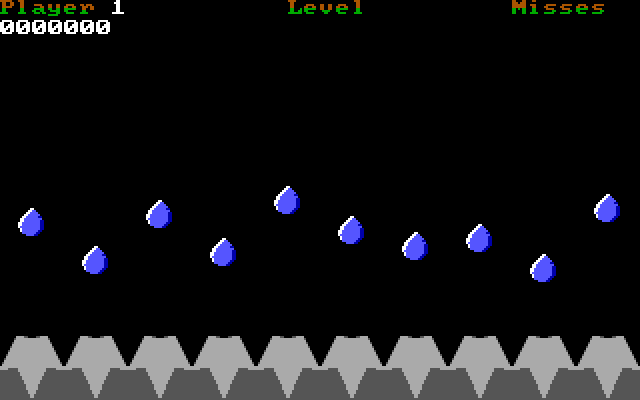
Keyboard in 'mint' condition, nice!
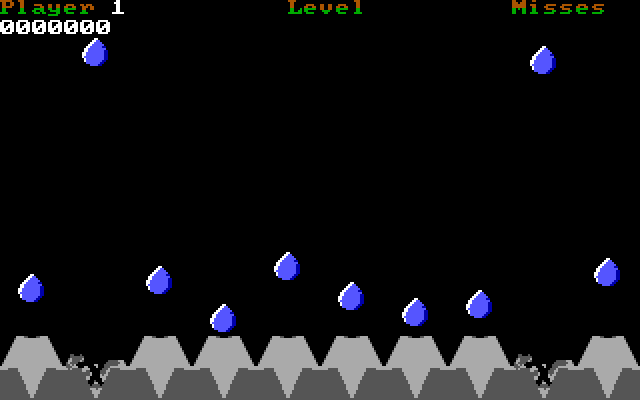
Two broken keys...
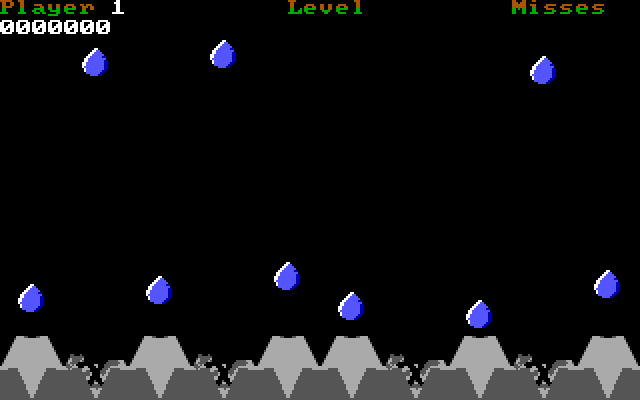
Four broken keys, almost done for!
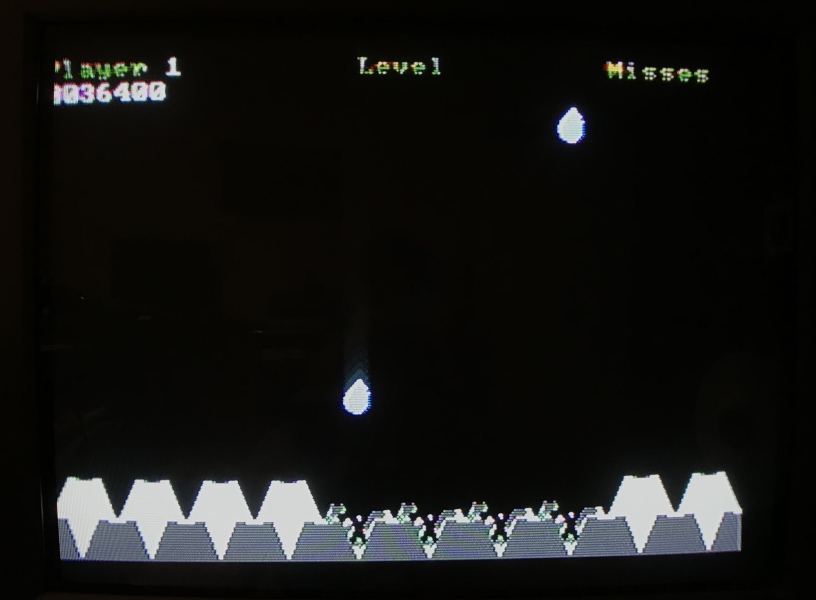
Naturally the game works on my Tandy 1000 EX with a Zapper connected:
That's all for now, I leave you with this animation of what is known as post water-induced short-circuit keyboard key disintegration...

April 25 update
NES Zapper vs. VGA monitor
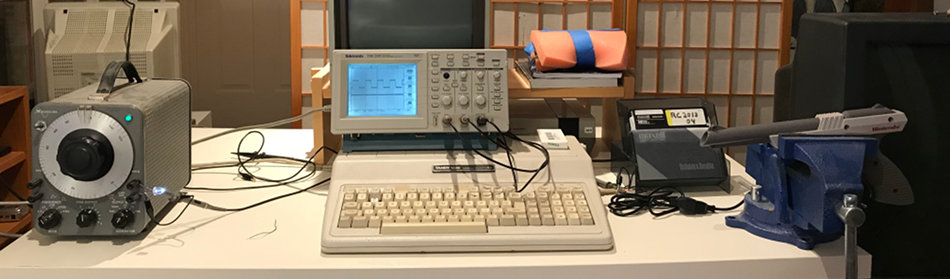
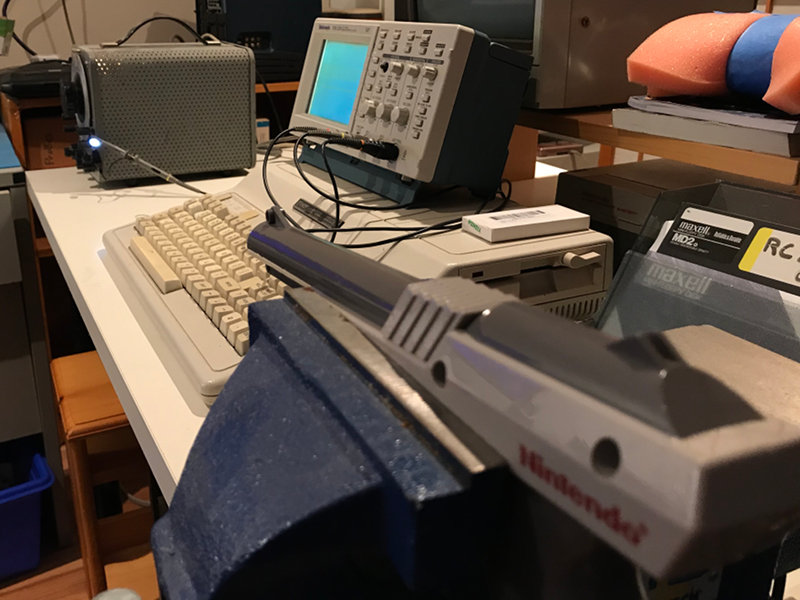
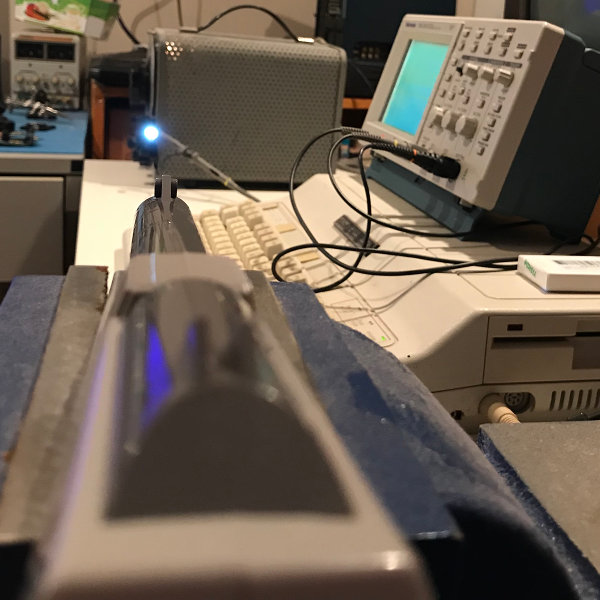
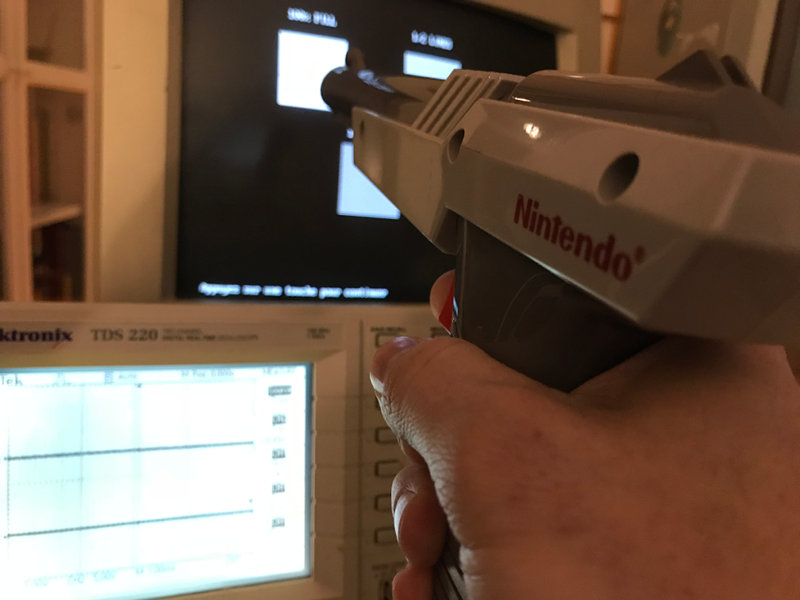
It is well known that the Zapper, at least the NTSC version, is meant to be used with a CRT screen with a vertical refresh rate of 60Hz and an horizontal rate of about 15.75kHz. The standard 640x480 VGA mode meets the 60Hz requirement, but the horizontal frequency is almost two times higher at 31.46875 kHz. So at least in theory, this is not adequate for the Zapper.With a very simple test, I attempted to measure the frequency range the Zapper will accept. I connected a white LED on the square wave output of a frequency generator and carefully aimed the Zapper at the LED. With an oscilloscope, I monitored the frequency output and the zapper light detection output. Here is a picture of my setup:
I found out that my Zapper, when exposed to a continuous squarewave of high amplitude, accepts frequencies from 1 kHz up to almost 74 kHz! But when I increased the distance from 1m to 3m, the maximum frequency fell to about 38 kHz.
It is regrettable, but I did not think of reducing the LED intensity to make it barely detectable by the zapper before playing with the frequency. Since VGA screens as bright as the LED I used probably do not exist, this experiment does not tell very much about the practical frequency range observable at typical CRT brightness...
But still, as the VGA horizontal refresh rate of 31.5kHz did fall in the response range I had seen during my simple experiment, I pointed the Zapper at a VGA screen and looked at the scope for an output. Unfortunately, there was none. Even when aiming at a white rectangle on a screen in mode 12h (640x480@60Hz).
During the days that followed, I had the following thoughts:
- Even though I had seen the Zapper accept a signal as high as 74kHz, it certainly did not mean that it's sensitivity at this frequency was equal to what it must be at 15kHz. In fact, expecting a sensitivity fall as the operating frequency moves away from the ideal 15kHz is quite reasonable.
- The VGA screen I used is not very bright, even with maximum settings. The light it emits, being very low if compared with the LED I used in the experiment, was probably not enough to trigger a detection at 31.5 kHz.
But I had an idea since the beginning of this project which was based on the following thoughts:
- When the zapper is pointing to a white zone on a screen refreshed at 31kHz, the zapper sees short pulses spaced at approximately 32 microsecond intervals. Each pulse is caused by the beam crossing the Zapper's "field of view", and repeated for each scanline.
- When a TV or CGA screen is used, there time between pulses doubles and becomes about 63 microsecond. In those conditions, the Zapper works well.
It seemed likely to work. So using QBasic, I entered graphics mode 12 and drew 3 test patterns: A first one in full white, a second one with only 1 out of 2 lines in white, and a last one with only 1 out of 3 lines in white.
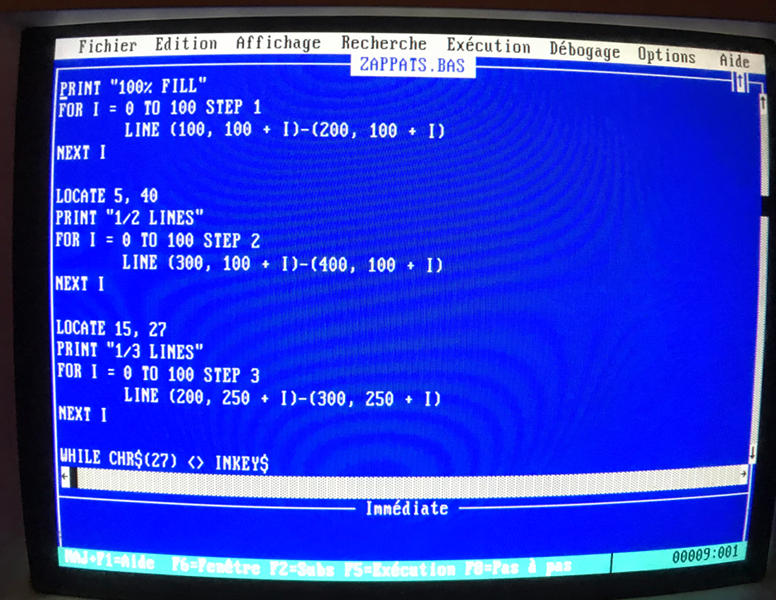
QBasic! Ah the memories...
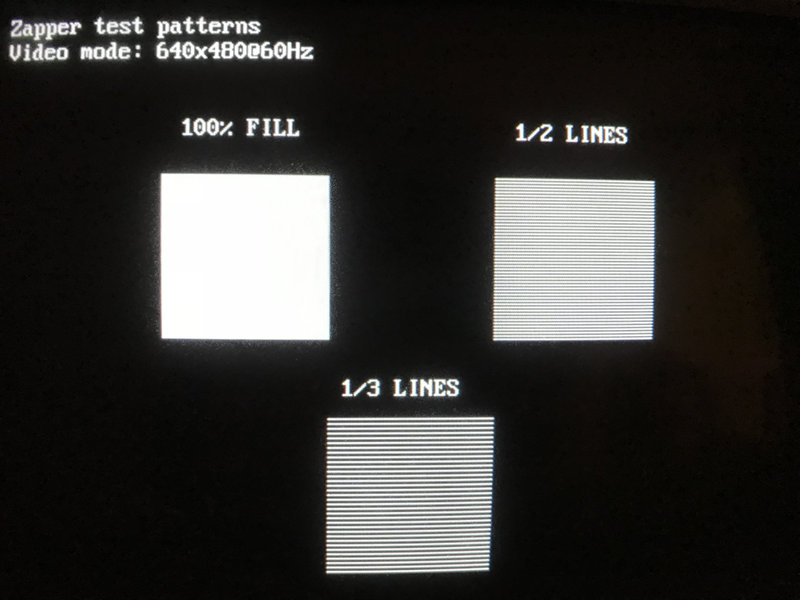
The test patterns
As I aimed the Zapper to the different test patterns, I kept an eye on the scope to see if something was happening. No reaction on the white and 1/3 patterns, but on the 1/2 pattern, there was an output! Hurrah!
100% white. No pulse.
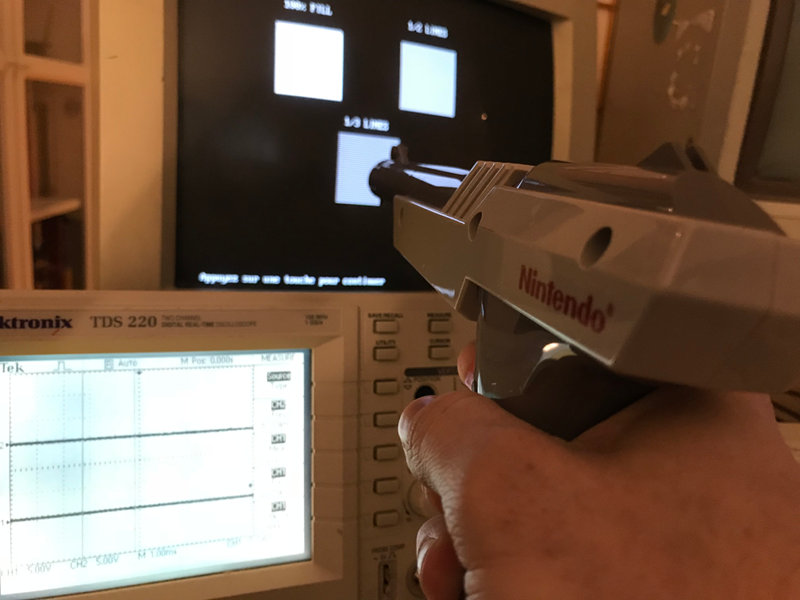
1/3 test pattern. No pulse.
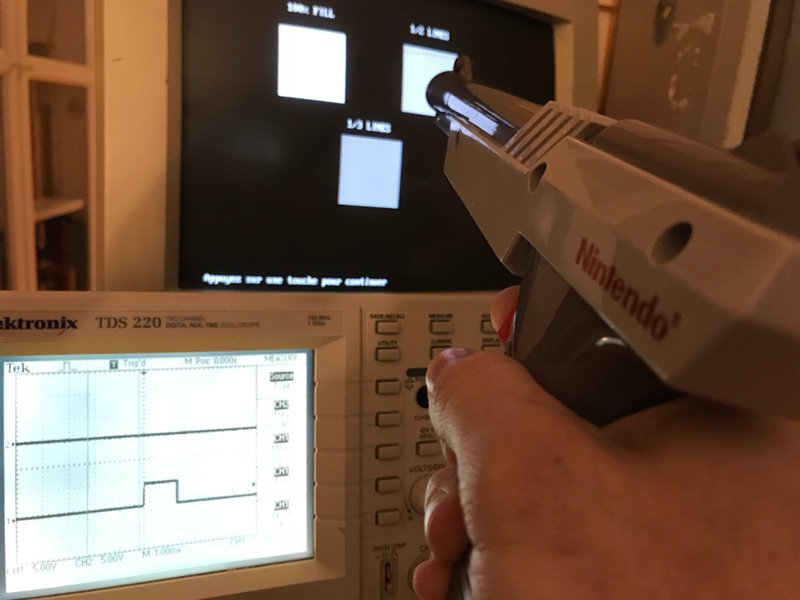
1/2 test pattern. It works!
Conclusion: It appears that the Zapper can work with a VGA monitor if one line out of two is drawn in black. I will build a Zapper to DB15 joystick adapter and do a complete test! But first, I need to code VGA16 support to my homemade video library...
April 27 update
Given the encouraging results of the tests I had done two days before with a CRT VGA screen, I built a Zapper to PC DB15 adapter so I could confirm with a complete chain (Zapper + PC + VGA CRT).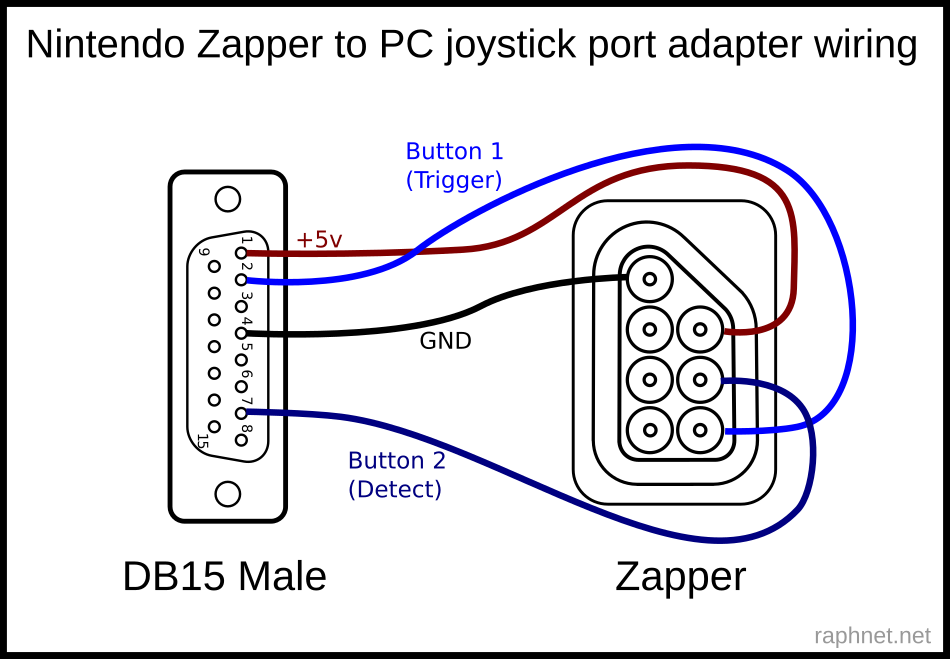
Wiring diagram
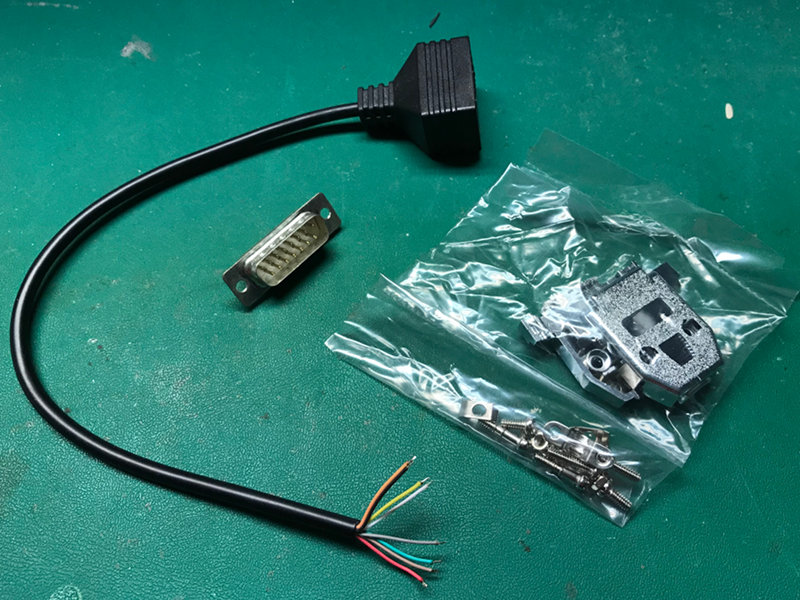
The components
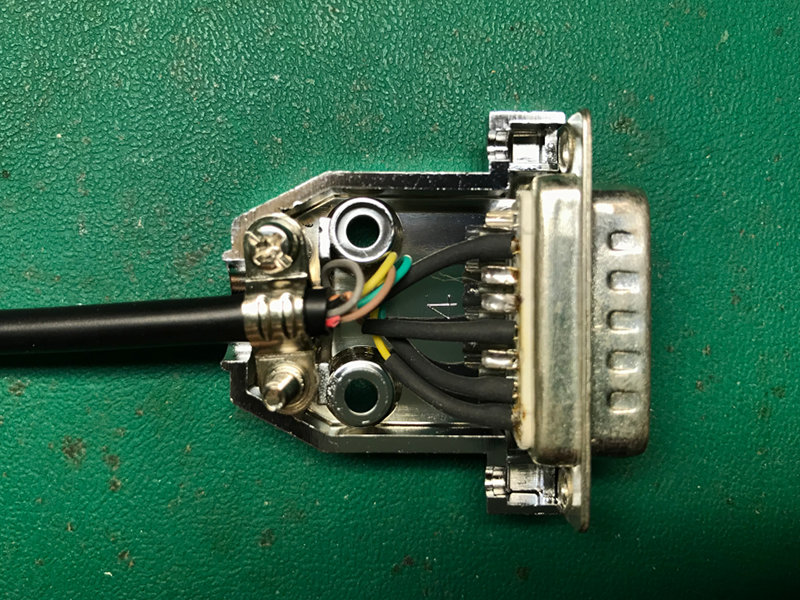
Assembly...
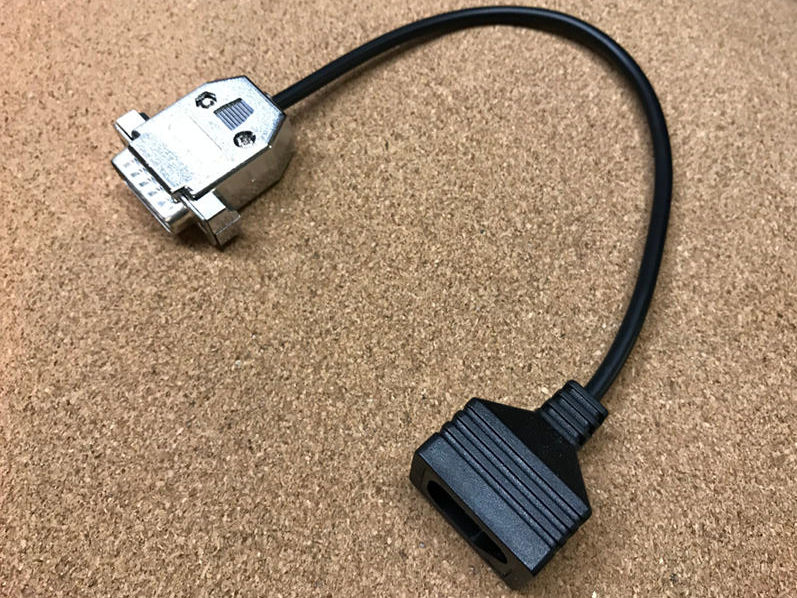
Completed!
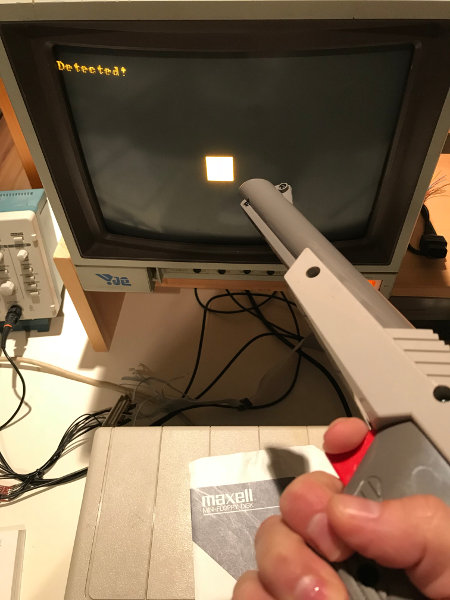
I spent some time updating my graphics library to support the standard VGA 16-color 640x480 mode (By the way, I had no idea VGA programming was so fascinating!) and I modified one of my previous test programs (see April 15 section for original). Then I connected the adapter and started the test.
Reminder: The square in the middle of the screen is not shootable (passive), while the one near the upper left corner is. When the test detects that the target has been hit, it writes Detected! in the corner. Otherwise it is simply miss that is written.
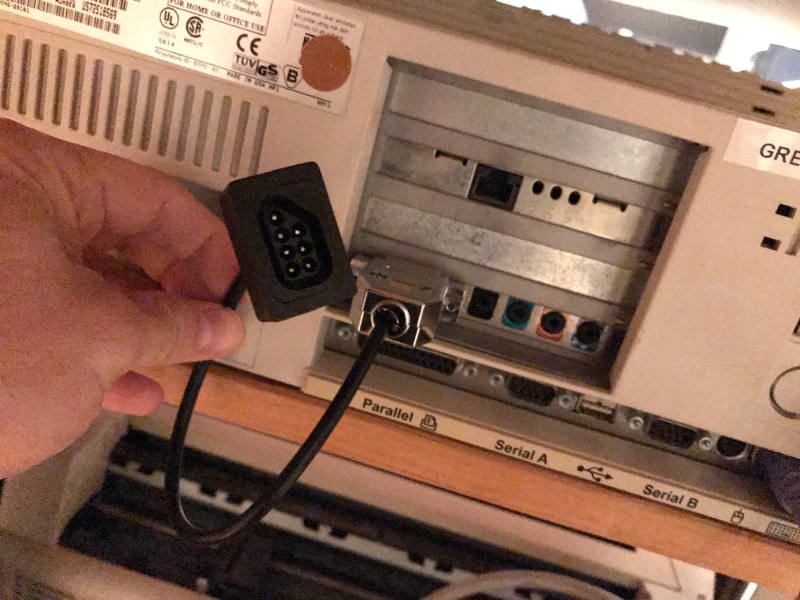
Installing the adapter
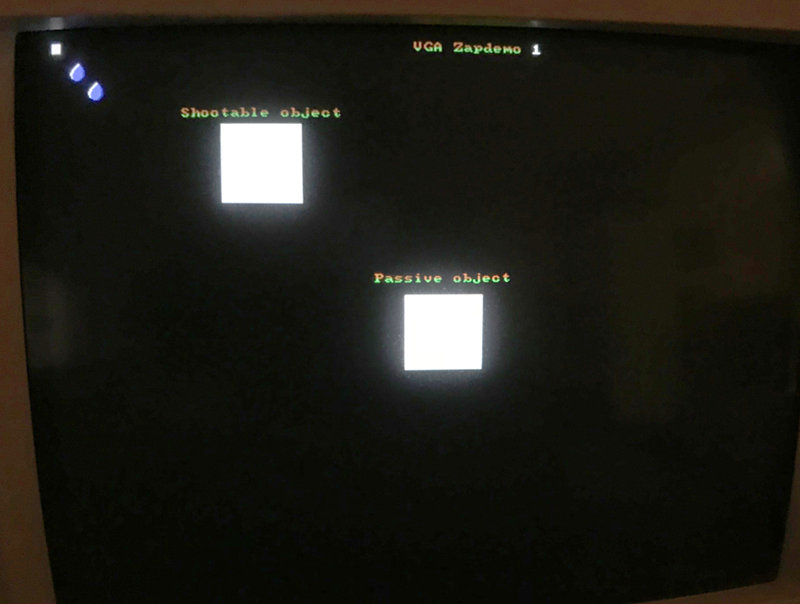
Test screen
It works very from point blank to about 1.5 meters. From farther apart, it becomes difficult to register hits. Either the target is too small, or the screen is not brigt enough, maybe both.
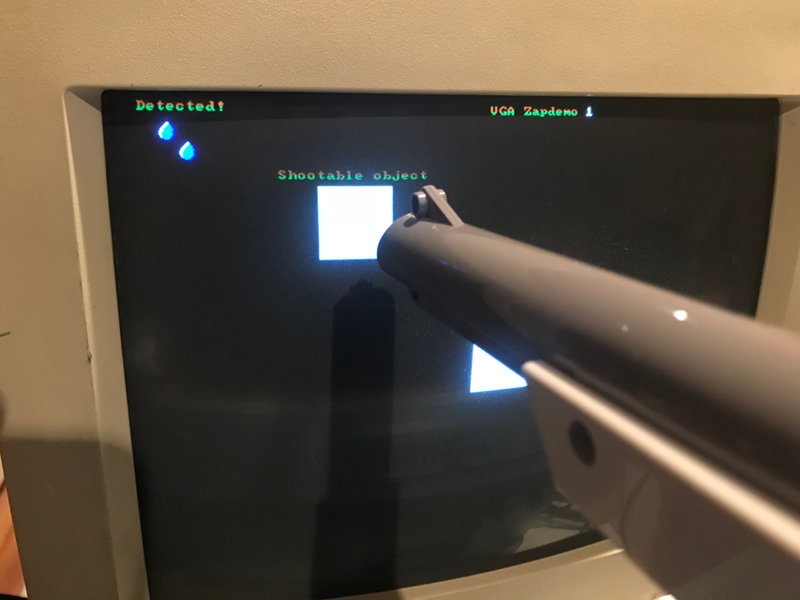
Point blank on target
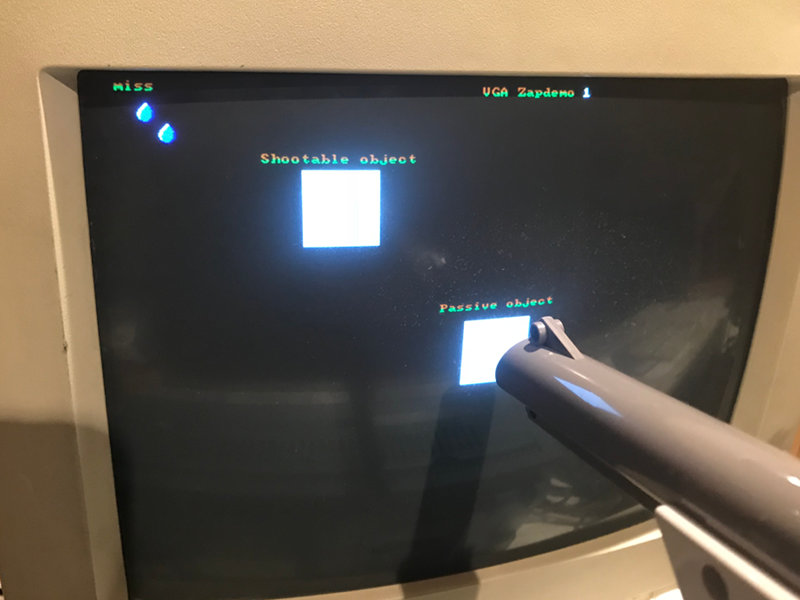
Point blank on passive object
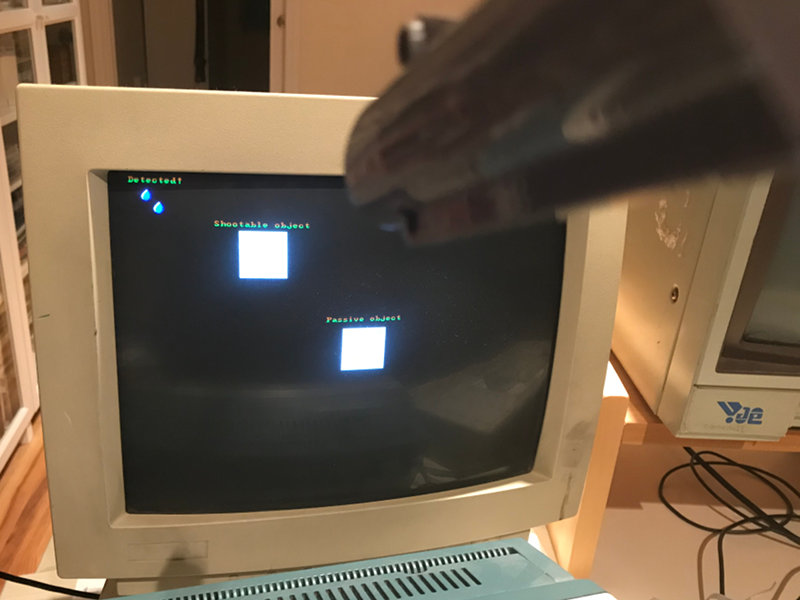
Farther, on target
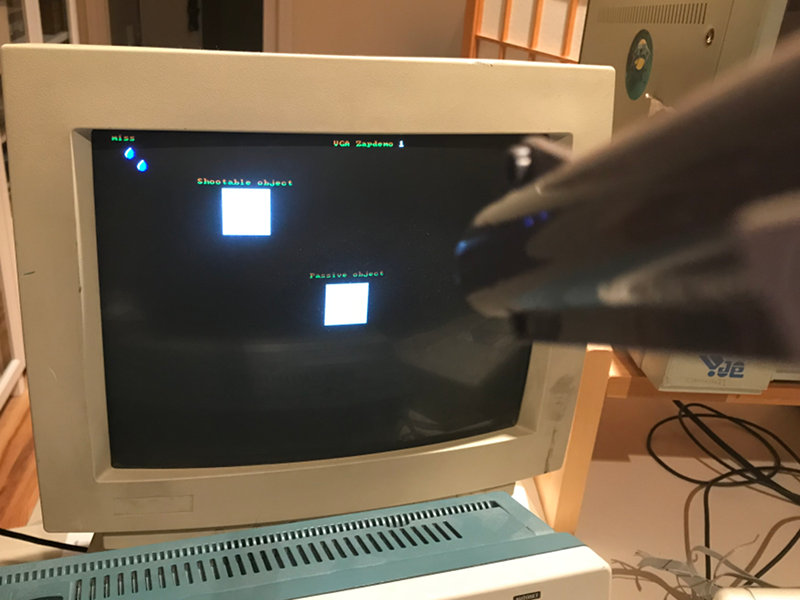
Farther, on passive object
Note: This test program will be included in the final release bundle including source code.
Ok, now enough experiments, I have a game to finish and RC2018/04 is almost at its end. But I will probably make VGA version of the game too, with mouse support for computers not equipped with a Zapper (and DOSBox).
April 29 update
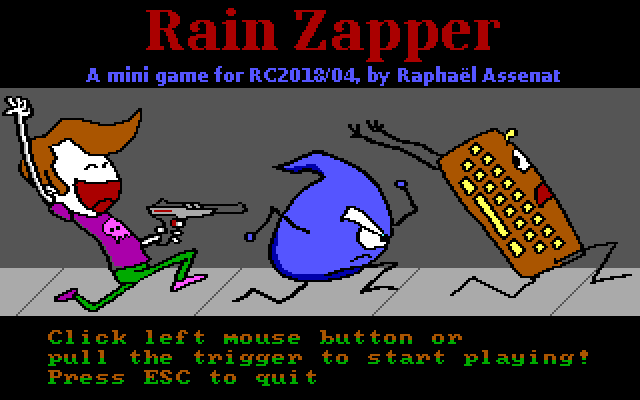
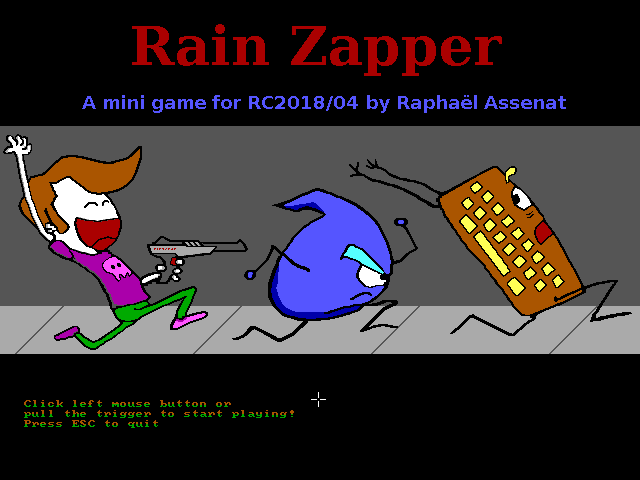
This weekend I worked on various finishing touches to the droplet zapping game (and decided to call it Rain Zapper). First let's talk about the main addition, the title screen.A friend who draws better than I do made this small sketch for me:
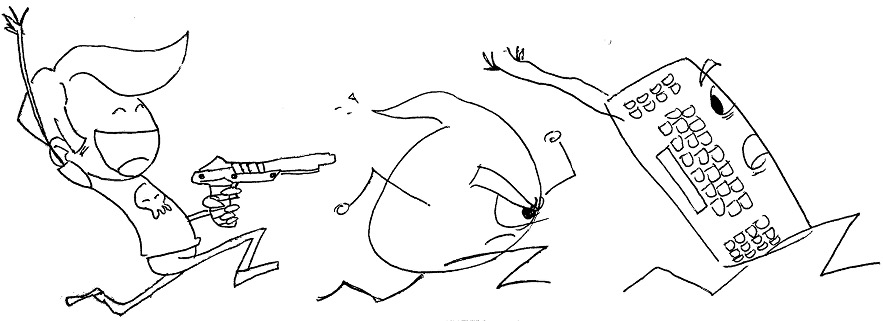
I scaled down the image and redrew the outlines. To avoid the apperance of NTSC color artefacts, I avoided thin (1 pixel wide) black lines on white.
Next I filled the shapes with color. It was a pleasure to have 16 colors to choose from as it is a much more than what (normal, without color artefact) CGA has to offer. However the Tandy color palette lacks a "skin" color... In the end I used white, as was done in Commander Keen. The result:
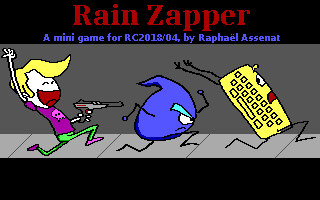
Not bad! But when viewed on TV:
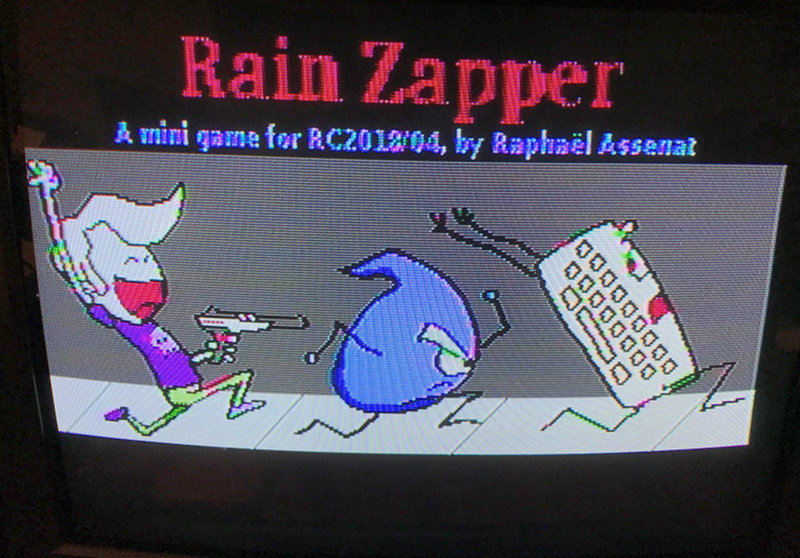

Oh? What about my yellow? And what's the deal with the green on the pants, it is almost white? I don't know if this is the "normal" result one obtains when using the Tandy 1000 EX composite video output. Of course this would not happen with a CGA screen, but I don't have one.
To obtain yellow, I had to use brown (also known as Dark Yellow on some monitors). For the green issue, I simply used Dark Green instead of Bright Green.
The result on a CGA screen (or in DOSBox) is as follows. Not too bad. (Not sure about the keyboard though...):
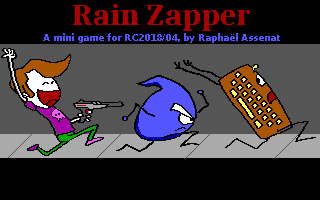
But the same picture looks OK on the TV:


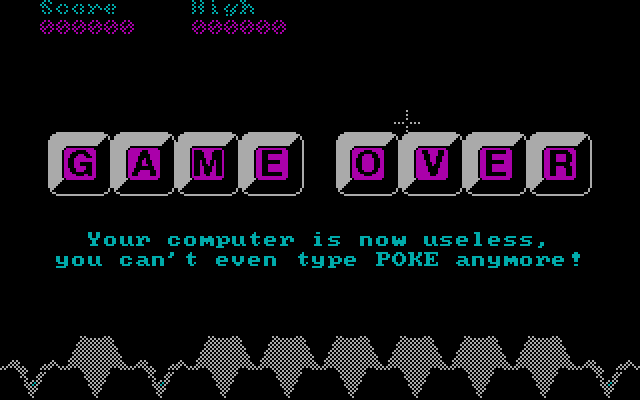
Besides the title screen, I also corrected minor details such as a partially covered score (too close to the edge), I implemented gradual speed and difficulty increase, the best score is now displayed (but only stored in RAM) and an ASCII banner is shown when quitting the game. Also, there is now a Game Over screen.
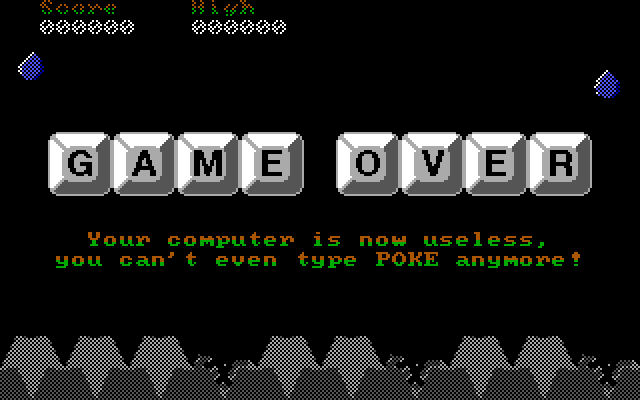
Game over
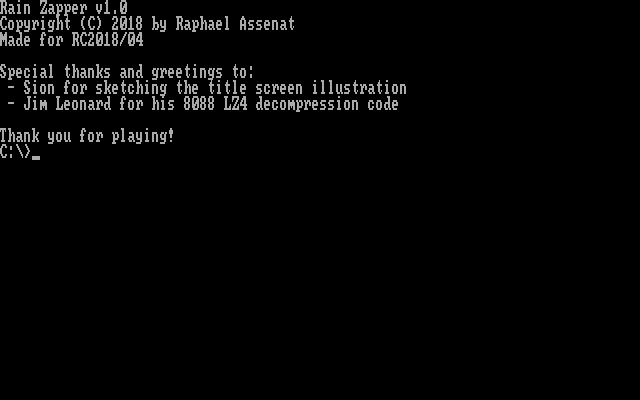
ASCII banner
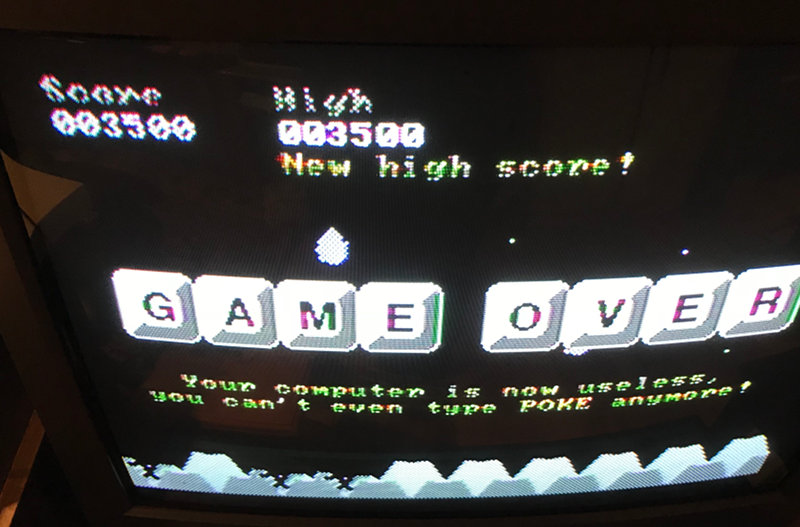
New record
I have a VGA version in the works, where one can play using a mouse or a Zapper. At the moment it uses the Tandy artwork (meant for 320x200) but the playfield dimensions and number of keys are automatically adjusted. It remains to be seen whether it will work well with the Zapper, given that the targets are half the size in 640x480. If it is a problem, bigger artwork could solve it. Otherwise, the white square that's drawn over the targets during detection could simply be enlarged.
The VGA and CGA versions (the later does not even exist yet) will be available in a few days/weeks after RC2018/04 ends. There are only a few hours left in RC2018/04 so my priority is the Tandy version, as it is one of my main objectives.
April 30 final update
Only a few hours left, at least if I understood correctly, I have until midnight! That's good since there were a few things I wanted to do before the end:- Displaying instructions below the title screen, such as "Pull the trigger to start playing!" and "Press ESC to quit". Additionally and only when a mouse driver is present: "Click left mouse button (... to start)".
- Enabling Zapper or Mouse mode depending on the action done by the user at the title screen.
- Dismissing the game over screen by pulling the trigger instead of pressing space. Prevents a trip to the keyboard.
- Release the game!
Ah the joy of debugging at the last minute!

The issue manifesting itself

Checking the vector
With this problem solved, the two possible screens, with and without a mouse, work perfectly fine:
With a mouse
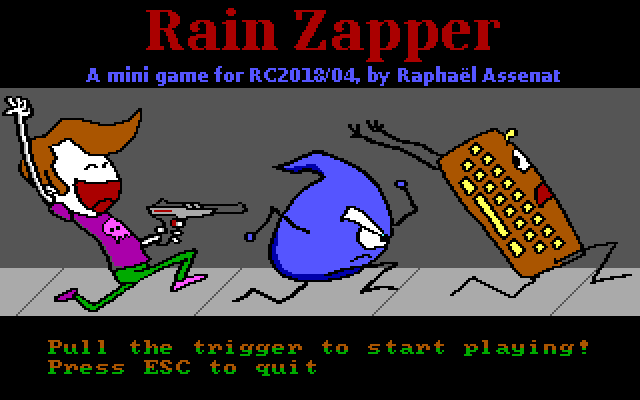
Mouseless
About the release
The files included in this first release are the following:- rain.com (28K) : The game « Rain Zapper » presented above.
- zapdemo1.com (14K) : The simple test from April 9 with two white squares. Useful to test your adapter if you build one.
- zapdemo2.com (14K) : The test for measuring the Y value using timing. Useful to test Zapper performance on different colors and with different line widths.
If using DOSBox, use 'machine=tandy'. Note: The mouse pointer is buggy in the old version of DOSBox included with debian. It clobbers on-screen graphics and reports incorrect X coordinates.
But what about CGA, EGA or VGA!?
Ready to try the game!?
The game Rain Zapper is available below. For the source code, see the GitHub repository below.| Version 3 May 27, 2024 (Monday) |
|---|
| Version 3, now with sound and high score saved to disk. Some bug fixes regarding mouse support. |
| File(s): rainzap3.zip (64.2 KB) |
| Version 2 May 27, 2018 (Sunday) |
|---|
Version 2, now for Tandy, CGA and VGA!
|
| File(s): rainzap2.zip (57.2 KB) |
| Version 1 April 30, 2018 (Monday) |
|---|
| First release. Tandy only. |
| File(s): rainzap1.zip (24 KB) |
 This project is also available on GitHub!
To request features, report issues or contribute, you may send me an email or use the GitHub repository:
https://github.com/raphnet/rc201804
Conclusion
Did I meet my goals?
In summary: Yes!My main objectives were:
- Design an adapter to connect an original NES Zapper to a Tandy 1000 EX PC.
Yes! This was an essential element, and I took care of it in the first week. - Code a Duck Hunt clone and/or an original mini-game if I find inspiration.
Yes! In the end, this is an or, not an and. I did a simple mini-game where one must save his keyboard from falling droplets by zapping them. - Use the Tandy-specific 16 color video mode
Yes! Nothing too difficult here, it was not the first time I used this mode. In fact I simply reused code from RATillery.
- Support CGA 320x200 video, and test the game on my XT-clone with a CGA card
No. I did not have the time to make the CGA version. But I will make one in a few days. As for testing on my XT clone, it will be a bit difficult as I noticed that I do not have a game port. Perhaps I could do a parallel port adapter... - Experiment a bit to find out if an unmodified Zapper can also work on a VGA monitor
Yes!. My experiments show that it is doable. Of course we are speking of a VGA CRT, not LCD. The goal was only "experiment a bit", but I did a bit more: I have a VGA version of my game almost ready! - Let the game also be played using a mouse
Yes!. The game does support mice, perfect for playing in DOSBox or on systems not equipped with a Zapper adapter.
My thoughts on the Retro Challenge
This was my first participation to the Retro Challenge, and in short: I had a blast! The challenge is the perfect excuse to play with old equipment: Use an amber CRT, manipulate 5.25" disks, write 8088 assembly, use a bit of GW-Basic and QBasic... But it is also a good way to learn new stuff: Understanding how the Zapper worked, improving my nasm skills by using STRUC and macros to easily manage object lists (for the droplets), discovering and seeing how cool VGA programming is, using a mouse driver through interrupt 33h...Will I participate next time? Absolutely! If I can, I will!
Epilogue - May 27
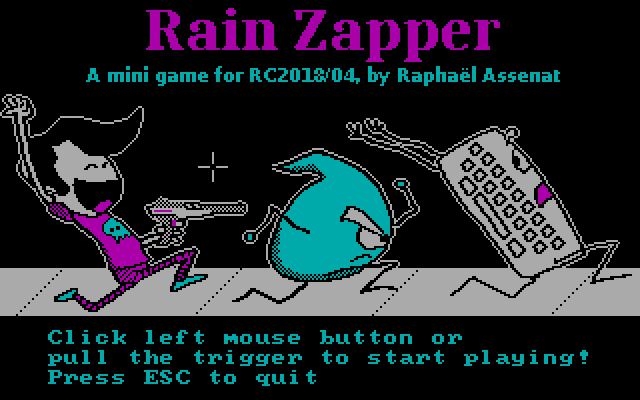
When RC2018/04 ended on April 30 I had not yet had the time to finish the CGA and VGA versions which would make it possible to play with a Zapper also on non-Tandy systems. But I worked on it for the last few weeks and finally have CGA and VGA versions available!CGA Version
I edited the graphics to use only 4 colors. The title screen was quite challenging, but I learned nice techniques such as the use of double borders in some places, notably around the keyboard, otherwise the black arms would have been invisible on this black background.Programming was a simple matter of using my CGA library (The one I made for RATillery) and recompiling.
I chose to use the Cyan/Magenta/White/Black CGA palette since it is the only one with a color suitable for the water (Cyan). Right now, the low intensity version of the palette is used. I have not had any issues, but on a darker monitor, the Zapper may not receive enough light. If this happens, enabling the high intensity palette during detection could be a good solution, as it would also provide a flash effect.
VGA Version
This version required a lot more work since VGA programming was a new thing for me. I use mode 12h (640x480, 16 colors), a planar mode, which is completely different from the CGA and Tandy modes I had used so far. But thankfully, what I needed to know was clearly explained in the Graphics Programming Black Book.By default, the 16 color VGA palette is identical to the 16 Tandy colors. I decided not to redefine them, in order to use reuse the Tandy Graphics.
On April 29 I posted a screenshot of a prototype VGA version showing a play field where the quantity of keyboard keys to protect was doubled (doubled due to the switch from a width of 320 pixels to 640 pixels). But just as I thought, the droplets were too small and very difficult to hit.
To solve this, I resorted to doubling the size of everything. The keys that were 32x32 are now 64x64, droplets that were 16x16 are now 32x32, and so on. And as I wanted to make good use of the extra resolution, I spent a lot of time adding pixels to smoothen the curves, round some areas or increase details. I think I may have spent a few hours on the title screen!
This version works perfectly well on my 386SX (the slowest computer I own that has a VGA card) with the Zapper to DB15 adapter. However in mouse mode, the mouse pointer disappears in the top part of the screen. What happens is that the game hides the pointer when redrawing objects that moved. When the pointer is shown again, the screen is already being scanned and if the beam position is lower than where the pointer is, the later is invisible.
I still need to speedup my drawing code, and this is not impossible! Right now, when droplets are drawn, data is copied from system RAM to video RAM. It would probably be faster to store the droplet off-screen in video RAM, then use the VGA latches to copy 4 bytes using a single byte read+write. Another potential optimisation: The game could manage drawing the mouse pointer by itself instead of repetitively calling int 33h. The mouse pointer could then be stored in video ram. I'm not sure if the mouse driver does that. Probably not.
Download
See the releases section above.References
- Nerdly Pleasures: The NES Zapper - How it Works, What it Works With and What is Worth Playing
http://nerdlypleasures.blogspot.ca/2015/09/the-nes-zapper-how-it-works-what-it.html - Wikipedia: NES Zapper
https://en.wikipedia.org/wiki/NES_Zapper - Wikipedia: Color Graphics Adapter
https://en.wikipedia.org/wiki/Color_Graphics_Adapter - Wikipedia: Tandy 1000
https://en.wikipedia.org/wiki/Tandy_1000 - Tandy 1000 documentation files.
http://www.oldskool.org/guides/tvdog/documents.html (in particular: 1ktech.pdf) - GW-BASIC User's Guide
http://www.antonis.de/qbebooks/gwbasman/
Disclaimer
I will publish the schematics for the adapter, as well as the source code for the demo game. The following disclaimer will apply.I cannot be held responsible for any damages that could occur to you or your equipment while following the procedures present on this page. Also, I GIVE ABSOLUTELY NO WARRANTY on the correctness and usability of the informations on this page. Please note, however, that the procedures above have worked in my case without any damages or problems.
Now you cannot say that I did not warn you :)